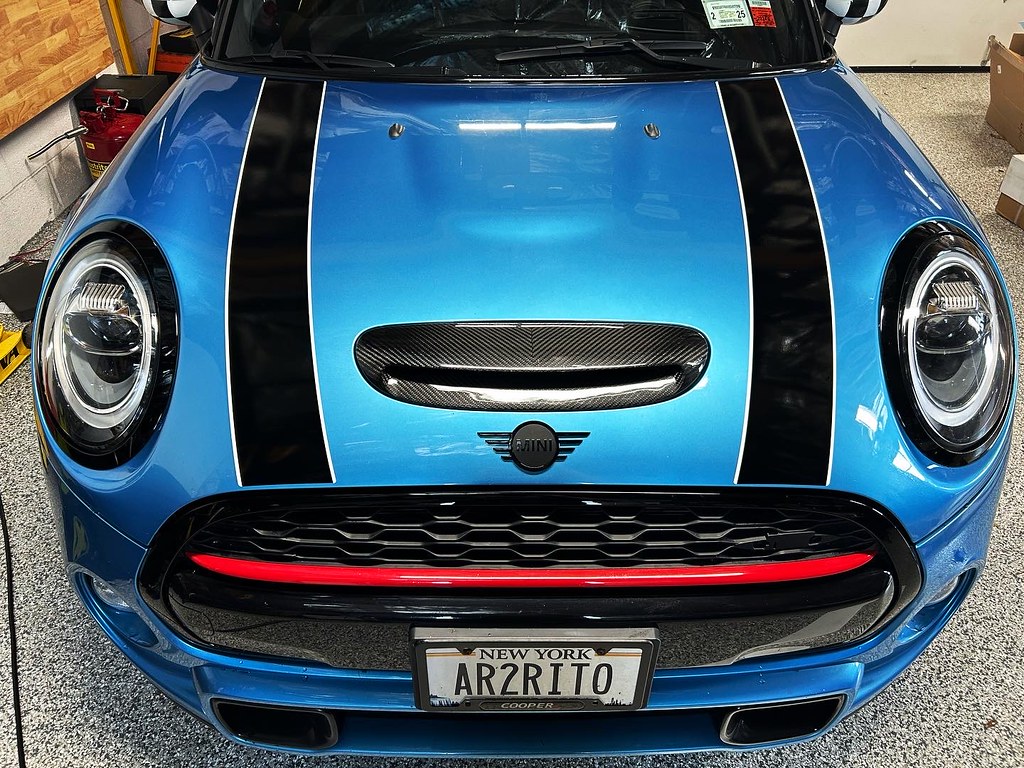
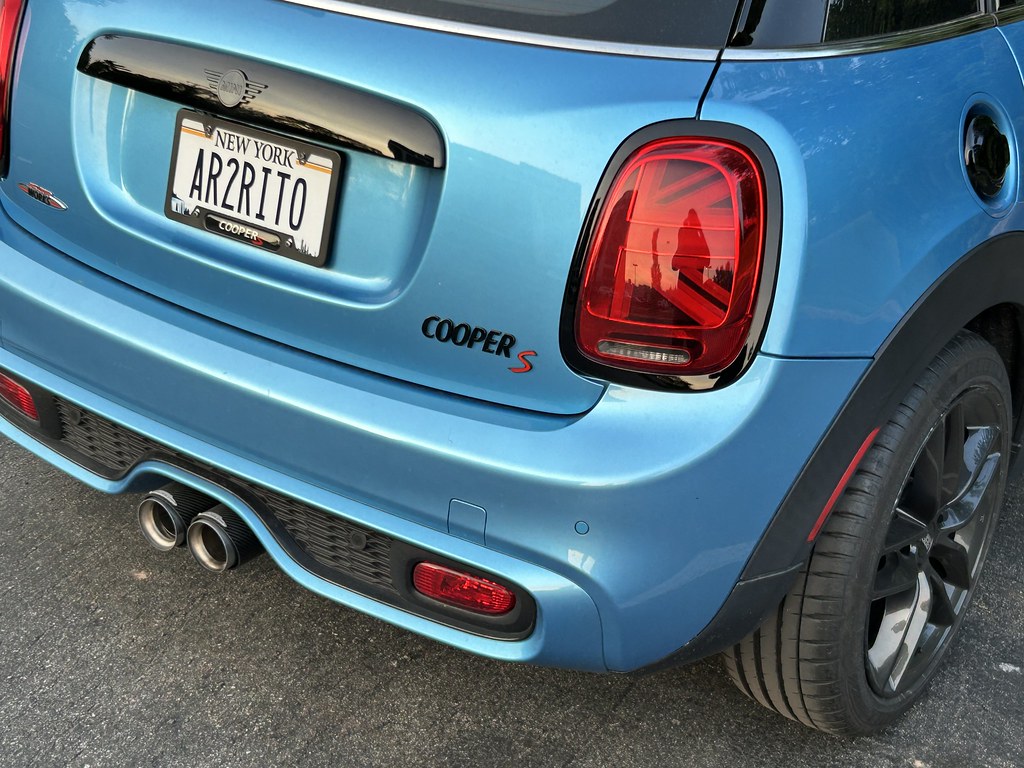
Showing posts with label arturito. Show all posts

Friday, May 29, 2026

Prepping the Mini for transfer

With the addition of the C55 AMG to the fleet as my new daily, I didn't want the Mini to just sit around go bad from not being driven but I also didn't want to sell it so my compromise decision is to let our nephew use it as his first car. Doing some final maintenance before handing it over and removing the JB4 tune so that the power would be more manageable for a teenager. I also sanitized and replaced the air cabin filter


Maintenance Update:

Mileage: 87,186

- 5L Liquimoly 0W-20
- New Mahle oil filter
- New oil drain copper washer
- New rubber oil drain gasket
- New STP air cabin filter

Saturday, January 17, 2026

JCW Suspension

Ever since I got the Mini, I wanted to do an OEM+ upgrade by doing a JCW conversion since they don’t make a 4-door JCW. I already completed most of that conversion shortly after buying the car and even sourced the JCW suspension new but just didn’t get the opportunity to install it to complete the transformation. After a few years of procrastination I decided it was time so I dropped it off with SJF so he could complete the install.

JCW suspension

The JCW coilovers are height adjustable but have a fixed valving and are made by KW. Since the car has almost 85k miles, I figured I’d also get brand new hardware, top hats, etc for the install to just freshen things up since putting those old components with new suspension seemed like the wrong thing to do. 

New front shocks and springs
New rear shocks
New top hats and associated hardware

The overall installation went pretty smoothly and I had the ride height set to just a little under factory height since it’s winter and the suspension settled maybe around 0.25-0.5” after sittting around before alignment. 

Front suspension installed

Rear suspension installed

New ride height

The car feels really amazing to drive. The ride is a bit more firm but very well controlled just as you’d expect from a KW tuned suspension setup. I’m definitely very happy with the upgrade and I’m glad that the JCW conversion is finally complete.

While the car was there I also had SJF flush the brake fluid since that was due.

Maintenance Update:

Mileage: 84,996

- New JCW suspension (made by KW) all around
- All new suspension bolts, top hats, etc for the suspension
- Motul RBF600 brake fluid

Friday, August 29, 2025

Oil change for the Mini

Realized that despite running only about 5K miles since the last oil change I realized it's already been almost a year so that had to get done. 

Maintenance Update:

Mileage: 81,627

- 5L Liquimoly 0W-20
- New Mahle oil filter
- New oil drain copper washer
- New rubber oil drain gasket

Friday, July 18, 2025

Disinfecting the AC system in the Mini

Starting a few weeks ago the AC in the Mini started to have a bad wet dog / mildew kind of smell that was making us feel sick. To address this, I got a can of Klima Cleaner Pro, removed the air cabin filters that were still very new in the car then sprayed everything in there to disinfect the system. I let it soak up and drip out of the condensation drain for about 15 minutes, reinstalled the filters, then ran the air on high (no recirc) for 15 minutes to let it go through the system. Pretty simple 30 minute total job. 


It definitely smells better now though I may need to reapply one more time if it's not 100% gone. Seems to be a common BMW/Mini problem maybe in the way the condensation drain is set up. At least I know the drain itself isn't clogged since I saw all the fluid I was spraying in eventually go out the drain and drop onto the ground under the car. 

Sunday, June 1, 2025

New cabin filter for the Mini

The AC has started to smell a bit musty so it's probably time for the air cabin filter to be replaced on the Mini. I curse the engineer who designed this system. Not only is it all the way in the center console but the flap you open up to replace it, goes up to open so it's literally trying to close on you as you remove and install the new filter.

Old filter left - New filter right

Maintenance Update:

Mileage: 81,065

- New Hengst air cabin filter

Monday, December 23, 2024

New Battery for the Mini

The Mini is now 5 years old so I was expecting the battery to start going bad soon. Well it seems the cold weather has started to finally reveal its impending doom by borderline being unable to start in freezing temperatures so I wanted to get ahead of it and replace it before it truly dies. 

Original BMW is finally dying

Removing it is a bit fiddly with a few panels that need to get taken out for clearance but I'm glad it's not really as bad as some videos made it out to be where they even removed the intake. I'm not sure if it's because I have the Eventuri intake but after I removed the front panel, it was easy enough to slide up and out.

New Duralast Platinum AGM battery installed

I replaced it with an equal capacity Duralast Platinum AGM battery then used Bimmerlink to register the new battery with the system so it knows it's new. 

Maintenance Update:

Mileage: 78,416

- New Duralast Platinum H7-AGM 80Ah 850CCA


Friday, September 6, 2024

Oil Change for the Mini

It's been about a year now since the last oil change. We've only logged about 6K miles on the car since then. I'd normally change the oil at around the 5K mark but I think this is fine. Oil level has been rock solid. Haven't had to top it off or anything like that. 


Maintenance Update:

Mileage: 77,141

- 5L Liquimoly 0W-20
- New Mahle oil filter
- New oil filter housing (messed up the plastic drain screw last time so replaced the whole thing with a new housing this time)
- New oil drain copper washer
- New rubber oil drain gasket

Thursday, December 28, 2023

Replacement Windshield for Mini

During Christmas I was driving behind a pickup truck when I heard a rock or something hit the top of the windshield. It didn't sound like much but within a few minutes a crack about 12" long started to develop so had to get the windshield replaced today. Replaced by Safelite and then camera recalibrated.

Rock chip that resulted in a crack

Mileage: 73,621

- Replacement windshield

Friday, September 8, 2023

First oil change for Arturito

Ok well this isn't really the first oil change but it's the first oil change done by me. According to the records, the oil was changed before it was sold to me but since I have no idea what oil is in there, I really wanted to get this oil change so this was a bit overdue for me to get my hands oily.

New oil filter in

New oil


It's a bit more fiddly that my other cars since there's a separate drain for the oil filter housing. Other than that though it was pretty much a breeze. 

Noting torque settings for the future:

Oil drain bolt - 25Nm (17mm bolt)

Oil filter drain screw - 5Nm (T50 Torx) also, accidentally pushed too hard with my ratchet and stripped the plastic teeth in the new drain screw so I'll have to pull the whole housing out first next time I do this and extract it with something else.

Oil filter cover - 25Nm 

Maintenance Update:

Mileage: 71,479

- 5L Liquimoly 0W-20 (supposed to take 5.5 quarts. Will drive the car around to get warm so the computer can measure the actual level before I add more)

- New Hengst oil filter

- New oil filter drain screw

- New oil drain copper washer

- New rubber oil drain gasket

Monday, September 4, 2023

Changing Spark Plugs on the Mini

Anytime I get a "new to me" vehicle, I'll typically change the spark plugs no matter what the mileage is so I know exactly when it was last replaced. I'm fairly certain the plugs on the Mini were changed on schedule so I didn't feel the need to immediately do it but I still wanted to get it done so I know exactly what I'm starting with and what's in there.

E8 torx socket needed to remove the coils

You need an 8mm (E8) Torx socket. Unlike the GTi, getting the coils off was nice and easy and you didn't have to worry about having the rubber part get stuck in there if you didn't get the car a little warm before attempting to remove them. 

Coils removed

You also need a special 14mm thin wall 12-point spar plug socket to get the spark plugs out.

Old spark plugs look alright

The plugs need to be torqued it down to 23Nm +/- 3Nm and the bolt for the coils is 8Nm.  

Maintenance Update:

Mileage: 71,436
- 4 New Beru 12120040551 spark plugs


Tuesday, May 30, 2023

Fresh Stripes and Completed Chrome Delete

For some reason the previous owner left a cup imprint on one of the hood stripes that kept bothering me so I ended up ordering fresh stripes from Mini USA to swap in.

Annoying blemish

The process was simple enough but tedious. I marked off the edges using painter's tape and heated then peeled off the old stripes. The problem is that it still left a sticky residue on the hood so I spent a solid few hours using adhesive remover to get it all off before applying the fresh stripes.

Edged marked

Residue left from peeled stripes

New stripes applied

I also picked up some "blackout tape" for the beltline to finish off the chrome delete look. It was also tedious and I'm not sure I like the finished look up close but it'll do for now. I may end up just buying the real replacement black trim to do it right.

Applying blackout tape

However the complete look with everything de-chromed looks so good.

Final look with the blackout and fresh stripes


Monday, May 15, 2023

Mini De-Chromed

I like cars with colors which is why the electric blue of the Mini works quite well. However, I'm not a big fan of all the chrome so I bought almost all the pieces needed to de-chrome. I did it over two days. The first day I just took care of some easy stuff like the emblems and the headlight and tail light trims.

Blacked out front emblem
Blacked our rear emblem, Cooper S emblem and tail light trim

I then went on to do the front grill trim and replaced the upper grill with a JCW grill with chili red stripe but opted to not put the JCW logo on (even though I have it on the back from the exhaust installation). I think it really makes the front look much more aggressive.

Front de-chromed

The previous owner also seemed to have managed to scuff the front passenger side fender trim. Since you need to unclip most of it to remove the front bumper anyway, I figured it would be little effort and cost to replace it with a brand new one.

Removed scuffed passenger front wheel arch trim

Lastly I replaced all the door handles and the fuel door cover with OEM piano black versions to complete the dechrome look. 

Replacing the door handles not just putting stick on black covers

Looking proper blacked out and front wheel trim replaced

Blacked out

The only bit of chrome left is the belt line. I want to replace it with the OEM black pieces but it's really expensive and almost not worth it so I'm going to attempt to just do a vinyl black cover first to see how it looks and if it doesn't look right, commit to the real replacement. The car also needs a slight drop but I've already got the solution for that. Just need time to get it installed.

Saturday, April 8, 2023

JCW Spoiler and Summer Wheels/Tires

The factory Mini spoiler looks a bit stunted on the slightly longer 4-door Mini Cooper so I ordered a JCW spoiler from Mini of Manhattan which took around a month to receive from the UK. It comes with new black side pieces but the spoiler itself comes primered and unpainted. 

JCW Spoiler (unpainted)

JCW Spoiler

I took it over to New Saddle Brook Auto Body and two weeks later (they were busy working on a bunch of other cars), I was able to pick it up freshly painted gloss black to match my roof.

JCW Spoiler painted gloss black

Installation was pretty straightfoward. You had to pull out the side covers to get to the 10mm bolt holding the side in place, then in the hatch there were five plastic covers you had to take off to get to the T20 torx screws holding the rest of the spoiler in place. Taking off the original spoiler took a bit of effort but you basically have to pull it straight out with some force and it'll eventually un seat itself from the clips holding the middle in place. Then reverse the whole process to install the JCW spoiler.

Side cover removed exposing the 10mm bolt
Uncover these holes in the hatch to get to the T20 torx screws

OEM spoiler removed

JCW spoiler installed

I also took delivery of my new summer wheel and tire setup. Unfortunately someone who previously worked on the Mini must've used an impact gun to way overtighten one of the wheel bolts and I ended up breaking a 17mm socket and rounding off the bolt head as I was trying to take it off unsuccessfully. I ended up ordering this lug nut remover set from Amazon. It's a twist socket that basically has these "teeth" that help bite into the bolt head allow you to use maximum torque. Along with a strong break bar, an extension and quite a bit of muscle, it eventually let loose and I replaced it with a new bolt that I was able to pick up locally Autozone for a few bucks. 

Lug nut remover twist socket set

Twist socket

Got the wheel bolt off but destroyed it in the process

I was then finally able to put on my new wheels and tires. BBS SX 17x75 +45 black wheels wrapped in 215/45R17 Michelin Pilot Sport 4S Tires. I loved these tires on the GTi so it made sense to get them for the Mini too. They kind of look like the OEM JCW wheels but a bit wider and I'm going for an OEM+ build so this the perfect low key combo.

New wheels and tires

New wheels and tires

New wheels and tires installed

Friday, March 31, 2023

Black LED Sidemarkers

I like the somewhat blackout look on the Minis so I've started the process of replacing any chrome pieces. One of the easiest was to just replace the side markers with the newer style LED versions that come in all black.

Newer style black side markers


Original chrome side markers with standard bulbs

Friday, March 24, 2023

Breathe Easy - Eventuri Carbon Intake

The Mini Cooper S originally had an intake scoop for the top mounted cooler back when they first came out supercharged but things changed over time, the kept the scoop as a design element only but is really just a fake blocked off "vent". I like things having purpose and I'm definitely not a fan of fake vents.

Eventuri Carbon intake scoop

Upon searching for intake options there was really only one that drew my eye, the Eventuri Carbon intake. Not only does it have an excellent airflow design but it actually makes use of the hood scoop location to draw fresh air. It took several weeks to get here since apparently these are made to order and have to come from the UK but it was worth the wait. The quality is impeccable. 

Eventuri Intake unboxed

The installation itself only took 30 minutes. A few 10 and 7mm bolts and the stock intake was off. 

Factory intake

Factory intake removed

I then had to transfer the MAF sensor over to the new intake arm. Although this Mini is a 2019, it was actually made in late 2018 so it's the last of the pre-LCI versions.

Transferring the MAF sensor

With the MAF sensor fitted, I could then couple that intake section with the reverse mounted filter which is not only a thing of beauty but one of the secrets of this intake design.
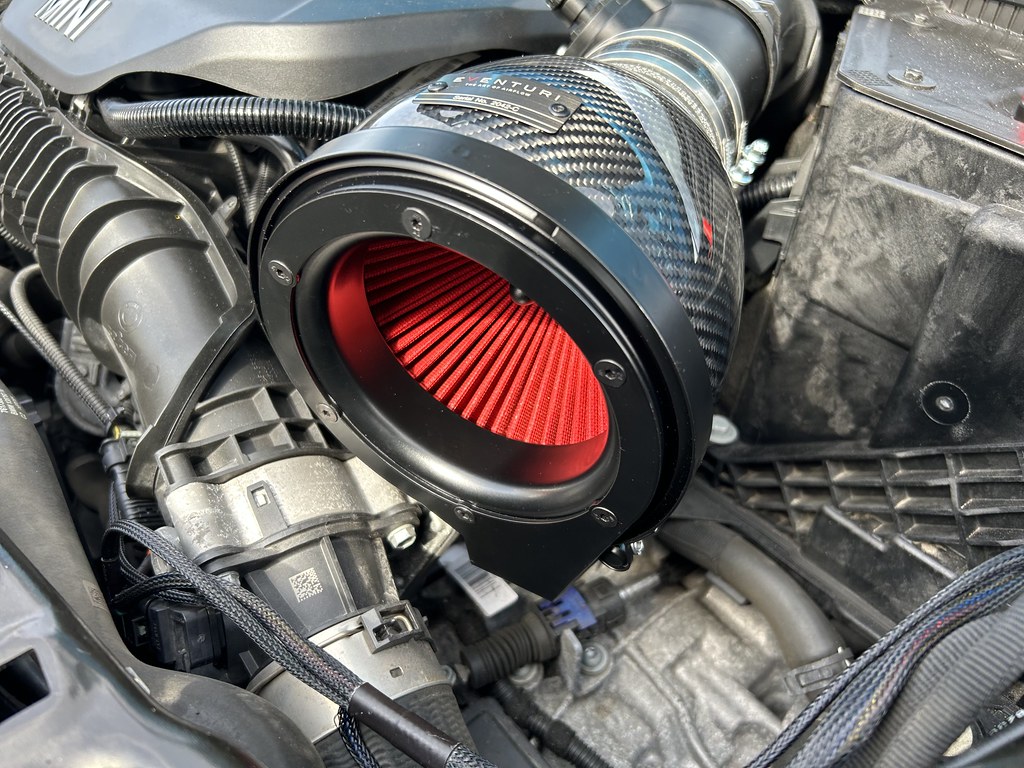
Main intake fitted

Now I could install the carbon ducting that pulls air from the stock location behind the grill and also from the hood scoop.

Intake installed

Too bad it'll be hidden from view most of the time. I then had to remove the factor fake hood scoop to install the carbon real scoop from Eventuri. Thankfully although the factory scoop is non-functional, there are actually factory holes in the hood for air to pass through if it was open so no cutting is needed.

Factory "fake" scoop
Real hood scoop

Real hood scoop

I don't know how much power, if any, this adds but I do know it's both functional and incredible to look at. It also lets you hear the turbo flutter more easily which is a nice little bonus.