Sunday, December 12, 2021

Brawlee rear glass lift gate dome light bar

One of the problems with the JK 2-door is that the dome light which sits in the center of the vehicle doesn't illuminate the area behind the 2nd row seat so the cargo area is pitch black at night which is beyond annoying when you're fumbling around try to get something from the back really quickly.

Brawnee rear glass lift game dome light bar installed

To get around this, I picked up a Brawlee rear glass lift gate dome light bar. It's basically a strip LED you hardwire to the dome light power circuit with an inline bluetooth and IR module so you can adjust the brightness and even the color if you buy the fancy pants version (ok really it's just like an extra 5 bucks) to get full RGB support. It attaches to the inner part of the lift gate lip using provided 3M tape. To ensure good adhesion, I cleaned the area with alcohol and also used a heat gun to make sure the tape was nice and warm and tacky. Once mounted, with the wire on the passenger side, you can then use the provided adhesive cable guides to right it by the rear window defroster the follow that wiring down the hardtop so you can run the wires along the factory wire loom behind the carpet.

Routing the cable

Routing the cable

Routing the cable


The LED plugs into the control module which houses both the bluetooth controller and an optical IR sensor so you can use the provided remote to change settings if you don't want to use the app.

Control module

The power is tapped from the wires that follow the factory rollbar. You just open up the rollbar padding cover behind the front passenger seat, then tap into the yellow with white stripe for power (that's the positive lead going to the dome light) and the black wire for ground.

Tapping the power

It's really that simple and makes a big difference. I selected amber as the color and it matches really well with the amber from the factory dome lights. When I change the dome lights to LEDs I'll probably change the setting on these as well to match the color output. With the lift gate up at night, it illuminates not only the cargo area but a lot of the area behind the vehicle making it super convenient. Would definitely recommend this for anyone that is sick of having to use their cell phone flash light to do even the most basic things around the cargo area at night. 

Remote


Friday, December 10, 2021

New Head Unit for the Jeep

I installed the Alpine HCE-RCAM-WRA rear view camera last week and it was now time to install the new head unit, an Alpine iLX-W650 just like what I installed on the Cayman last year and thankfully this was a much easier install. 

Alpine iLX-W650

Removing the dash was as simple as removing four 7mm bolts and popping the clips, then the old head unit could be disconnected. I had to take a dremel and trim a bit of the plastic at the top of where the new head unit would hit to give it adequate clearance. 

Old stock head unit out

I then ran the wire from the rear view camera through the rear side panel then along the carpet where the wiring harness ran. 

Running wire from the rear view camera

Tucked the wire behind the carpet

Ran the wire through the side panel then behind the glove box

Since the camera doesn't plug directly into the head unit directly even though it's made by the same manufacturer, a provided power unit adapter had to be installed. The 12V power was tapped from the rear light wire in the passenger footwell by the firewall, then grounded to one of the bolts on the side where other ground wires were connected. I ordered the head unit from Crutchfield so it came with the easy to use adapter harness already. The only thing I added was the ebrake bypass to allow you to operate the head unit normally without doing the ebrake dance all the time.

Splicing and soldering into the harness

The rest was simply installing the new head unit in and making sure the bezel was as level as I could make it. Overall, it wasn't a hard install. I need to fix one issue where I may need to re-pin the harness since I'm not getting phone audio when making a call through the head unit. I accidentally requested a harness for a regular Jeep audio system but Chopper has premium audio and needs the front channels wired differently. 

Sunday, December 5, 2021

BFG K02s

I was going over the records for Chopper and the previous owner bought the wheel and tire package in mid-2016 which was only 3.5 years ago but it seems that in that time he logged a little over 40k miles. The Nitto Ridge Grapplers still looked ok but I wanted to give a different tire a try since I needed a new tire for the spare ATX Series AX201 wheels I bought to replace the OEM one on the car already.

ATX Series AX201 - 18x9 0-offset matte bronze

I decided to go with a fresh set of BF Goodrich K02 tires in LT285/65R18. This was the same specs as the Ridge Grapplers coming off the wheels but they are actually about 0.5" shorter (32.5" vs 33") and weigh a bit less. Since the TPMS sensors on the wheels were also over 6 years old now, I figured a new set of those was worth slapping on at the same time.

New TPMS sensors

I went over to SJF Performance to get it all mounted of course. One side of the tires had the white lettering whereas the other side was all black. I kind of like the white lettering look on off-road vehicles so I had SJF put that side facing out. 

SJF putting on the new sensors

Tire mounting time

I had to clean off the protective blue coating they put on there to actually make them white and they sure look the part now.

Mounted and balanced.

We had to make some minor adjustments to the tire carrier I installed yesterday, moving it towards the vehicle about an inch, to get the tire closer to the body. Also, the way these spokes lined up, I had to put the camera a bit offset in order to make the camera slip into the opening between the spokes. It's now slightly off-center but shouldn't impact parking too much. 

New spare wheel and tire mounted up

Obviously all the tires were replaced with K02s and I think it looks really proper on Chopper. I was semi-annoyed I forgot my "real" camera but these will have to do for now.

Chopper with the new rubber

Chopper with the new rubber

Chopper with the new rubber

I set the pressure to 35psi which seems to be the recommended street pressure on the forums for these tires. My first impression is that these are pretty awesome. They're actually quiet on the road and felt compliant to uneven surfaces. I also felt that they were easy to control. The new TPMS sensors kicked in and got detected by the ECU within just a few miles of driving. I'll reserve my final judgement on this setup for a long term review later but for now I'm definitely happy with this purchase. It should do pretty well on snow and be a good all around, all year tire setup. The new suspension and tire package has really helped a lot in the handling department. It still drives like a Jeep but with better street manners. I'd definitely recommend this combination for anyone now going the "serious business" route. 

Maintenance Update:

Mileage: 68,976

- 5 new BFG K02 LT285/65R16 tires
- 5 new TPMS sensors

Saturday, December 4, 2021

Heavy Duty Tire Carrier

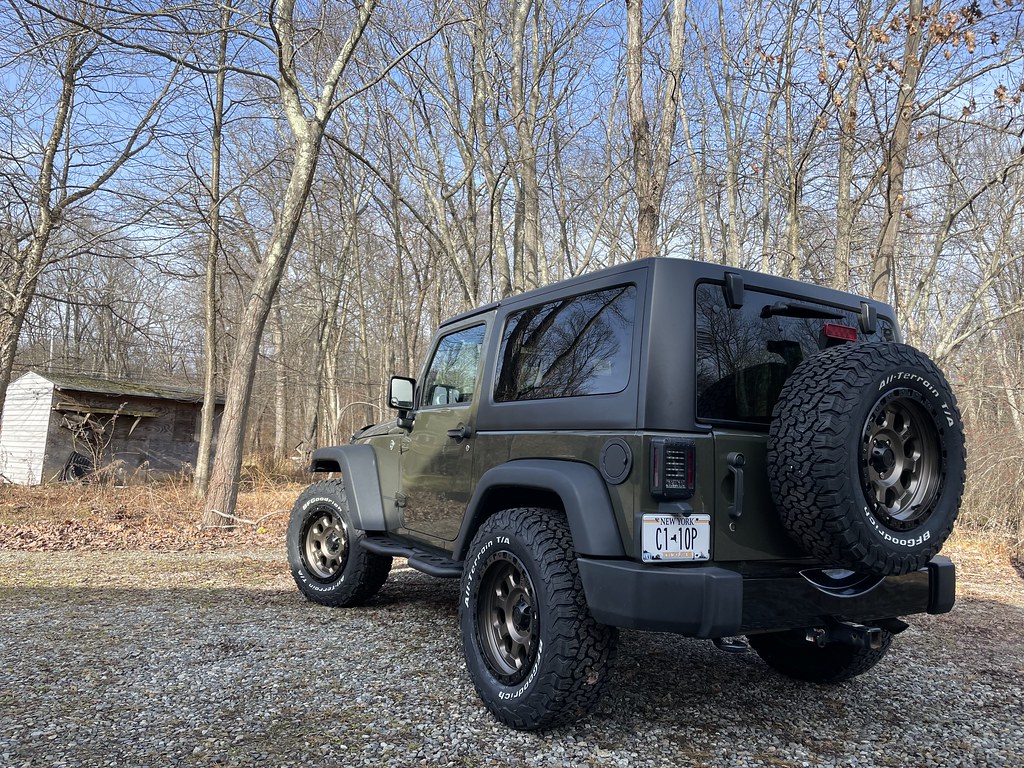
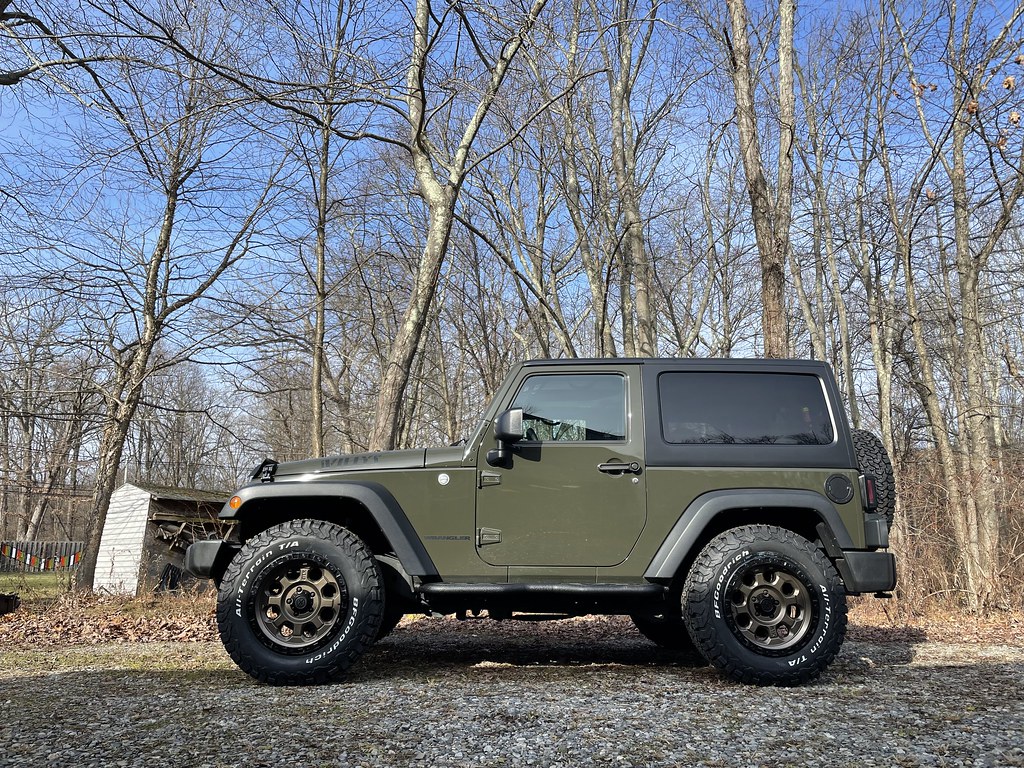
The previous owner upgraded the wheels to ATX Series AX201 Matte Bronze in 18x9 0-offset wrapped in LT285/65R18 Nitto Ridge Grapplers but left the spare tire stock. Obviously he did that to save money but it doesn't make much sense since the stock tire diameter is only 31" and the new setup is 33". That would definitely not make the diff happy if you put that on in case you needed to. I was thankfully able to find and buy one more AX201 wheel in the same spec that's on the Jeep now so that's going to go on the back. 

Stock wheel and tire setup

The stock wheel actually looks really good on the Willy Wheeler edition and I guess it came stock with mud terrain BFG KMs. Unfortunately the PO sold the stock set so this is kind of on its own. In order to be able to handle the new larger wheel/tire setup on the back I needed to upgrade the tire carrier and hinge to something more heavy duty. I decided to go with the Rugged Ridge Spartacus Heavy Duty Tire Carrier kit. 

Factory tire carrier and hinges removed

First step was to remove the factory tire carrier and hinges then clean all the cruft built up underneath it for a nice clean install. The tailgate is still latched in but since it sits 1" above the bumper so you need something to support it while the latches are removed. I had some dense insulation from a window fan lying around and used that for support wedged between the tailgate and the rear bumper. I attached the new heavy duty hinge using a combination of the factory torx bolts and some new hardware they provided. This thing is super solid. It makes it feel like you're closing a bank vault every time you close the tailgate now. It can easily handle the weight of a 37" tire setup if needed.

Rugged Ridge HD hinge installed

Next, I mounted the tire carrier itself. It's adjustable so you can move it further or closer to the tailgate to accommodate various tire sizes. It took several back and forth test mounting of the wheel before I was happy with the positioning. It reuses the stock third brake light housing. Since I was working on the tailgate anyway, I figured I'd wire up the new Alpine HCE-RCAM-WRA rear view camera that's going to be connected to a new Alpine ILX-W650 head unit that's on its way to me. 

Tire carrier mounted

Alpine rear view camera mounted

Everything installed. Nice and solid setup.

The rear view camera wiring just goes through the same grommet used by the factory brake light, then you fish it through the tailgate and zip tie the cable to the existing cables. 

Rear view camera wiring zip tied to factory rear light wiring

Factory spare re-installed with rear camera peaking out

For now the stock spare is back on the back but the new wheel with the fresh tires will be on very shortly. 

Factory spare setup back on for now. 

Next stop....tires!!!

Friday, December 3, 2021

Suspension Upgrades

Chopper's got 67K miles on the clock now so the dampers are getting a bit tired. My wife didn't want to lift the car any higher so I felt like the least we could do was to put on a set of fresh good shocks and a steering damper upgrade. The combination should help some of the floatiness that it currently has especially on the highways.

Chopper on the Quick Jack 

I borrowed the QuickJack SUV and Light Truck adapter from Alex and it did a perfect job of getting it high enough to get the wheels off the ground. I only have about 6 inches left until it hits the garage door opener but it was more than enough space to work with. Best part of working on the Jeep is that you don't even need to remove the wheels to change the shocks. I just had to loosen the fender liner to give myself more space to work with but even with PB Blaster, the top nut was a bitch and half to get off. The threads had rusted to the point where the nut wasn't coming off so I just used good old muscle until it snapped off. I decided to got with Fox 2.0 IFP performance shocks that are good for 0-1" lift. It's supposed to offer a slightly firmer but more controlled ride...plus they look pretty sweet.

That's one way to get the top nut off

Most of the time spent was just in removing the old shocks. The install was otherwise a cakewalk. Front shocks are only held by 2 bolts/nuts and the rear by 3. 

Front shocks in

Rear shock comparison. The old ones have seen better days.

New rear shocks in.

I figured I might as well upgrade the steering stabilizer. It's only two bolts. The hardest part was removing one of the bolts closest to the wheels. It hits the tie rod as you back it out but if you get the angle of the wheels and tie rode just right and wiggle it, it eventually works its way out.

Factory stabilizer vs Teraflex Steering Stabilizer

Teraflex steering stabilizer installed

With that out of the way, we did a few more cosmetic mods and functionality mods starting with some Red Rock honeycomb grill inserts. I think it tightens up the look on the front by hiding the radiator. Oh, the wife's super excited that her custom plates arrived. Yea, that's why this Jeep is called Chopper...that's her kinda droid lol. 

Honeycomb Grille Inserts 

Also added some Rugged Ridge grab handles for the rear to make getting in and out easier.

Rugged Ridge grab handles

Lastly I repurposed the extra roll bar mount I had lying around for the Element fire extinguisher and mounted a fire extinguisher back there just in case. It's secured via long velcro straps rather than the hose clamps the mount comes with and it's not going anywhere.

Element fire extinguisher installed

We still have so many more boxes of stuff to install but for now this'll have to do. 

Maintenance Update:

Mileage: 68,187

- 4 new Fox 2.0 IFP performance shocks
- New Teraflex steering stabilizer


Saturday, November 27, 2021

Hothead Headliners

Hardtops introduce some amount of wind and road noise into the cabin because they don't have any kind of liner. In the summer time they also contribute a bit to heating up the cabin because they don't really have good insulating capabilities. To address both at the same time in the Jeep, I picked up a set of Hothead headliners. These headliners are really nicely constructed compared to other products in the market with a radiant barrier to reflect heat and a firm backing for a support the high quality headliner fabric. 

Hothead Headliners

They install by 3M VHB tape so you need to prep is key. Ideally you'd install this in the summer time when things can get nice and hot and with the outside temps near freezing today, I put the jeep in the garage, turned on the heater and let it get to a bit warm before starting this project. First step was to scuff the hardtop a few times with the provided sandpaper. You don't have to get too crazy, 3-4 passes just to rough up the surface a bit is enough. 

Scuffing up hardtop interior

Then to ensure that the surface was free of any dust or contaminants, I applied acetone twice just to be extra sure. 

Acetone time

I also ordered their "Sound Assassin" strips as part of the kit. It's really nothing more than sound deadening pre-cut into strips that go right into the hardtop ridges to help further dampen noise. A quick application and some pressure with the included roller was all that was needed to set them in nicely.

Before

Sound deadening strips being applied

All the strips installed

I also opted for the liners to cover the sides of the hardtop for a uniform look. Those are attached via Velcro strips so I put those strips down first before putting in the rest of the panels.

Velctro strips applied
Side panel ready to go in

Next, I took each panel and put them up against the heater in the garage to warm up the tape as much as I could then quickly applied each panel on making sure to apply several seconds of pressure on each strip to ensure maximum adhesion. 

Front headliners installed - 11-27-2021

Rear headliners and side panels installed

Once I was happy all the panels were in, I let the car run for a bit with the heat at maximum just to give as much opportunity for the 3M tape to bind properly. Overall, this was a pretty easy project. Took maybe 2 hours taking my time to do it and ensuring proper prep. I think it really adds to the interior aesthetically and is very functional too.