Sunday, October 27, 2019

An Inch Matters - Lowering, fixing swaybar, prepping for Stage 2

The stock GTi suspension especially when DCC (Dynamic Chassis Control) equipped is actually quite good even for spirited driving. However, one thing that bothers me is the slightly large wheel gap that detracts a bit from its otherwise sporty hot hatch stance.

Lowered on Eibach Prokit - 10/28/19
Rather than go overkill by installing fancy coilovers, all I really needed was a mild 25mm drop and perhaps adding a bit more front camber for better handling. To achieve this without affecting the stock dynamics too much, I decided to get Eibach Prokit springs and 034 Motorsports Dynamic+ camber mount.

034 Motorsports Dynamic+ camber mounts - 10/28/19
The 034 Motorsports Dynamic+ camber mounts offer stiffer rubber bushings than factory and moves the top of the strut in to add 1.4 degrees of negative camber. Combining this with Eibach Prokit springs that lower the car 25mm all around increases the front camber to around -2.5 degrees, probably the upper limit of negative camber I'd want to run on a primarily street driven car.

Eibach ProKit - 10/28/19
Of course, if you're going through the effort to install new springs and camber mounts on a car, might as well replace the strut bearing and rear spring pads.

New strut mount bearings - 10/28/19
New rear spring pads - 10/28/19
I went to SJF Performance today to get everything installed since I had to get the car aligned after installing the new springs anyway. The fronts were a bit tricky but once Steve figured out the best sequence to get the strut out on the driver side, the passenger side was much easier.

Front strut reinstalled with new spring and camber plate - 10/28/19
Rear springs in and sway bar fixed - 10/28/19
The rear springs should've been an easy affair with just three bolts holding the lower arm in place but as we were replacing the springs, we noticed how badly the rear sway bar was binding. It was so stiff that even disconnected on both ends it took a fair amount of force just to get the bar moving at all. This was installed by the previous owner and it simply wasn't done right. The grease in the bushing was wrong and the sway bar bushing bracket was too tight. We disconnected the rear bar and new grease applied to the bushing. A thing washer was added to the bracket to space it out just enough and now there's no more binding. It moves smoothly like butter. No wonder I was hearing some noise in the rear during more extreme cornering. Now the rear handles like it should.

RS7 (Beru 06K905601M) spark plugs
RS3 (06H905110G-RED) Coil Packs
Finally, since the car already has a CTS downpipe and an upgraded clutch, I'm planning on putting the APR Stage 2 High Torque tune. The previous owner commuted daily in the car so kept it pretty conservative with a Stage 1 low torque tune since he was putting almost 17K miles per year on the car but since I will probably only do a third of that, I figure why not. To prep for this, I decided to pop in RS7 spark plugs which are one step colder than the OEM plugs and are a great OEM option for tuned cars. The previous owner already upgraded to RS3 coil packs but that was 25k miles ago and I just wanted to make sure everything was in good order before upping the boost so a new set of RS3 coil packs were also put in.

RS7 plugs and RS3 coils installed - 10/28/19
I'm so glad we did this because it turns out the previous owner did not torque the plugs properly. They came out with very little effort, almost as if they were hand tight. Checking the torque on the plugs was already on my checklist when I bought the car since I knew the owner was kind enough to put in fresh plugs for me before handing the car over but didn't own a torque wrench. Anyway, with the new plugs installed and properly torqued to spec, the engine is running so much smoother. Idle feels great and power feels spot on.

Alignment Specs - 10/28/19
Finally, after driving the car a bit to let the suspension settle, we put the car up on the alignment rack. The front camber and caster is not adjustable but with me in the car, the camber is pretty sweet at -2.3 and -2.6 and the caster a perfect 7.7 degrees. I had Steve zero out the front toe. For the rear, the car ended up around -2.5 degrees after lowering. That's a bit too much on a FWD car. I wanted a one degree differential front to rear so Steve dialed the rear camber back to -1.5 and put a tiny bit of rear toe in to keep the car stable.  The car feels phenomenal now. It corners a lot better and the new spring setup is perfectly European...firm yet compliant. Visually, it's a subtle change that makes a big difference.

Maintenance Updates:

Mileage: 51,263

- New RS7 Spark Plugs
- New RS3 Coil pack

Sunday, October 20, 2019

Exhausted..Install, fixes and Winter wheels and tires

The stock exhaust on the GTi is actually pretty efficient so with the downpipe already on the car, there really wasn't much to gain performance-wise from adding an exhaust but one of the most important parts of having an engaging car is having it make all the right noises. I've been wanting an excuse to buy an Akrapovic exhaust since I saw one at the Porsche tech day in real life so when I found out they made one for the GTi, I simply had to get one.

Akrapovic Titanium Slip-on Installed - 10-20-2019
Although this all Titanium and carbon fiber axle-back exhaust cuts the weight by a good 15lbs, it's really all about having the right exhaust note and how they look. It's such an expertly hand-crafted piece that's just a nice subtle touch to the rear of the car. Below 2500rpm it's pretty quiet and under the radar but as you go up the revs it starts to sing in a very distinct exhaust note. Unfortunately, it was raining most of the way home so having the windows up muffled most of it, but when I had a chance to put the windows down especially going under overpasses, wow, it really sings but not in an obnoxiously loud way.

Cutting off the stock muffler - SJF Performance - 10-20-2019
Installation was pretty straight forward with the right tools. SJF just hacked off the rear muffler where the instructions indicated (2nd dimple) and then a couple was attached to connect the new axle back with the OEM pipe. The exhaust hangers are held on by only one bolt each so it was a pretty quick install even with us taking our time to make sure we didn't scratch or dirty anything up.

Even the flange is titanium - 10-20-2019
Such a gorgeous tip
We also worked on Kay today. She's developed a bad exhaust leak that unfortunately continues to prevent me from setting ODB2 readiness to pass NYS inspection. One of the biggest sources of the leaks is the coupler going from the pipe to to header and the muffler itself. It looks deformed probably from installing and reinstalling many times with an impact gun.

Leaky exhaust coupler - 10-20-2019
We needed a new one with a 2" inner diameter and didn't think we'd find any. We went to the local Napa and were shocked they had it. That was relatively easy enough to swap in and that took care of that leak.

New 2" ID couplers - 10-20-2019
New coupler installed - 10-20-2019
Unfortunately when we ran the car on the lift, we could definitely feel another leak coming from the flange after the header on both banks. The gaskets that Soul Performance provided just aren't holding up so I've gone ahead and ordered new OEM Porsche gaskets but will have to wait for it to arrive to attempt to fix that leak.

Stud conversion removed - 10-20-2019
Much to some people's dismay, I got sick of the stud conversion from Rennline that we installed back when Kay was getting prepped for B-Street. For starters, I really don't change wheels that often so putting on wheel hangers isn't that big of a deal and most annoying for me was how badly the nuts they provided rusted up. I simply got sick of seeing rusty wheel nuts on nice wheels so I replaced them with Titanium wheel bolts from Acer Racing (specific length designed for 5mm spacers which I run).

New Titanium Wheel Bolts - 10-20-2019
Hooray for clean bolts that will never rust - 10-20-2019
After the big Nationals road trip, I didn't want to leave the car with potentially contaminated oil over the winter so we put in  a fresh 8.5 quarts of Driven DT-40.

If you own a Cayman, be religious about oil - 10-20-2019
Finally, I picked up a set of used 17x8 +35 OZ Superleggera wheels and had SJF mount a fresh set of 225/45/17 Pirelli Sottozero 3 performance winter tires. These are nice and strong and will do quite nicely as my winter setup once the temps regularly drop below the 40s.

OZ Racing 17x8 +35 Superleggera
225/45/17 Pirelli Sottozero 3
Gotta love these old school OZs
All four mounted up and ready to go - 10-20-2019
SJF Performance
Maintenance Update:

Miles: 39,650
- 8.5qt Drive DT-40
- New Napa Gold filter

Monday, October 7, 2019

Track Readiness - Cooling and Safety

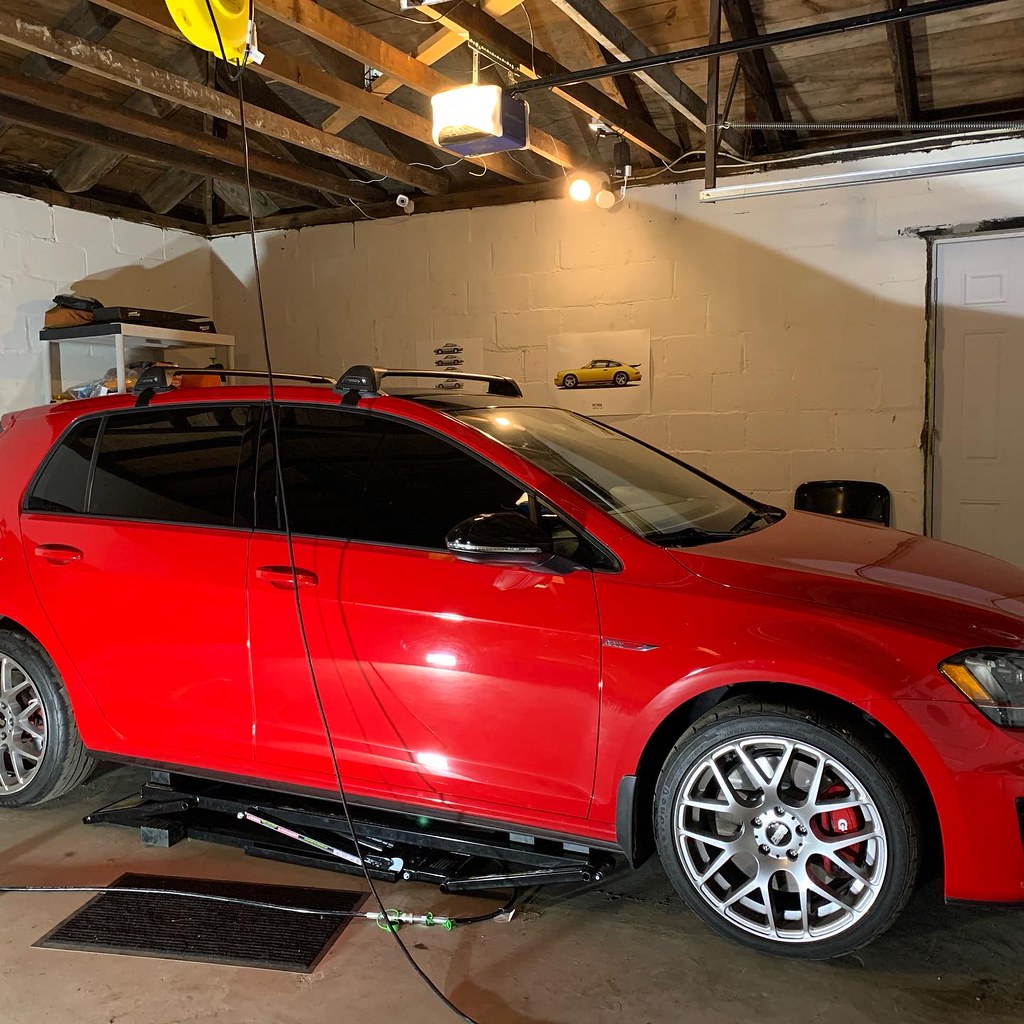
Now that SCCA Solo Nationals is behind us, it was time to install all the parts that I'd been accumulating the past few months to make the Cayman track ready. What does track-ready mean? Well, I've already done a number of precautionary modifications such as the motorsports air-oil separator and a baffled oil pan but the next step is to address cooling, safety, and additional oil monitoring. I dropped the car off with Speedsport Tuning two weeks ago along with boxes of parts and they put it all together for me.

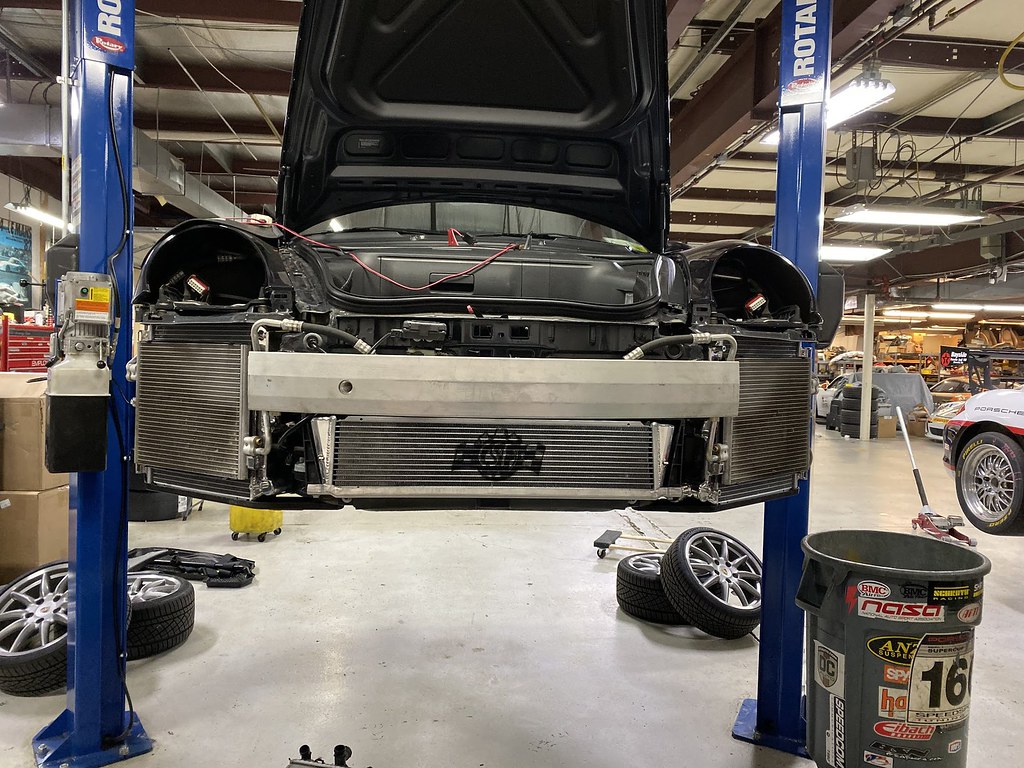
CSF Radiators Installed - 10/4/19
Initially, I had planned to just add an OEM center radiator but with the side radiators being 12 years old, I thought it was worth replacing them as well. After doing some research, I felt upgrading all 3 radiators to CSF radiators would be the right choice. They're extremely well crafted, offers improved cooling performance, and with an all-aluminum design, are more durable than the OEM ones.

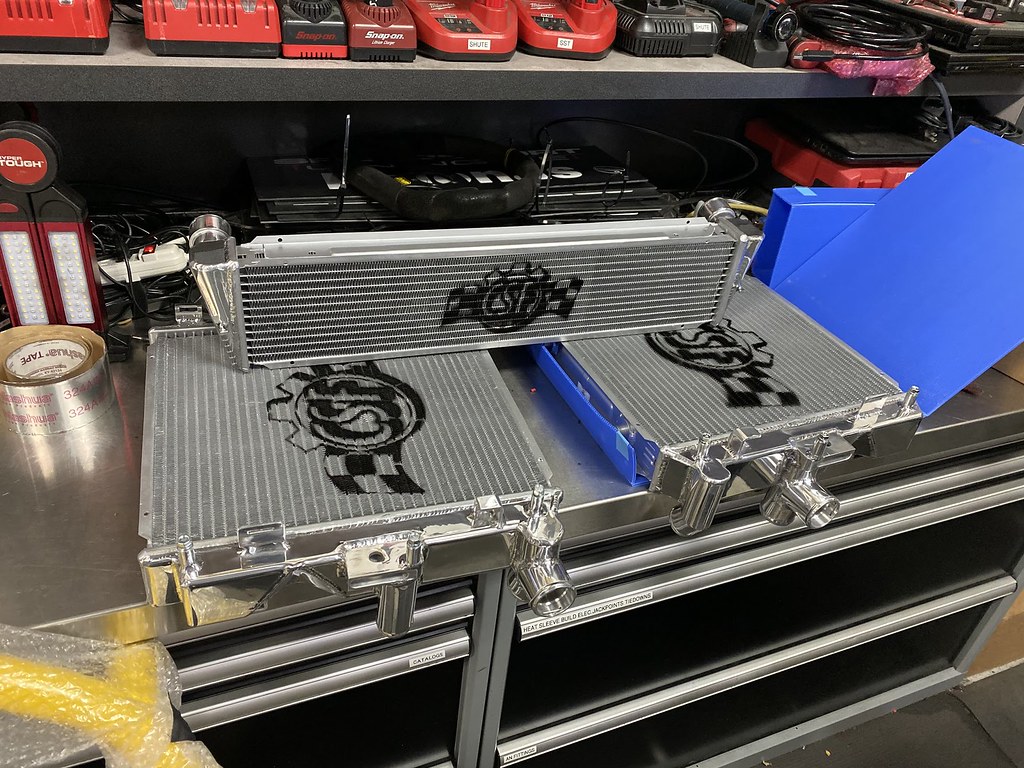
CSF side and center radiators 
Obviously, to make the center radiator work, they had to cut out the piece of the front bumper which is actually standard on Tiptronic model 987.1 Caymans. To avoid leaves accumulating on the radiator, I also picked up a Zunsport center grill for a clean look.

All back together with the Zunsport center grill - 10/4/19
Porsche clearly wants to distinguish the Cayman from the 911 and one way they do that is by not including oil monitoring as standard. There are no oil temperature or oil pressure gauges built into the car nor are there any sensors on the engine for it. I hate being on track and not having at least visibility into my oil pressure to know whether or not I'm dumping oil on the track so I had one added in.

Oil pressure sender wired in
I chose the Autometer Ultra Lite II oil pressure gauge because the face matches the OEM gauges quite nicely and fits perfectly in the spot where the Sports Chrono clock sits. This is a much more functional use for that space since having a stopwatch is pretty useless.

Autometer oil pressure gauge in sports chrono gauge pod
A few months ago I received my Heigo Rollbar from Germany and dropped it off with JT Powder Coating to have it powder coated Hot Mustard. Although I don't technically need a rollbar in the car, many tracks now insist on rollbars if you are using 6-pt harnesses with fixed backed seats. I also like having the extra layer of safety.

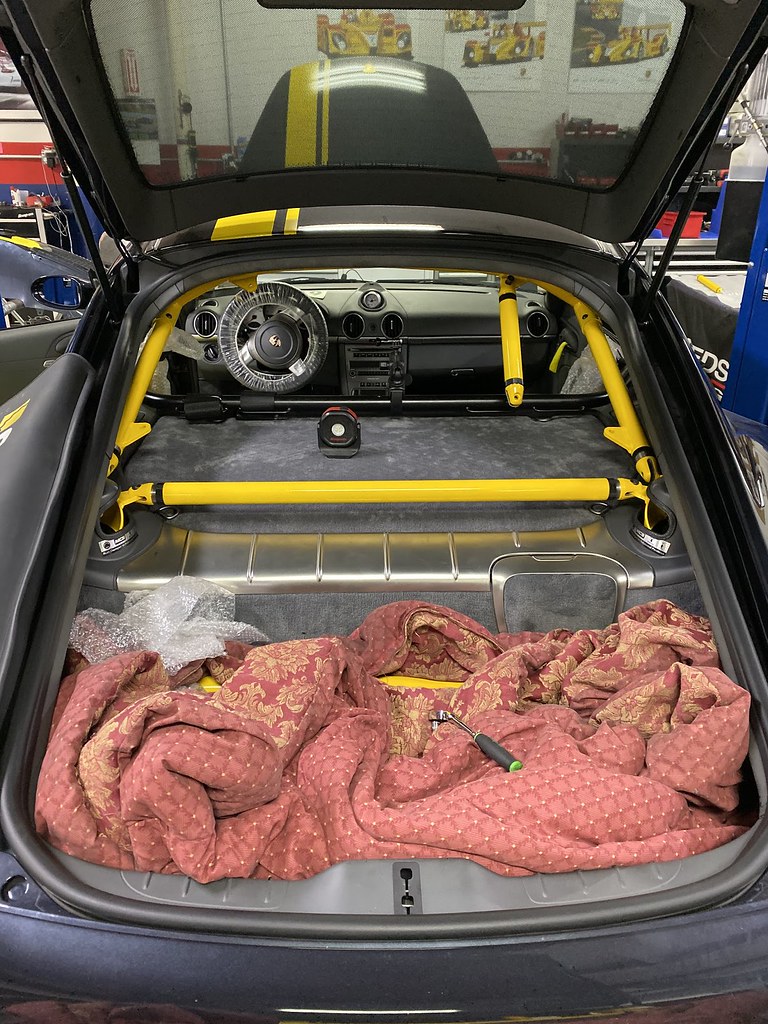
Powder-coated Heigo Rollbar
I decided to continue to use the DMC harness bar since I like its relative placement and mount points for the harness. Thankfully the Heigo fits in perfectly without interfering with either the DMC harness bar or the GT2 carbon seats (I can still slide the seats all the way back). They installed the rollbar for me including the harness bar that it comes with. This is the crossbar that sits closest to the back of the car. Although I'm not going to use it for its official purpose, I think it helps add rigidity since it ties the two rear shock towers together so it made sense to keep it in.

Rollbar getting installed
Heigo Rollbar Installed - 10/4/19
As part of them going over the car, they also noted that the coil packs had started to develop cracks so I had all coil packs and plugs replaced with new ones.

The car is now fully track capable. I don't intend on making any of my cars dedicated track cars and I'm far from being a track rat but I do like to know that if I wanted to do a track day in the Cayman, she's ready to go and that I've done everything I can to improve safety for myself and the engine.

Maintenance Update:

Mileage: 39,481
- New Coils Pack
- New Spark Plugs
- New radiators (CSF)

Saturday, October 5, 2019

Tints Off, Brakes Refreshed - Ready for Inspection

I like a slight tint on cars but the previous owner put on some crazy 15% tint all around. Legalities for NYS aside, I just find this too dark especially for winter driving so I tried to garment steamer method to take the film off. It actually came out great but was incredibly time consuming to do right (35-45 minutes per window).

Steaming the tint to soften the adhesive - 10-5-2019
It left minimal residue (mostly in areas where I rushed a bit). These windows must've been tinted with the windows out or something because the tint extended to areas way past the trim so I don't even know how he got it there. This also made it tricky to grab an edge so I slit the top after heating to have something to grab onto.

Slitting and peeling the tint off - 10-5-2019
I think it came out ok. The factory/natural tint on the windows is actually nice so I think I'm going to keep it this way.

Before with 15% tint
After with OEM tint levels (70%?) - 10/5/2019
The last remaining item to get through before inspect was the rear brakes. The previous owner had replaced the front brakes only not too long ago with Zimmerman rotors and EBC red brake pads but opted to punt on the rear for a bit. It still had some rear braks left but I personally think it's on the low side so I put in new rotors and EBC green brake pads to keep the front bias of the brakes.

New rear rotors and pads - 10/5/2019
Rear brakes all buttoned up - 10/5/2019
I'll be finally registering it shortly to put the plates on and the car is now ready for NYS inspection. Now all the basics are out of the way we can start putting on the real mods.

Maintenance Update:

Mileage: 50,785
- New Zimmerman Rear Rotors
- EBS Green Brake Pads
- New TTY M14 bolts and set screw

Thursday, October 3, 2019

Functionally Aesthetic

I have a tendency to go towards spending a little extra for visually appealing mods but I also try to make sure they have some functional aspect to them rather than just be purely cosmetic. I picked up these used Euro rear headrests which, upon first reaction, you'd think makes no sense since I don't sit back there.

Euro Rear Headrests - 10/3/19
Well, while the GTi is nice and small, the rear visibility isn't the greatest and the OEM rear headrests sticking up the way they do, block a good chunk of the rear window even when pulled all the way to their lowest position. Naturally, one easy solution is to simply remove the headrest but I don't like how that looks. Plus, if I actually have backseat passengers, I would like them to have a functional headrest.

OEM "tall" headerests
As you can see, the euro headrests (called that because that's how these cars come in Europe), are L shaped so when you drop them to the lowest position, they sit flush with the center headrest and get out of the way. Anyway, it's a fairly inexpensive mod using OEM parts that in my option look pretty nice and are quite functional.

OEM headreset (left), Euro headrest (right)
I was very glad when I first saw the car from the previous buyer that he hadn't drilled the holes for the front license plate. Unfortunately, in NY, front plates are required and especially in Manhattan, that's a really easy way to just keep getting tickets. Rather than add the OEM license plate bracket, I went with a tow hook mounted one from U.S. Mills. It's really nicely constructed and sits in a decently pleasing location. The best part is that it takes almost no time to remove if I want to have a clean front end for photos or other activities.

U.S. Mills front license plate tow hook mount - 10/3/19
Finally, the car came with a flush mount Whispbar roof rack but I had the previous owner remove it when I was looking at the car to make sure the paint underneath it hadn't gotten ruined. Thankfully all is well and so I spent the evening putting it back on just so I could figure out the fitment.

Yakima Whisbar roof rack - 10/3/19

I was at least grateful that the previous owner actually gave me a brand new mounting kit with new rubber feet in addition to the old one (I'm obviously using the fresh mounts). It took a large amount of fiddling to get these seated just right but the clearances are quite good and the sunroof tucks just beneath the rear crossbar. That makes this complicated because if I had anything actually attached to the bars then I can't open the sunroof all the way anymore. That makes me wonder whether or not I'm going to keep these on but for now, the answer is yes since I have some nice ideas for roof boxes to help with the decreased storage space once this car replaced my Touareg completely.

Roof bars on. Looks alright I think - 10/3/19
If I do keep these on, I'm going to mark their spot and add these Laminx clear film strips underneath to prevent marring of the paint.

Laminx clear film to protect from roof rack feet marks - 10/3/19
The car's coming along quite nicely. We've got a few more things to take care of before I deem her worthy to officially roam around the streets as my car but we'll try to sort much of that this weekend.