I was driving around today with my "real" camera scouting for random spots for future photoshoots and figured I might as well take one of the GTi now that she's all done. I have to say I do really miss shooting with a non-cellphone camera and appropriate lens setup (Olympus EM-1 with 75 f/1.8 and 12mm f/2.0). I even got to have a nice chat with a random guy who really liked the car. He was visiting from the Philippines and said they have a local VW Sportwagen club there so shout out to those peeps!
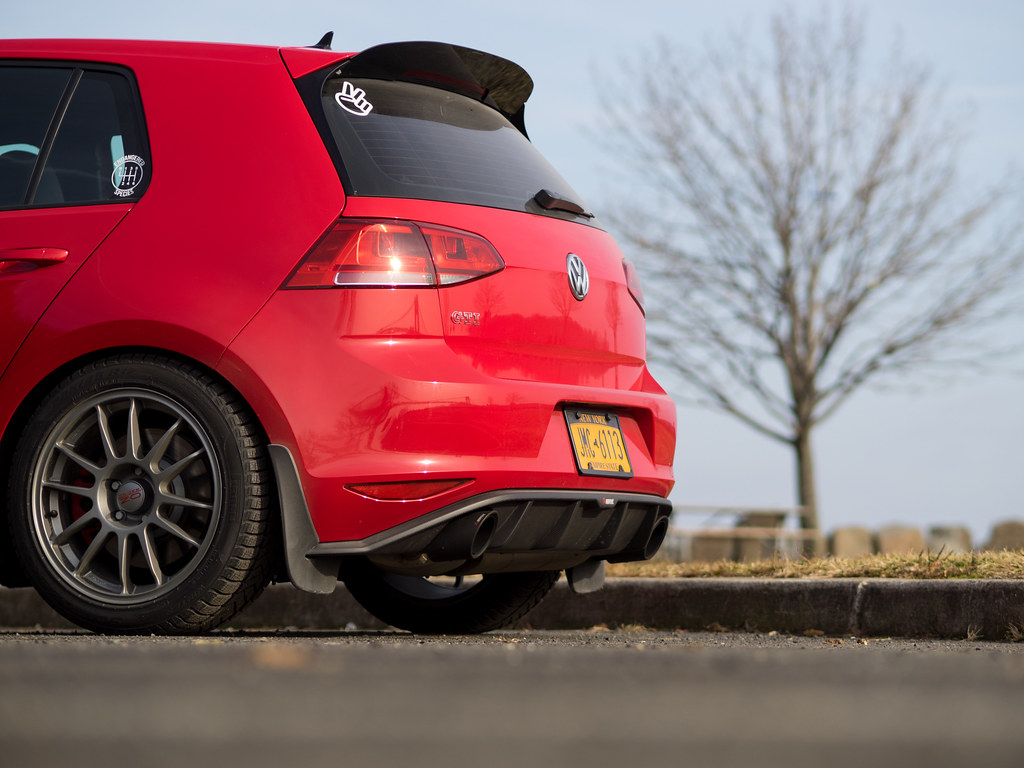
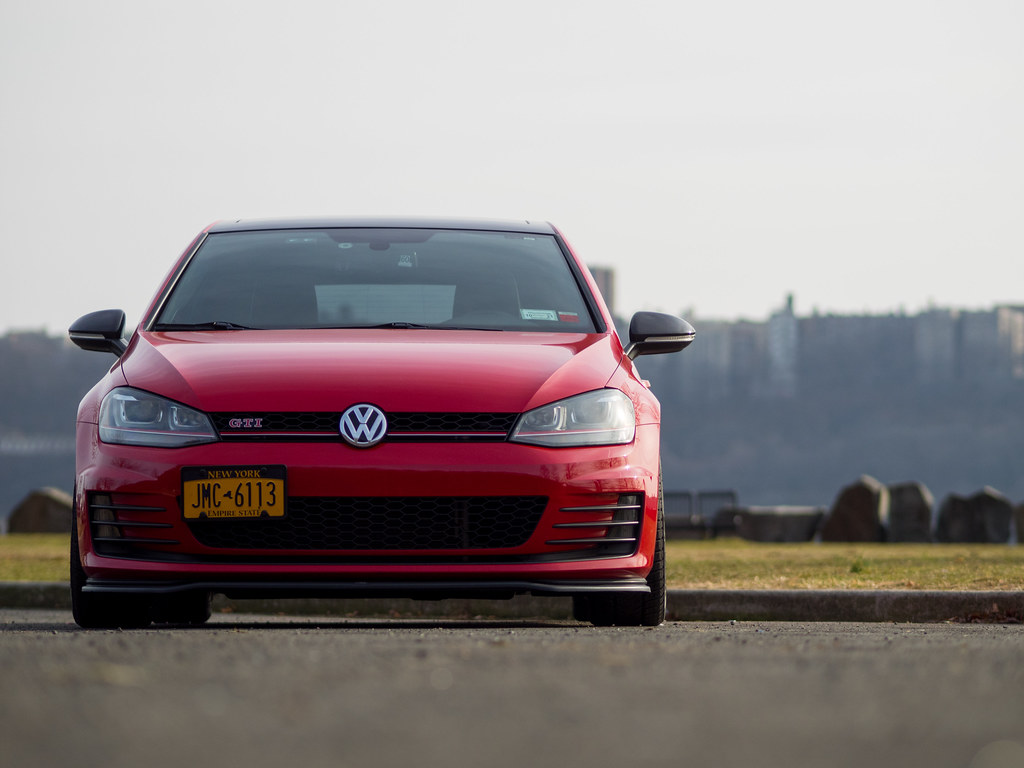
MK7 GTi "Chilli" - 12/18/2019
MK7 GTi "Chilli" - 12/18/2019
MK7 GTi "Chilli" - 12/18/2019
MK7 GTi "Chilli" - 12/18/2019
MK7 GTi "Chilli" - 12/18/2019
No detail shots today. The car was actually pretty dirty from all the random salt flying around off the roads but thankfully the red does a good job of masking most of it.
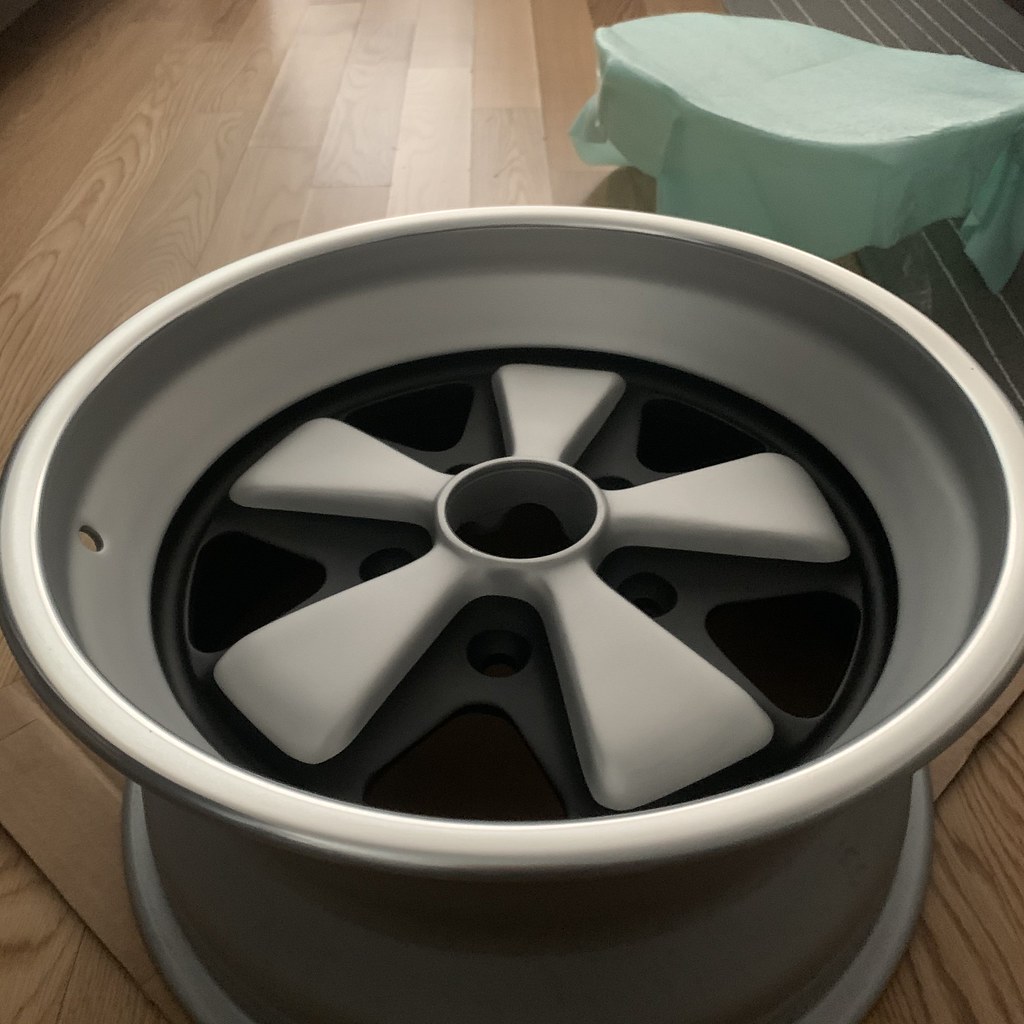
I wanted to get Fuchs wheels that were not finished in black for Scarlett but didn't want to touch the original wheels since I think those should be preserved. I also wanted slightly wider wheels for better stance and a fatter rear lip (I have the factory 16x6 16x7 optional wheels on the car now).
Fuchs 16x7 16x8 RSR frosted finish - 12/27/2019
I ended up coming across these and they're going to be perfect for the car. They're original (either 1979 or 1982 dated) original Fuchs wheels in 16x7 and 16x8 restored by Peter, a.k.a. "The Fuchs Guy", a.k.a. autoclub911 on Pelican, from SoCal.
Fuchs 16x7 RSR frosted finish - 12/27/2019
The following was done to them and they're absolutely gorgeous period correct wheels:
As these are of course forged wheels, they weigh in at just 13.4lbs and 14.8lbs for the 16x7 and 16x8 respectively. Too bad they'll be tucked away until the end of the build but wheels make or break the look of the car and I'm really glad I finally found the wheels I wanted.
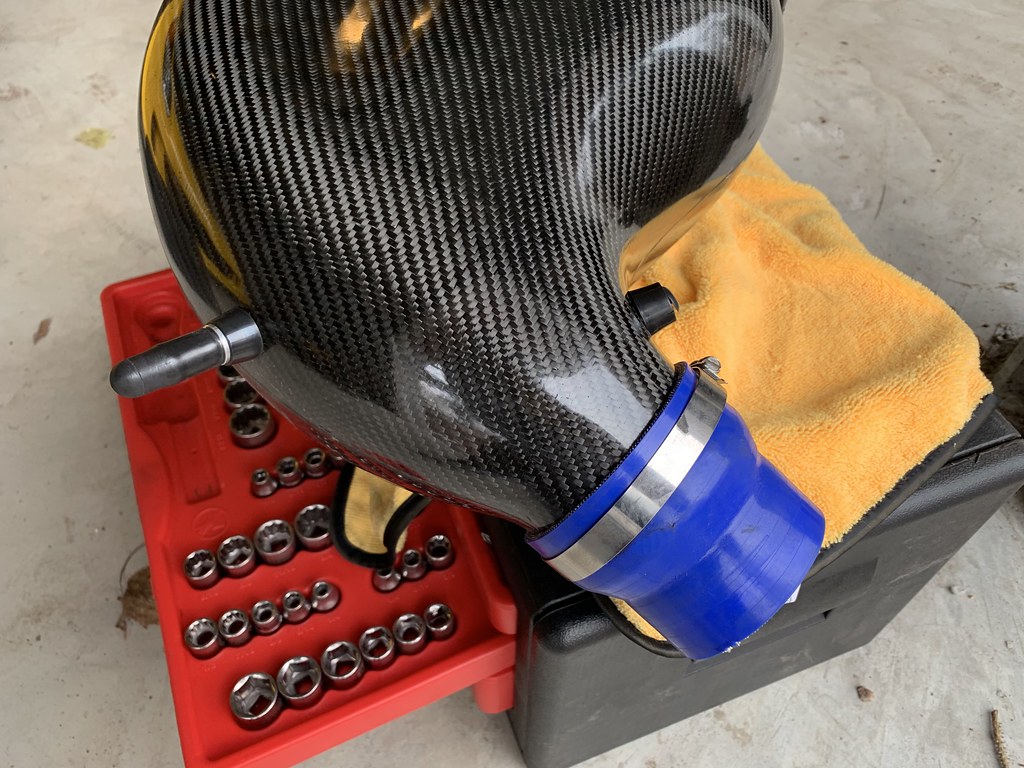
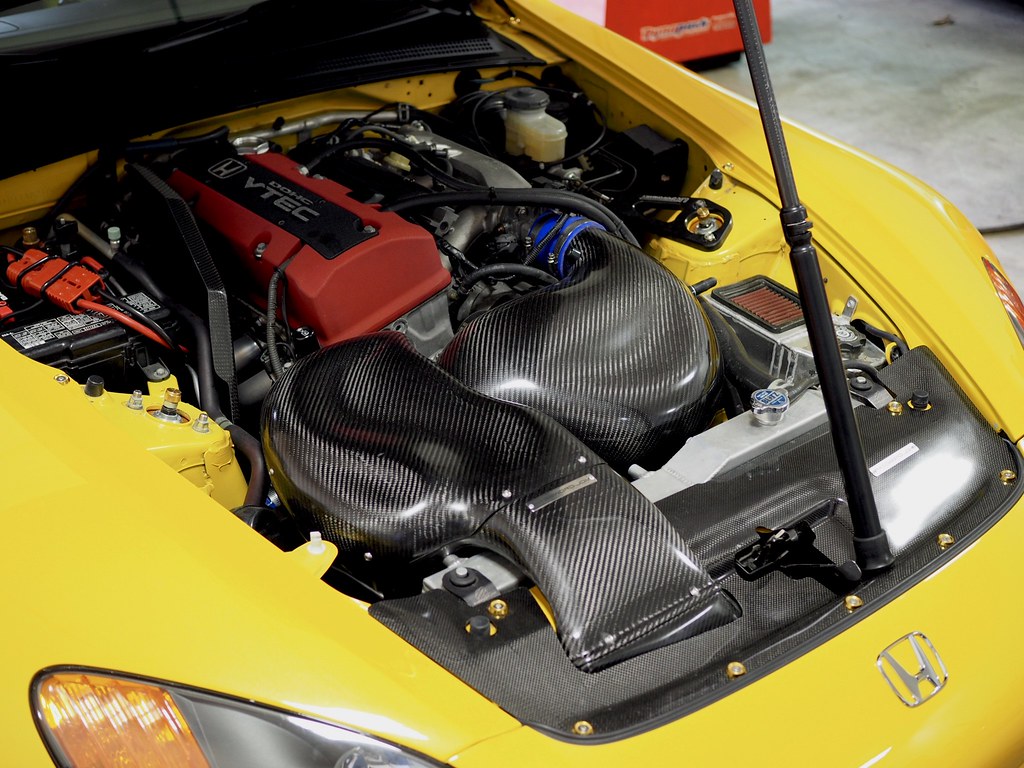
One thing that's been bugging me for over a year now is that the PasswordJDM intake for Bumblestook arrived with a blue silicon coupler. There's nothing wrong with it functionally but it looks completely out of place in an otherwise black/yellow/red engine bay.
Time to say goodby to the blue coupler - 12/26/2019
I picked up an appropriately sized Vibrant Performance black coupler hose earlier this year which is 2.5" to 3.5" ID and 3" long but just never had a chance to put it in. Now that it's winter and there's nothing else to do, I figured the long overdue "fix" had to get done now.
Vibrant Performance black coupler - 12/26/2019
Getting the old coupler off was a bit of a chore as the combination of it being on there for a year and the cold weather meant it didn't want to budge. After a few minutes with a heat gun, the silicon softened enough for me to pull it off then it was relatively easy enough to put in the new one. It did need some coaxing to get the throttle body side on but with some stretching it finally went on.
Much better looking engine bay - 12/26/2019
Older pic with the blue coupler for reference
I know it seems pretty mundane but I'm actually really glad Bumblestook is, for all intents and purposes, "done", so I actually love the fact that all I really have left to do in any given year are small fiddly bits like this and maintenance.
I received the Akrapovic dry carbon rear diffuser weeks ago but simply didn't have time to put it on. It's the final exterior piece I wanted to change the look of the GTi and to do it right I knew I needed to get it on a lift and enlist the help of SJF Performance. The OEM rear valence was a bit of a pain to remove but mostly because we did the install without removing the rear bumper so getting to some of the tabs was more challenging. Although the rear diffuser had great fitment, the holes for the screws were off by a few millimeters so we had to file them open a bit more. I also have OEM mudflaps that obviously weren't made for having a diffuser so SJF had to trim it down to make it work. The tips were a bit too close to the diffuser which both didn't look great and would probably result in scratches later so SJF used some washers to space them out a bit and now they're at the perfect distance.
Akrapovic dry carbon rear diffuser - 12/14/2019
I think it looks awesome back there with the Akrapovic titanium axle back. It's a subtle design that really doesn't call for any attention but is a nice detail when someone takes a closer look. The craftsmanship is perfect, not a single misplaced weave. It truly sets the bar for quality of carbon fiber pieces for me going forward.
Akrapovic dry carbon rear diffuser - 12/14/2019
Akrapovic dry carbon rear diffuser - 12/14/2019
There were also two maintenance items I wanted to get done that I've been procrastinating on while all the other work on the car was getting finished. The first was replacing the transmission fluid. I simply didn't have any record of it being changed but the stuff that came out seemed to be fairly clean so someone must've changed it at some point. I just don't like not knowing how old the fluids are in my cars. Whoever changed the transmission fluid previous also did a fantastic job overfilling it so I'm glad we got this done so now there's the correct amount in there (around 2.3L).
Fresh transmission fluid - 12/14/2019
The same was true for the Haldex diff. I didn't want to chance old fluid being in there since the car now has over 52k miles so I picked up a nice diff fluid replacement kit from shopdap which conveniently included a nice bit of fill hose and brand new fill and drain plugs and gaskets. I'm also glad we did this because the drain bolt was hand tight (loose) so that was a big no no.
Fresh diff fluid - 12/14/2019
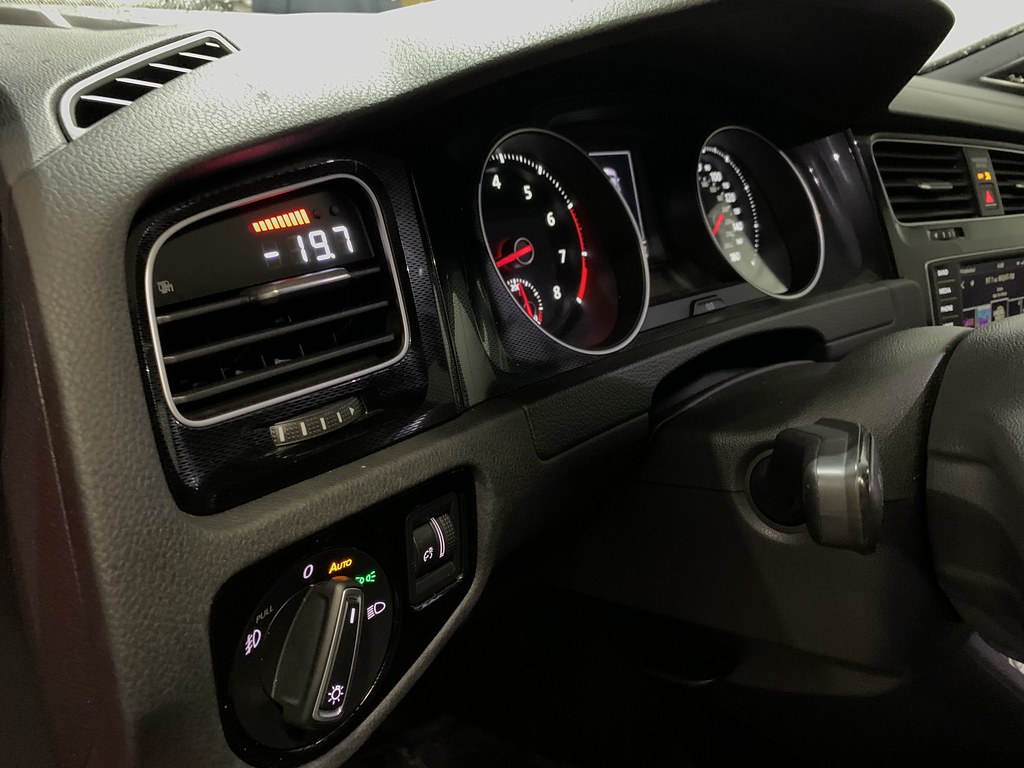
Finally, I went to go visit Alex and while he was working on his car, I decided I might as well pop in the P3 V3 ODB2 vent gauge I bought during Black Friday. It's a pretty nifty gauge that'll let me see some engine parameters easily. I'll admit I mostly got it because I thought it looked cool but it does have the added benefit of being able to show and clear CEL codes that might crop up...a useful feature for anyone that owns a VAG product. The installation was fairly straightforward since I ordered the unit with a complete replacement OEM vent. I just had to pop out the old vent and run the wire through the side panel similar to what I did with the dashcam installation to run the connector to the OBD2 port.The match in both color and style is OEM so I'm very happy with it.
P3 V3 OBD2 vent gauge installed - 12/14/2019
I'm pretty much done modding this car and I'm enjoying driving it a lot. I did finally receive the auto folding mirrors but that's going to be an annoying install so I'll wait until I'm a bit more bored to work on that mini project. Now I can focus all my attention on the 911 when it arrives.
I'm turning 40 next year and I was trying to think of an appropriate special vehicle to celebrate. I've been looking at a bunch of options but it had to be a driver's car, not something so precious I'd be afraid to drive it. My main criteria were that I wanted it to be a car that offered a different driving experience from the cars I have now and it had to be manual. My intention was to find something over the winter but I stumbled across a deal I couldn't pass up over a week ago and so today I flew down to South Carolina to seal the deal. Say hello to the latest addition to the Steguis Motorsports fleet, a 1983 Guards Red 911 SC (Super Carrera) I am calling "Scarlett".
I've been leaning towards an older classic car and the air-cooled Porsches simply have that special something that really kept me looking back at them. I saw a Guards Red 1980 911SC listed for sale at CCS Motors this summer and I kept going back to looking at it online. It was a bit too clean and pricey for what I wanted but it gave me an idea of what to look for. The 911SC itself isn't a particularly special or rare car but having a G-series Porsche of the generation around the year of my birth felt like a very appropriate choice. Sure it's not fast, it has no frills, no power steering, no ABS, and the 915 transmission is less loved than the G50 that proceeded but overall the SC is a raw and truly engaging vehicle.
1983 Guards Red 911 SC - Scarlett - 12/7/2019
Made in West Germany - 12/7/2019
My search eventually led to this 1983 911SC being sold by a private seller in South Carolina. 1983 was the final year of the SC. The car has 160K miles on the odometer and the clear coat front of the A-pillar is starting to fade badly and most people would simply pass on it. However, as the "Buster" once said "Pop the Hood!", and under that exterior is a freshly rebuilt (by Porsche, and with warranty) 3.0L flat-6 engine. The engine is still being broken in with just around 20 miles on it since the rebuild earlier this year and I have all the paperwork to prove it. The most recent previous owner had it for almost a decade sitting around clocking only 1000 miles in 10 years since buying it off his friend. He recently decided to start it up again and didn't like the little oil leaks and smoking at startup so he brought it into a dealership where the engine was completely overhauled. Other things were fixed as well including the AC switch and a new OEM windshield was installed. It also just got a new battery and a new leather dash cover. The AC blows very cold, heat works, all gauges work including the clock.
Freshly rebuilt 3.0L flat six - 12/7/19
Freshly rebuilt 3.0L flat six - 12/7/19
Brown interior
Everything works on the car except for the headlight switch which is intermittent, a common air-cooled Porsche fault and the driver seat has a rip in it but otherwise, the car is in good mechanical shape. It also spent all of its life until recently on the west coast so it's a rust-free chassis. This is the perfect driver's car baseline I wanted for my air-cooled Porsche project. It's clean enough to build on but old and used enough that I don't have to be too precious with it so it won't make any Porsche purists cry too much.
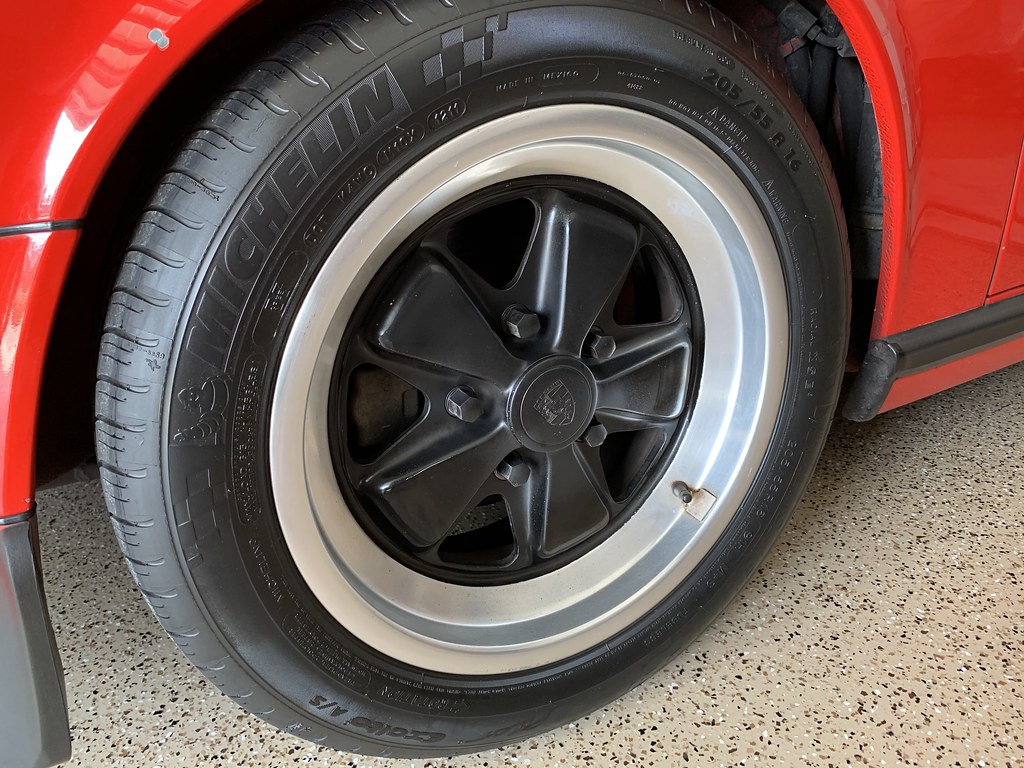
Front wheels with fresh Michelin tire
Front wheels with fresh Michelin tire
Since this was a bit of an unexpected and sudden move on my part, my build sheet for it is still evolving but you can rest assured knowing that Scarlett will be built up to a standard that befits her membership to the Steguis Motorsports fleet. I think the direction I'm going is a light restomod. I'm really excited about what's to come and hopefully we'll get her done before my actual birthday next Summer so I can enjoy driving her once the weather gets better again. For now, she needs to get transported up to the northeast where we're going to breath new life into this old but loved car.
Well, it's finally time to finish up the power modifications to the GTi. I dropped off the car with Dion at Drive Auto Works (DAW) shortly after Thanksgiving so they could get to work on it while I was away on business. First up is an upgrade to the IS38 turbo used in the Golf R / Audi S3 to get a better power curve. It's just a slightly bigger turbo than the stock IS20 so it makes similar peak torque numbers but doesn't drop off in power as you get up into the higher rpms which is really where the difference counts. I had them transfer over the CTS Turbo inlet and muffler delete but this time I decided to keep the stock diverter valve rather than install an aftermarket one. My understanding is that it really shouldn't be needed for this revision of the IS38 and the aftermarket ones can cause more issues than they help.
New IS38 Revision F Turbo
Since they were going to have to disconnect the CTS downpipe to install the new turbo, I wanted to replace it altogether with a new one from AWE. The AWE downpipe has the advantage of having a flex pipe built into the design to allow for movement and minimize the chance of cracking under stress. More importantly, it has a German high quality HJS cat on it so I know it'll perform optimally.
AWE Downpipe
Delicious HJS Cat
IS38 and AWE Downpipe installed - 12/4/2019
Of course, if we're going through the trouble of installing a new turbo and downpipe, I might as well upgrade the intercooler as well. DAW hooked me up with pricing on a Wagner intercooler which should provide much-needed cooling of the boosted air come summer. It's a nice OEM like fit but is thicker and higher quality with no plastic pieces.
Wagner Intercooler - 12/6/2019
With power almost double, and the car having over 50K miles already, I figured an upgrade to the engine and transmission mounts would be in order. Since this is a daily I didn't want too much NVH so I went with 034 Motorsports Density Line of mounts. These are still rubber but are solid and have a slightly harder rubber than factory. It keeps the engine in place without adding annoying NVH to the cabin and they're an excellent street upgrade mount set.
034 motorsports density line engine and transmission mounts - 12/6/2019
Finally, all this hardware isn't going to do much without a tune. I already put in one step cooler plugs and new coils a few weeks ago so she was all ready to get the APR Stage 3 IS38 high torque tune. It now makes around 350 hp and 350 ft-lb of torque to the wheels which I think is actually pretty absurd for a FWD car but it'll sure be fun and is now officially the most powerful car in the Steguis Motorsports fleet which I find a bit hilarious. The car drives phenomenally well. It has a very OEM driving feel and pulls really hard all the way to the top. It feels like a proper hot hatch now.
APR IS38 Stage 3 High Torque Tune - 12/6/2019
APR Stage 2 high torque for reference
Big thanks to Dion at DAW for getting me all sorted and Rad at Tatis Motorsports for helping me source some of the parts so I could get this done when I wanted this past week. Now that we're all done with power mods, I just a few more cosmetic tweaks to make and she'll be exactly where I want her to be and I can close out this build.
I'm a big fan of spoilers and ducktails (as evidenced by ducktail on the Cayman) and while I'm happy with the general shape and lines of the GTi, I always thought it needed a little extra on the rear spoiler. The little black ones that stick on the top look out of place and some of the other aftermarket options are just too big. I decided that the Aerofabb V2 spoiler extension fit the bill quite nicely. It's not too noticeable but adds a little extra hint of black in the rear that gives it a bit more of a defined shape.
Aerofabb v2 spoiler extension - 11-23-2019
The actual installation instructions call for heating up and cutting the glue that holds the OEM spoiler to the side pieces then removing it completely so you can drill holes to mount the spoiler extension. I personally didn't like the idea of having to drill the OEM spoiler so I decided to just use more automotive grade 3M tape as well as 3M adhesion promoter to make sure I'd get a nice bond between the tape and the painted surface and not drill any holes at all.
3M adhesion promoter
It's getting pretty cold right now so using tape and the promoter is not really a great idea since this is supposed to be used when it's warm out. Not wanting to wait until the Spring, I stood there with my wife's old hair dryer heating up both the extension, the spoiler and the tape so they'd all be nice and warm before proceeding with the installation.
Aerofabb spoiler extension installed - 11-23-2019
Aerofabb spoiler extension installed - 11-23-2019
Aerofabb spoiler extension installed - 11-23-2019
I think it came out quite nicely. I applied constant pressure on the spoiler extension while continuously applying heat with the blow dryer (not heat gun as that'd probably be too hot) and left it in the sun for an hour. A few spirited test runs later and there was no sign of movement or loss of adhesion so I think I'll leave it like this. I'm sure it'll only get better as it stays on longer. Overall I'm happy with the product. The gloss black finish matches the other black sides of the hatch quite well but I suspect it's going to attract quite a bit of dust over time but perhaps a nice polish and ceramic coating will take care of that after the Winter.
One thing I always thought was peculiar about the styling of the MK7 GTi was that it has black side skirts and rear valence but the lower front of the bumper is all mostly body-colored. I wanted to complete the black outline look in the front as well so I picked up a textured black plastic Maxton Designs V2 lip.
Maxton V2 Lip Installed - 11/16/19
It doesn't really make the front much lower but it does extend out the sides an inch or two more so I will have to be a little more careful when going up steep inclines. The upside is that this is plastic and relatively cheap so it's mostly a sacrificial lip.
Prepping the lip for install
It came very nicely packaged from ECS Tuning and included a slew of bolts and nuts to secure it to the bumper. I felt that was unnecessarily complex so I grabbed a pack of self-tapping screwed instead and just used the included washers to help spread the force a little. You're supposed to install this with two people but it's a light enough piece that, with the car on the QuickJack, I was able to hold it in place with one hand while getting the first screws in then I went to town putting in around 16 screws to make sure it doesn't fall off at high speed.
It's even TUV certified
bolts securing the lip
The fitment is really good. It follows the various contours of the stock bumper so it's actually easy to align. Overall I'm happy with it and I'm actually glad it's not too rigid so it'll have some give in case I scrape it on something. The car's only lowered an inch so I don't foresee there being too many problems.
deAutoLED brake/tail/turn LED set - 11/16/19
A lot of people retrofit the Euro LED tail lights or the MK7.5 lights but I'm personally quite happy with the rear lights. I do wish they were LED because I hate dealing with burnt-out bulbs and I like that they're brighter and redder. I picked up a set of LED brake/tail/turn bulbs to replace the factory incandescent ones and more importantly, I also replaced the reverse bulbs with very bright LED bulbs so that I have great visibility even when reversing in dimly lit places.
Tail lights removed to swap bulbs - 11/16/19
It's a pretty simple process. Just had to remove the rear lights to access the bulbs and also open up a panel on the hatch to replace the rear bulbs and reverse LED there too.
LEDs swapped in
deAutoKey LEDs installed - 11/16/19
I also spent the better part of the morning enjoying driving the Cayman out one last time through Bear Mountain. With the temps constantly dipping into freezing and salt being laid on the roads, it was time to put her away for the winter. I forgot how amazing this car is to drive. It's just so visceral and it truly is a different driving experience from my other cars.
Final drive for 2019
Getting her clean before being put way
She was also pretty dirty so before putting her away, I got her washed and put the cover on to mark the official end of her 2019 driving season. Lots of fun adventures and looking forward to taking her to track next year.