During the first iteration of the 911SC build, we installed LED headlights from Audette Collection with Bosch fluted lenses along with an H4 harness conversion. While aesthetically it looks great, to be frank, I found the lights to be dim and a bit scary to drive at night. I wanted to get something that was really well engineered and have been eyeing 9Eleven Headlights for some time now.
9Elevent Headlights Raven headlights in Gunmetal
The headlights are an engineering work of art and while they are quite pricey, I'm more than happy to support small business who do things the right way. Installation was pretty straightforward since I already had LED lights before with the H4 conversion. The kit came with a harness that connects to the H4 socket and then their connector on the other side that goes to the headlight.
H4 adapter harness
I also got fresh headlight gaskets. Even though my old ones were still fine I figured it's cheap enough to put a fresh set in. I've never bought anything that actually included white gloves to ensure you don't mess up the lights during install.
included white gloves
The lights look absolutely gorgeous installed and the brightness is spot on. I opted for black headlight rings and I think it gives a nice aggressive look.
Raven gunmetal headlights installed
Raven gunmetal headlights installed
Lights on
Audette Collection headlights (left) vs 9Eleven Raven Headlights (right)
I've had the Achtungcraft air duct for the oil cooler on Scarlett for some time now and the screen has started to come off. I've also unfortunately hit it with my knee a few times when walking around the car. I saw the new NACA air duct from Joe Engineering and it looks much better. It's streamlined into the bumper so nothing is protruding and funnels air nicely to the oil cooler. I ordered the premium version which has a nicer finish and made of better material.
Joe Engineering NACA duct
Joe Engineering vs Achtungcraft
Install was super easy and just took a few minutes since I had already removed the side marker before to install the Achtungcraft duct. I made some suggestions to Jose about how to improve on it a bit in the future but overall a nice piece.
For the past few months I noticed something odd, every now and then I'd have the 911 on my CTEK charger but it'd throw an error that the battery wasn't holding charge. I figured that my battery was just dying but it's really only been 3 years. Still after the battery just wouldn't charge anymore, I bought a brand new battery and noticed the same thing was happening. I decided to check for any draw on the battery while the car was off and key out of the ignition and it measured 370mA. That's way too high especially for an "old car" with barely any electronics.
370mA of draw
I unplugged every fuse and relay from the car and nothing changed. This was bizarre. I eventually gave up and took it to Lee's Autowerks so he could get to the bottom of it. He eventually found the source of the problem but it wasn't the usual suspects. For whatever reason, the ignition switch had become faulty and the contacts terminal 30 and terminal X was closed (on) all the time. You can see in this video comparing it to the a new ignition switch (later installed in the car) that those contacts should be normally open.
Faulty ignition switch (left) vs new normally working one (right)
With the new ignition switch install and key out of the car, you the draw is now only 35mA which is well within the 100mA max static draw noted in the service manual. Big thanks to Lee for getting this all sorted so I don't have to worry about the battery just dying on me if it's not on a tender all the time.
Well for a few weeks now my CTek battery tender would keep showing the red light when trying to charge the battery on Scarlett. I thought maybe it was just the charger being bad but sure enough, the battery was down to 10V and was not holding charge. Very strange since it was only about 3 years old and I haven't put that many miles on the car. Either way, replaced it with a new battery and all is fine again.
With snow on the ground again, it was pretty clear that the 911 was going to be in hibernation for the rest of the winter so it's time for another oil change so any contaminants in the oil don't just linger in the engine for a few months.
Oil change time
The unmistakable blue-ish/green color of the Driven GP1 oil is still the oil really isn't very contaminated at all.
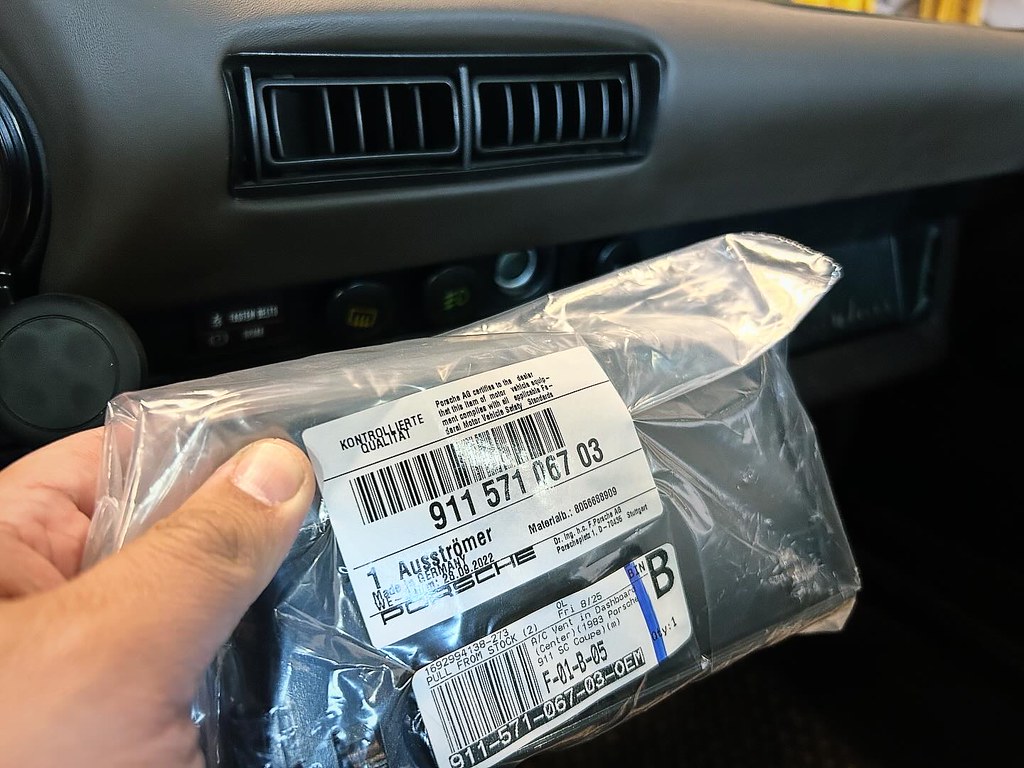
I've had a broken central vent in the 911 since I bought it. The left to right adjustment is loose so it flops around all the time not staying in the same direction and one of the vent fins was just broken completely and doing whatever it felt like. I got a replacement OEM vent last year but procrastinated putting it on even though it literally takes a minute and I finally did it today. I'm not sure why I waited but it's nice when broken things are fixed.
It's been a pretty decent winter where I've been able to take Scarlett out a few times when she'd normally be tucked away. That said, we're almost at March and it's time to get some fresh oil in her before the official driving season starts again.
Oil Change
Still looking decently clean under there
Fresh Oil - 2-24-2023
Ugh, looks like I only put 1500 miles on her last year. That's really sad. I'll try to take her out more this year.
While we were in California, my wife had Scarlett detailed and ceramic coated at Detailer's Domain in Norwood. Their work reputation of course preceded them so I was expecting it to come and great and they did not disappoint. Phil and his team are true professionals and the attention and love they put into their work is second to none
Detail complete - 6-20-2022
It obviously first starts by getting the car perfectly clean. It then underwent paint correction to ensure that each panel was as color perfect and flawless as could be. Unfortunately by this time I had already received a rock chip on my front bumper but that's fine, it's all part of having a car that's actually driven.
Getting clean
Polishing
After polishing, it was coated with Nanolex Si3D Max for incredible shine and paint protection. The way it lights up under artificial light is insane.
Ceramic coating
So Shiny
While I obviously want a clean shiny car, given Scarlett's age, I didn't want to to be too overly glossy and lose some of that vintage appeal. I'm glad to say that in natural light, she still looks clean and shiny but not too much that it looks too much like a brand new modern vehicle.
a head turner
a head turner
a head turner
a head turner
Really loving how it all turned out and more importantly, with the ceramic coating, it should be easier to keep clean going forward.
I always like to start the season with some fresh oil. I've been running Driven DT-50 on Scarlett for some time now but decided to give GP-1 a try next. Unlike DT-50 which is a pure synthetic, GP-1 is synthetic blended with Pennsylvania Grade base dinosaur oil given it a green color. It's supposed to be quite good for classic air cooled cars and includes a high amount of ZDDP.
Driven GP-1
I really love using my Raceramp wheel cribs for this stuff. With the oil lines running through the passenger side of this car, it's a bit hard to place the pucks exactly right if I try to lift it using the QuickJack. With this setup, I can get it off the ground high enough and just let it rest on the wheels.
Draining the oil
Draining the oil
I let it drain overnight to make sure I got out as much oil as possible. Since I was changing oil types, I wanted to make sure even the oil in the oil cooler and oil cooler lines came out. Normally this would be pretty hard to do but the Elephant Racing finned cooling lines make this an easy job. There's a Schrader valve right after the oil cooler thermostat you can use to inject up to 90psi of air to push the oil through the system for a more thorough purge. That's around 1-2 quarts of extra oil that come out if you do this right.
Schrader valve to push the old oil out
Using compressed air with about 85psi of pressure
Torqued the drain bolts to 31 ft-lb and popped in a fresh Mahle OC-54 oil filter and added 9 quarts to start off with. That pretty much fills that the oil tank and most of the engine but the oil cooler is still empty at this point. Drove the car around for about 10 minutes to get everything up to temp so that the oil cooler valve would open up, then kept checking the oil level while the engine was hot and idling. I had to add a full 3 more quarts. This is a good thing as a completely dry engine and system should be around 12 quarts to fill up so my drain method did in fact get out almost all the oil from the system leaving the dipstick right at around the 3/4 mark.
Fresh Mahle OC-54 oil filter.
Engine's humming along nicely and running very smoothly. Ready to hit the streets near you soon.
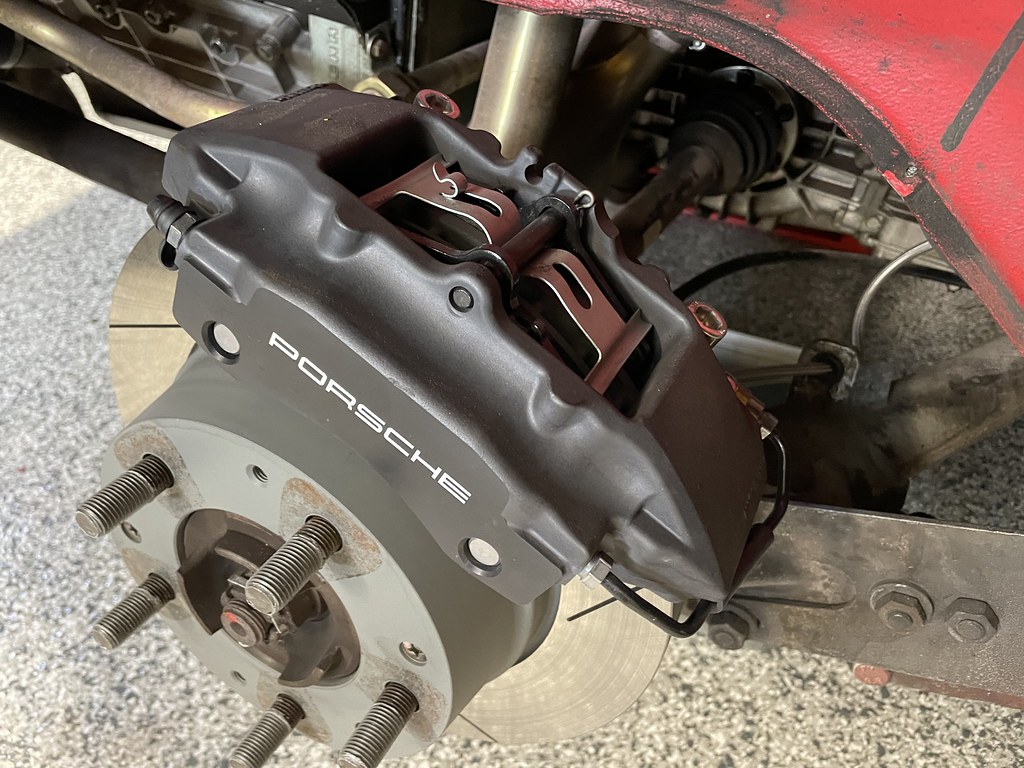
Since about the middle of last summer, I started to notice that at least one of my calipers would seize just a little after being on the brakes for a while. The older 911 calipers were fairly known for this and the logical choice would've been to just replace it with a new OEM caliper or rebuild them. That's not really how I do things especially when there is an opportunity for an appropriate upgrade.
Rear brakes converted to Boxster calipers
In this case, I stumbled upon the Elephant Racing Boxster caliper conversion kit. I was initially just going to order the full kit from Elephant Racing including the caliper, rotors and pads but after consulting with Speedsport Tuning, I had them order just the adapter kit and piece the rest separately so we could better tailor the kit to my needs.
Front brakes converted to Boxster calipers
The kit consists of billet aluminum adapter brackets to adapt the Boxster's axial mounted calipers to the radial mounts of the older air cooled 911s as well as mounting hardware and braided stainless brake lines. These are design to take the base Boxster calipers from 1997-2004. I had them get me new slotted Sebro rotors (from the 3.2 Carrera - 84-89 911) and OEM Textar pads. I could've gone with a more aggressive brake pad compound but it's important to match the pads to the tires, especially on a non-ABS equipped car. Since I run the car on regular Continental DW tires, having an overly aggressive pad would likely be too much and make it easier to lock up the tires under heavy braking.
Clearancing required
There's a little bit of clearancing required to make the brackets work but nothing too crazy. The shop said the hard lines supplied with the kit don't fit really well. They're just a tad too short for comfort so they fabricated correct length lines for me.
New stainless brake lines
New stainless brake lines
Of course, changing out all the brakes like this requires a complete brake bleed. We used standard SL6 DOT4 ATE brake fluid.
Brakes being bled
One of the main reasons I chose to upgrade to modern style calipers is that they are monoblock aluminum, which makes them both lighter and stronger. I could've gone and found some used Boxster calipers to save some money but I had the shop order brand new calipers from Porsche since I felt they were reasonably priced for new OEM calipers anyway. After all the money invested in this vehicle, seems to make little sense skimping out on the most important part of the car...the thing that makes it stop.
Discerning eyes will spot the non-stock calipers behind the Fuchs
Very appropriate OEM+ upgrade
Snarky purists will comment that this isn't really an upgrade and I'd have to agree that yes, from a pure brake performance perspective, the old OEM calipers offer basically the same stopping power (provided they don't bind up). What I do get with this restomod using more modern parts is the improved reliability, decreased weight, and more predictable brake modulation. When it comes to stopping power, having confidence it'll work the same way every time is the most important thing to me.
Looking sweet with her summer setup back on - 3-13-2022
My 83SC has a brake booster and from what I could tell on my long drive home, the pedal feel and balance was still very good. Modulation was easy and it didn't change how the car felt under braking dramatically, which for me, is a good thing. I think if you have a non-brake boosted car, you'd likely have to consider switching to the master cylinder from a 930 turbo to be able to control the larger pistons used in these calipers. I will say that I'm very satisfied with this setup and would highly recommend it for anyone looking to put a more modern brake system into their old air cooled car.
Maintenance Update:
Mileage: 169,654
- 97-04 Base Boxster Calipers
- Sebro slotted front rotors - 91135104123SET
- Sebro slotted rear rotors - 285802CSET
- Textar OEM brake pads
- Elephant Racing Boxster a caliper adapter kit
- Stainless brake lines
- Brake flush and bleed with ATE SL6 DOT4 low viscosity fluid
While I wait for the contractors to get some important work done in the garage, I've been making slow but steady progress. One of the most important things for me was to be able to organize the extra wheels for all the cars. I've been neatly stacking them for years but I've always wanted a proper tire rack. I ended up getting three Maxxhaul 50256 tire racks because they can hold 325lbs each and of course they're black and yellow. They came with lag bolts but since my walls are concrete, I opted to use 5/16" x 3" Tapcon masonry screws instead and they definitely hold up well. I think I made the most efficient use of that corner of the garage.
Maxxhaul Tire Racks
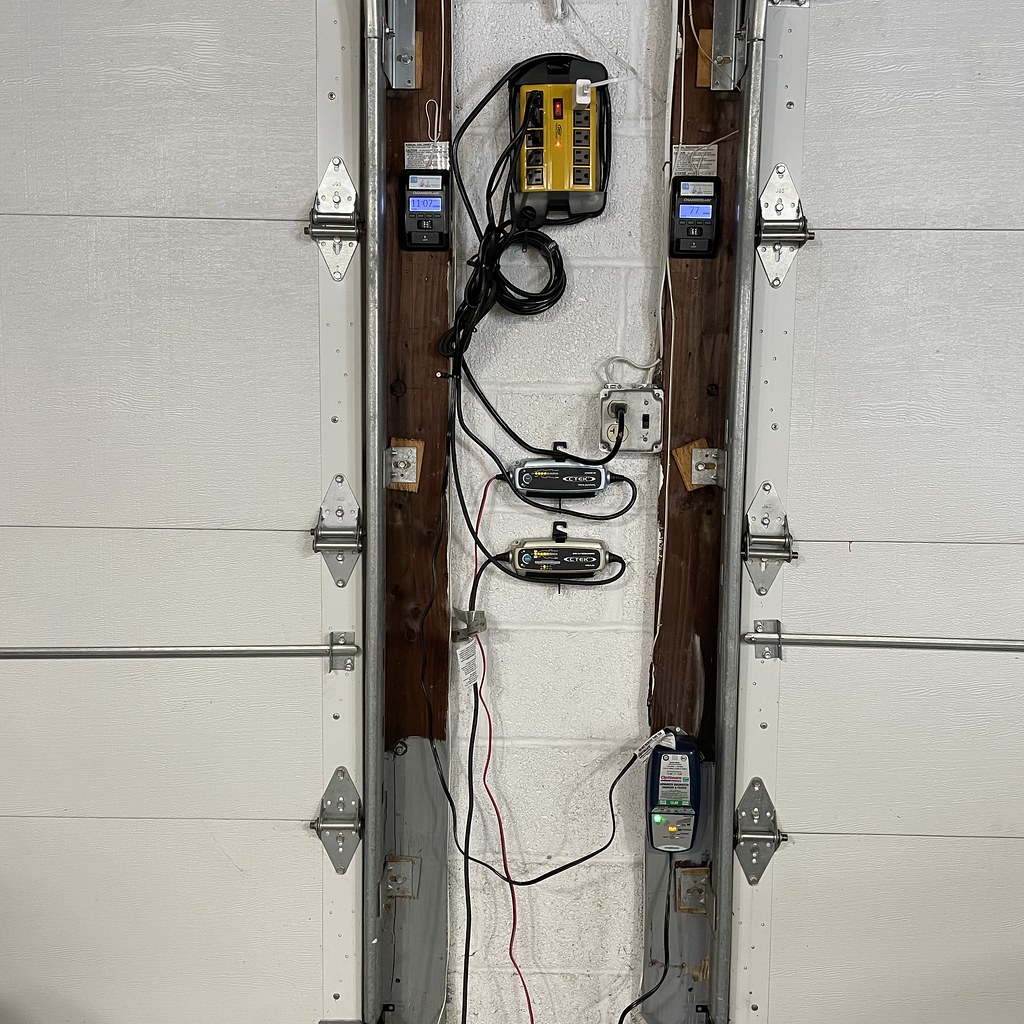
Last week it was raining so unusually hard it overpowered the gutters on the garage roof and some water got in via the side door. It wasn't much and thankfully the floor was sloped away from the center where the battery tenders were on the ground so they didn't get wet. Vowing to avoid that risk from happening again and to protect against lightning strikes, I mounted the CTek and Optimate chargers on the wall plugged into a heavy duty surge protector. I may eventually move these above each car but for now I feel better that they're way off the ground. I'm not going to win any OCD tire management contests with this wiring job but it's better than what it was before.
Battery tenders mounted to the wall
I also got to put up some decorations to give it a more personal touch. The sweet JBL Link View Google display is so I can both listen to music and keep an eye on the front door (Google Nest Hello doorbell) for any deliveries even when I'm not in the house.
Decorations and Tech
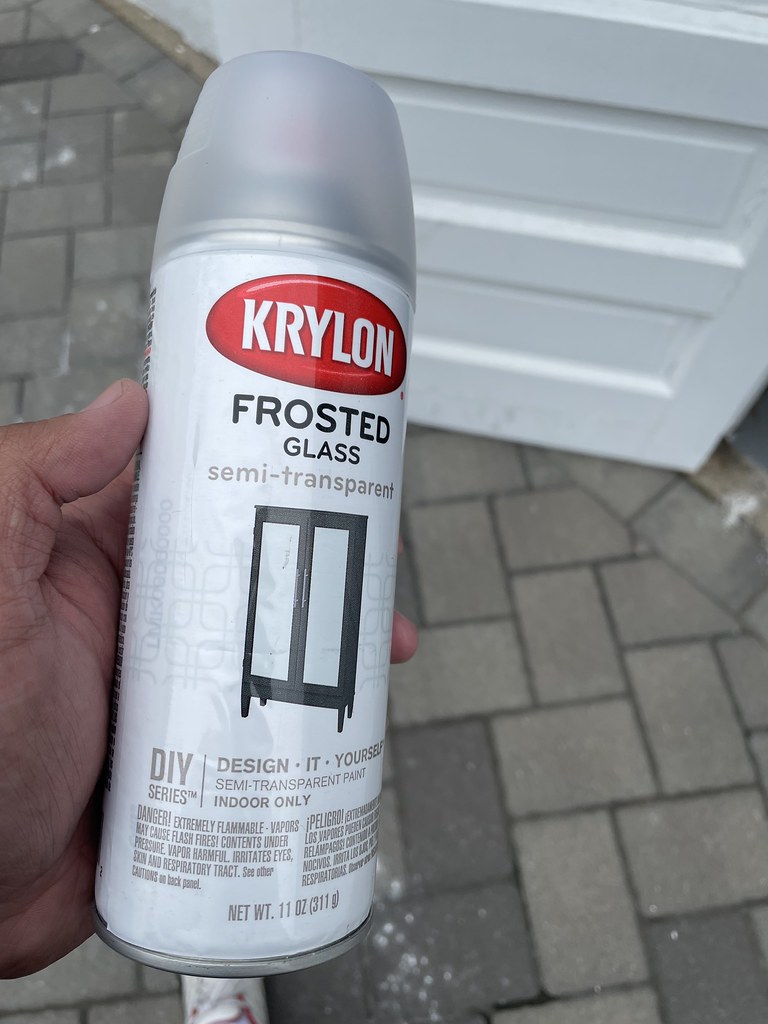
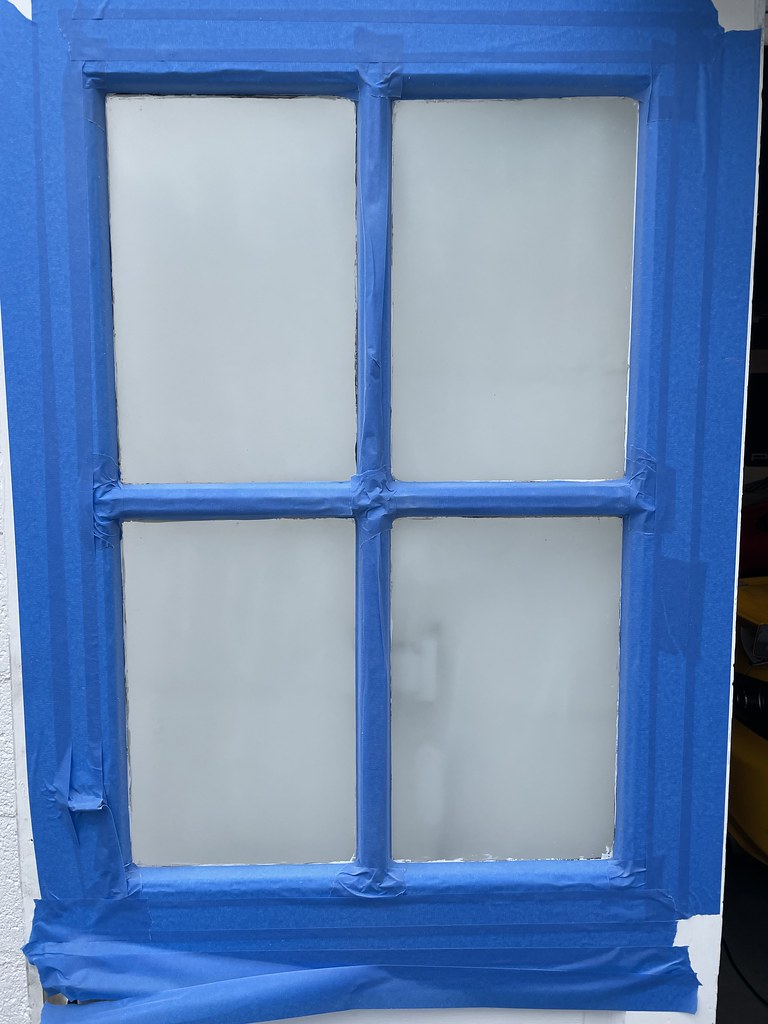
I didn't like that my garage side door had just clear glass. I'm not worried about my neighbors but that doesn't mean I don't like a bit of privacy especially if I'm in the garage at night. I may eventually completely replace this door but for now I just wanted to add a bit of extra privacy without blocking light so I frosted it using Krylon frosted glass paint spray. I tried to keep the spray even but there were still a few thicker spots. It'll do for now.
Masking off the windows
Krylon frosted glass
After a few coats
Now I'm basically at an impasse. I need the vertical posts to be removed before we can do the floors and until I know when the floors are being done, I can't purchase my cabinets and shelves so I'm trying not to bring over too much stuff from the other garage yet since I'll have to clear all that stuff out when they get to doing that work.
DieHard Platinum H6 AGM battery
Onto some 911 updates, last week I got to battle test the electric AC on Scarlett in 90+ degree weather. It was fantastic. Not ice cold, but comfortable especially if you're wearing summer clothes already. The problem I noticed, which the shop also pointed out when they gave me the car back, is that if you're stuck in traffic or idling for long periods of time, my Odyssey PC925 simply can't hang. The high output alternator in the car can easily provide power to the AC and fans but below 2000rpm, it's not outputting sufficient voltage so the draw is almost exclusively from the battery. At only 28Ah, the PC925 can start the car and run basic electronics but not something as heavy of a load as an electric AC for long periods of time without the alternator taking over. The controller for the AC is designed to prevent your battery for completely draining so once it gets below a "safe" voltage, it turns the AC off. That's great from the perspective of keeping the car running, but horrible from the cabin heat perspective especially stuck in traffic in the summer when you need the AC the most.
This DieHard Platinum AGM battery puts out a respectable 70Ah so I'll be less worried about hitting any traffic next time. It's unfortunate because the PC925 in the Rennline billet mount looks so good. Not sure if I'm going to keep it for the cooler months or simply sell it yet. I suppose adding weight to the front of a rear engine car isn't necessarily a bad thing anyway.