For as long as I own ICE cars, the exhaust will always be something I pay particular attention to. For the Mini I wanted something that would suit an OEM+ build and thankfully one of the best exhausts for the Mini is the factory John Cooper Works (JCW) Pro exhaust. It's sold as part of the JCW Tuning Kit that includes a tune to add around 20HP and a lot more crack and pops. Seeing as how I've already added power via the JB4, this is a bit pointless so I'm not taking the car to the dealership to get the ECU reflashed permanently. This is not a one person job that I wanted to tackle in my garage so I enlisted the help of SJF and Jenna.
JCW Pro Exhaust Installed - 2-25-2023
The stock exhaust is a pretty big unit that goes all the way from the downpipe to the tips as one piece. Removal was pretty straightforward minus the clamp that bolts the front of it to the flex pipe that had a bit of rust requiring some heat-based persuasion. It eventually came loose without falling apart which was important since the kit didn't come with a new one.
Factory Exhaust
Factory exhaust removed
Factory exhaust removed
I don't think the new exhaust weighs any less than the stock one but I'm not a fan of overly quiet boring looking exhausts. Next up was the pretty straightforward effort of bolting on the new exhaust and lining up the Carbon Fiber tips.
JCW Pro Exhaust Bolted In
That mechanical process took roughly an hour. The next 3+ hours was spent on the wiring. A good chunk of the trunk trim had to be removed so the valve control module could be bolted into place. The wiring loom had one connector going to the valve control module, a wire with new grommet and connector that went to to the valve, one wire for ground and another wire that you had to snake through all the trim alongside the inside of the body to get to the fuse box in the front.
Valve control module installed
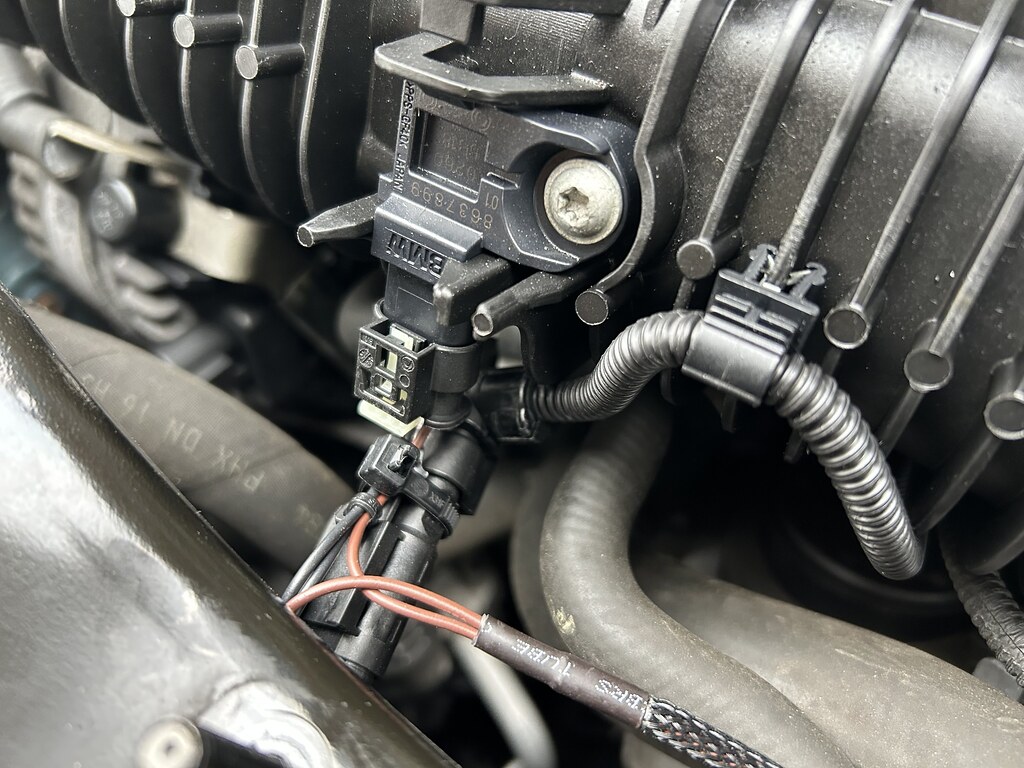
Exhaust Valve Connected
The fuse box is behind the glove box so you had to remove two screws holding the panel covering the bottom part of the glove box then lift the left corner of the fuse box so that the whole thing released from the mount. This was necessary since there were two wires that needed to be connected to the fuse box from the back of the panel. There's these blue plastic locking pins that hold the wires in place so to connect the new wires, you had to disconnect the sub-panel attached to the main fuse box and pull the blue locking pin out. The instruction say to connect the read cable to fuse plug F74 then put the provided fuse into that spot. It then said to connect the black cable to fuse plug F59. The problem with F59 is that on my car something was already plugged into it. Upon looking up the fuse diagram, it turns out that F59 is for "Camera-based driver assistance systems" which my car is equipped with. Thankfully, it turns out F57 is not used for anything so we wired up the black wire to F57 and put in the 3Amp fuse there instead.
Black wire in F57
Red wire in F74
We then affixed the provided JCW Tuning Kit badges.
JCW Tuning Kit plate for engine cover
JCW rear badge
The valve is activated via a bluetooth "loud button" that comes with a foam mount you're supposed to put in one of the cup holders. I didn't like this since I use my cup holders quite a bit so I got a 3D printed mount from AdditiveAuto on Etsy that places the button just under the start/stop button instead making for a super clean install.
Loud button mounted
Double press that button and "track mode" gets engaged opening up the valve to effectively make the exhaust a straight pipe bypassing the muffler. In sport mode with the valves opened up there's some very nice overruns and crack and pops on throttle lift off at higher RPMs. It's can get pretty obnoxious but it sounds really good. There's absolutely no drone on the highway and it's very mellow when just cruising around but if you are aggressive with the throttle, it makes some pretty glorious and aggressive sounds. Certainly one of the best 4-banger sounds out there.
It's been a pretty decent winter where I've been able to take Scarlett out a few times when she'd normally be tucked away. That said, we're almost at March and it's time to get some fresh oil in her before the official driving season starts again.
Oil Change
Still looking decently clean under there
Fresh Oil - 2-24-2023
Ugh, looks like I only put 1500 miles on her last year. That's really sad. I'll try to take her out more this year.
Usually a tune goes somewhere in the middle of my build list but given how easy it is to put a tune on a Mini Cooper S and immediately get gains even in stock form, I didn't see the need to wait for other mods to be installed. The 2019 Mini Cooper S runs a BMW B48 engine which is shared with a number of BMWs such as the 2 and 3 series (maybe even some of the X series?)...except it's detuned from the factory. Burger Motorsports JB4 Tune is a nice solution as it's a piggy back that leaves no permanent changes to your ECU. It's also very likely that my ECU, being a 2019+ is updated and locked from the factory, meaning I'd have to ship it out in order to get it reflashed if I went with a reflash based solution instead. I'm going for an OEM+ build this time around so I'm trying to make minimal changes or at the very least, make changes that are super easy to reverse, so the JB4 was the right match for my needs.
JB4 for B36/B46/B48 Kit with Optional JB4 Wireless Kit
I ordered the kit along with the optional JB4 Wireless kit that allows you to connect to it via Bluetooth using the JB4 Mobile app so you can see various engine parameters, update firmware and select engine modes. The wireless module isn't pre-installed even if you buy it directly from Burger Motorsports so the first task was to open the very nice aluminum case all the electronics is packed in and connect the wireless module. It's pretty straight forward, just remove the 4 screws hold it in place using a 3mm hex wrench, connect the D-pin connector and screw it down with the provided screws then reseal the case.
JB24 Wireless Module Installed
Next up was to remove the air intake duct so you can remove the connector for the MAP and TMAP sensors, connecting it to provided wire loom instead and then plugging the loom back into the sensors. To remove the connectors, just slide the white clip down to unlock it then I just used a small flat blade screw driver to just push the tab away from the sensor and the plug just slides right out. If you're fighting it, then you're probably pushing the tab towards the sensor than away from it (lesson learned lol). I then used some zip ties to firmly secure everything together so nothing was just dangling around.
MAP sensor piggy-backed
TMAP sensor piggy-backed and loom zip-tied to factory wires for an OEM look
Next you just had to remove the battery tray cover so you can place the JB4 unit in the space between the battery and under the windshield wiper motor. I was going to zip tie it in place but it's so snug in there, it's not going anywhere even if you wanted it to.
JB4 housing shoved under the wiper motor
For the ODB2 connector (so it can read the CAN bus and use that to get all kinds of useful data), there was a convenient rubber grommet in the firewall you can just take to feed the wire from the OBD2 cable to the engine bay. The instructions didn't say to put the grommet back after you go the wire through but it didn't seem to make sense to just leave the whole there so I cut a slot in the grommet and reinstalled it for a cleaner install.
Grommet to firewall removed
OBD2 cable fed from under the dash and grommet slit and reinstalled
OBD2 connector connected and excess wire zip-tied out of the way
At this stage, the JB4 should just work so I turned the ignition on to power the unit up, connected to it using the JB4 Mobile App (which I still find strange that you had to pay for separately), had it downloaded the latest stable firmware for the Mini and uploaded it. The process took a short 3 minutes.
Updating the firmware
Tune map selection
By default, it is set to Map 1 which is ideal for a stock car. It's got a small bump in boost pressure (+4 PSI to be exact). This should give me about an extra 40hp or so in sport mode on pump 93.
Slot cut to route cables through
I used a Dremel to cut a little slot in the factory plastics under where the rubber hood trim gasket goes, routed the rest of the cable by the intake box and put all the plastics back on. I think the install is nice and clean and very OEM. To an untrained eye you probably couldn't even tell the car is now just "almost stock".
Panels back on the car, looking OEM - 2-20-2023
Clean install
Clean install
The car is definitely peppier in sport mode and you can even hear some crackles as you downshift via the paddle shifters through the stock exhaust. It's not obnoxious but something you do notice a bit especially when getting onto highway off ramps. Drivability is still very good especially if you dial it back to "green" or "mid" mode. The bonus of having the JB4 mobile app is I can display a number of gauges pulling data from the OBD2 connector straight to my phone for both viewing and data logging.
JB4 Mobile App
Now I just need my intake and exhaust to arrive so we can switch to Mode 2 and and have a bit more fun. Unfortunately, the auto transmission can really only hold about an additional 60hp so that will keep me honest and not allow to me to get nuts with power adders. It's interesting, though not surprising that these engines dyno higher than their advertised power figures. That seems to be a very BMW thing. While this won't get me to the same power levels of my IS38 powered MK7 GTI, it'll at least start getting close.
Interesting video of a 2-Door Cooper S (same engine) on mode 1 JB4 tune
My wife and I have been talking about Minis since last year. Her Jeep is definitely her style but I've wanted her to also know what it feels like to drive a nice handling car. Problem is she doesn't drive stick and, well, all my cars are manual. It couldn't be just a plain old boring car. We both like cute little cars with character so a couple of weeks ago I stumbled upon an Electric Blue 2019 Mini Cooper S in Iconic trim with the automatic transmission at Jack Daniel's Porsche. Spoke with Marc, a fellow NEDC member, who works in sales there and got the deal done.
Electric Blue 2019 Mini Cooper S Iconic - Arturito - 2/8/2023
It was very well optioned and being offered for sale at a reasonable (i.e. not inflated) price and with just 65,476 miles, fit our needs precisely. This will likely replace my GTi as our "daily" since the number of cars we have is getting out of hand and more importantly, there's a lot of overlap between the two.
Not a Porsche
There was a minor crack at the top of the windshield so part of the deal was this was to be replaced and it was.
New windshield
The driver side fog light also wasn't operating. This turned out to be a corroded connector and they replaced that too.
Driver side foglight working again
They also cleaned the car up nicely and got rid of the scuffs on the wheels. That was nice of them but we all know these wheels are getting replaced anyway. They took care of the registration for me which I only cared about getting done right away so I could order the custom plates for it.
Sweet interior
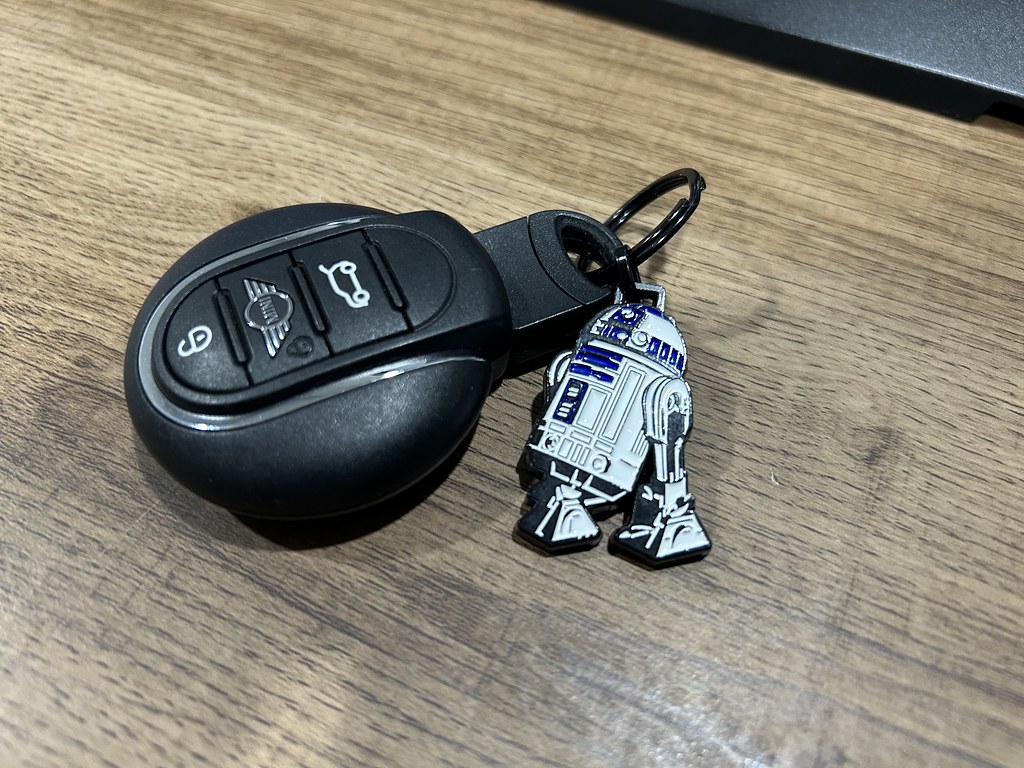
It's a fun car to drive. Certainly nowhere near as fast as my MK7 GTi and I'm semi-sad it's an automatic even if it has the flappy paddles but if this makes my car enjoy driving more then it's a big in in my book. My wife chose the name Arturito which comes from how Spanish people call R2-D2 (we're clearly big Star Wars fans as the Jeep is is also named after a droid, C1-10P, aka Chopper).