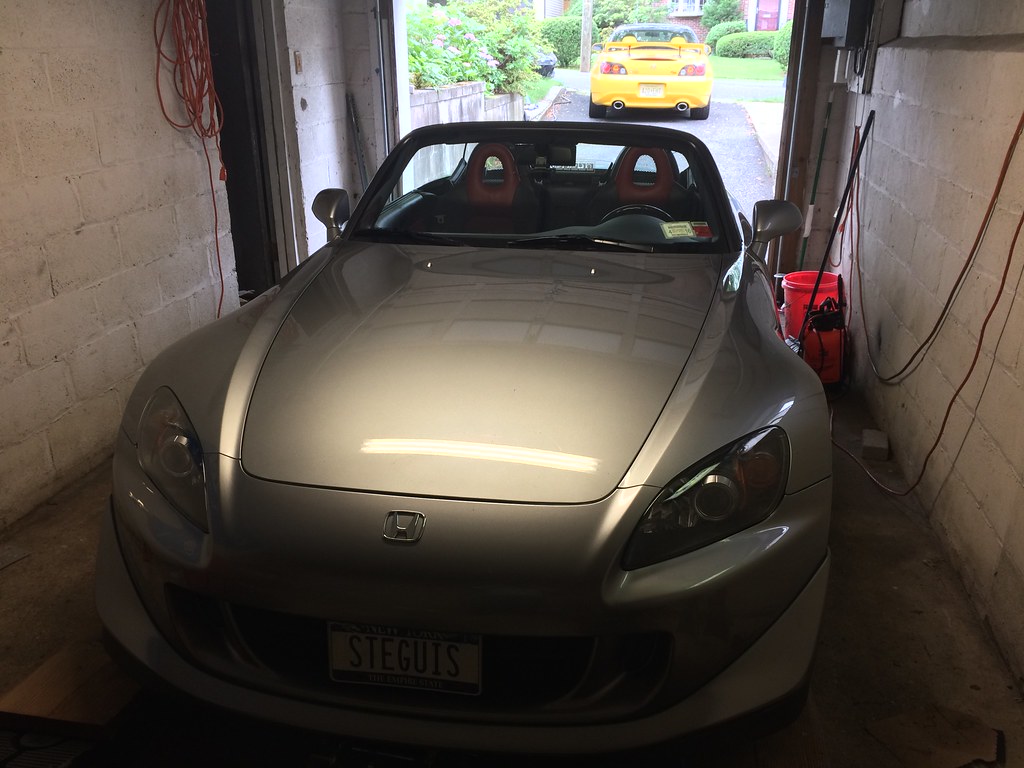
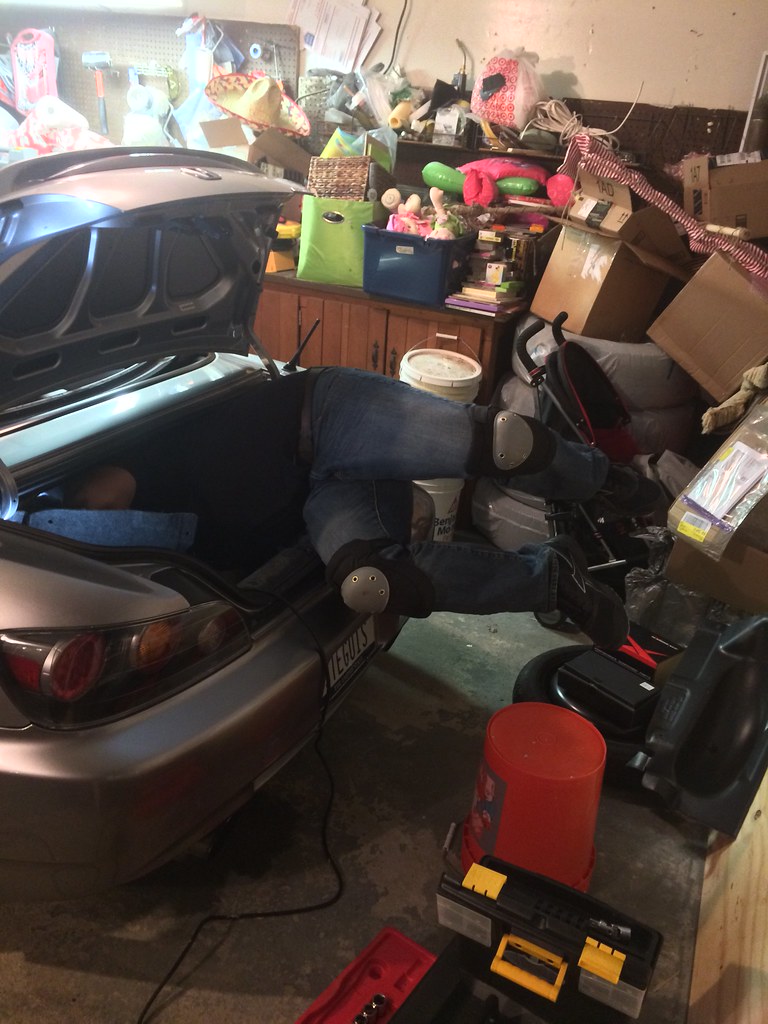
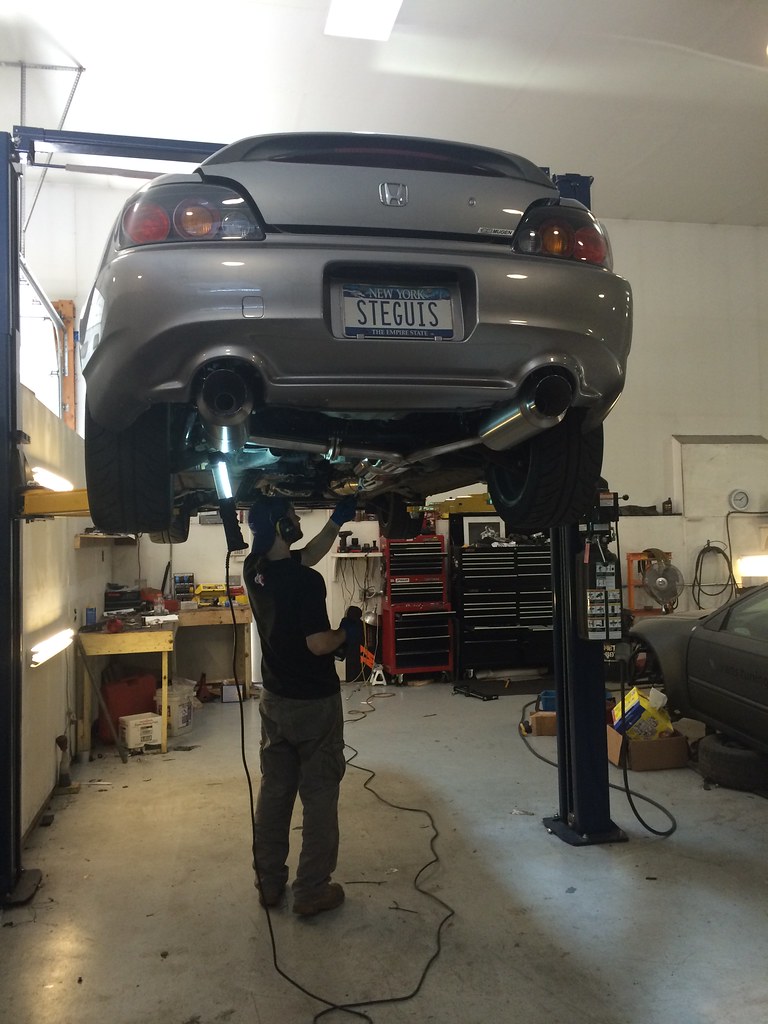
Between the miles driven since the shock/spring install last week and stuffing the car with heavy items while parked, I felt that the springs have had a chance to settle a bit and I could continue to finish off installing the remaining necessary suspension pieces this weekend. This time Hez was kind enough to help me out in his garage (you can see his sweet yellow CR in the background of the first pic). The goals for this weekend were:
Front and rear sway bars
Hardrace offset camber joint
Ride height adjustment
Ready for part 2 of the suspension install - 6/27/2015
The ride height after last week's install was close to or slightly higher than stock. While most STR guys run their car low (12.75" or so from the center of the hub to the top of the fender), I'm opting to run Lupa a bit higher. My target ride height is 13.5" which is exactly the ride height of the car lowered on the Eibach ProKit (about a 1" drop from stock). Having seen the wonders of higher ride height on Bumblestook, I feel that a very mild drop is most appropriate because it provides a few specific advantages:
As a street driven car it makes clearing ramps and drive ways better.
It offers more suspension travel.
It maintains the geometry the Honda engineers carefully determined to be optimal for the S2000 chassis.
I may not even have to push the fender tab up to clear the 255s up front.
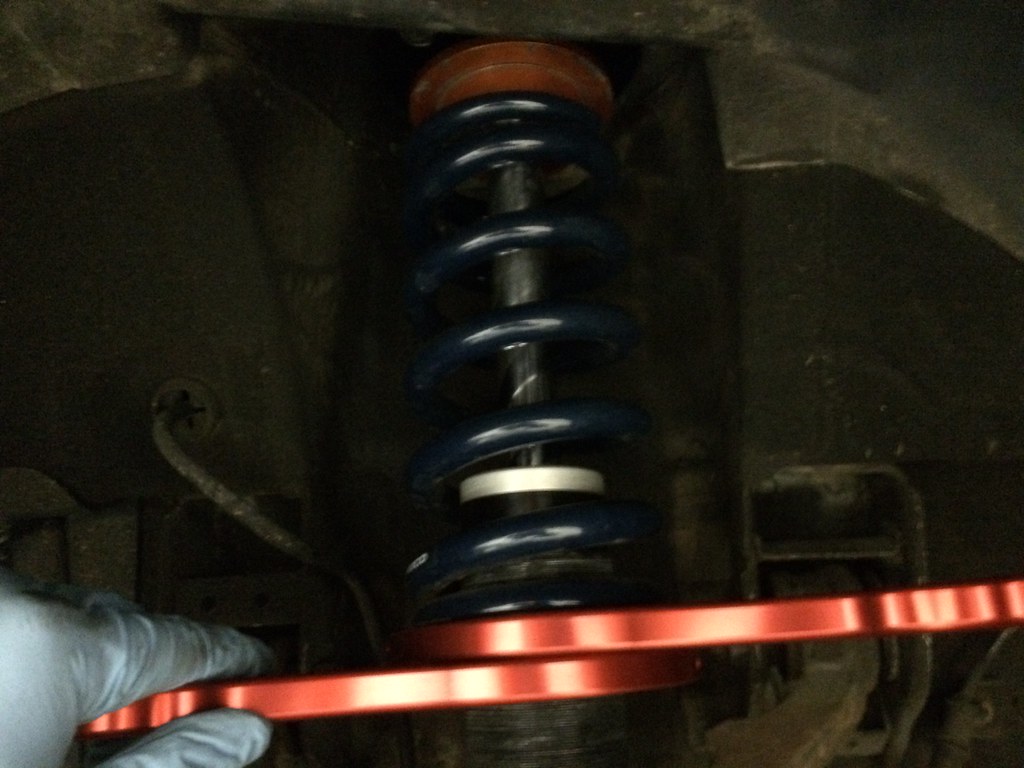
Adjusting ride height - 6/27/2015
While Hez was working on disconnecting the stock sway bars, I went ahead and started adjusting the ride height. I'm not getting overly precise here. The ride height is approximately 13.5" which is good enough (and equal left to right) since I'm going to eventually do corner balancing anyway. For now I just wanted the ride height to be closer to what I will eventually run and not the 14.5" or so it was sitting at before we started. I'm running 7" springs so unfortunately dropping it that much now leaves some slop up top between the spring and the top hat at full droop which I could remedy by using helper springs but for now I'm opting to leave it out. Mostly it's to save money but also because I'm likely going to have to pull the shocks again in the future anyway so I'll deal with it then. During normal driving conditions and racing with the sway bars in place I'll never reach full droop so I don't foresee any issues. I do have to be careful that the springs seat properly when I lower the car from being on jacks now though but it's really not that big of a deal.
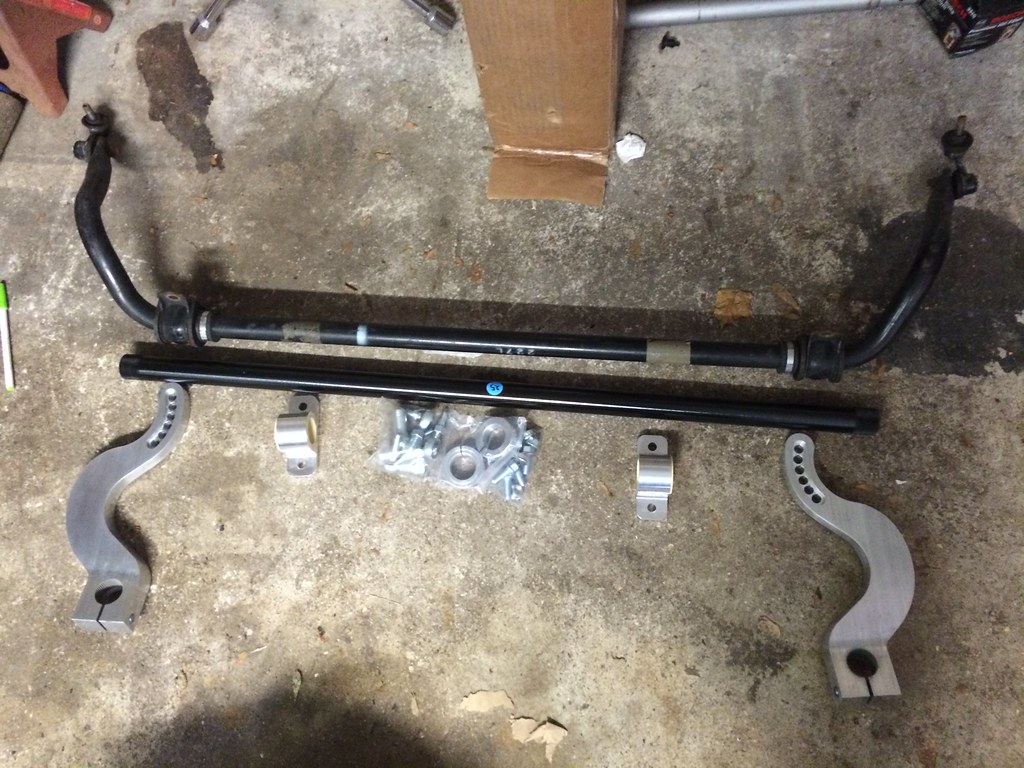
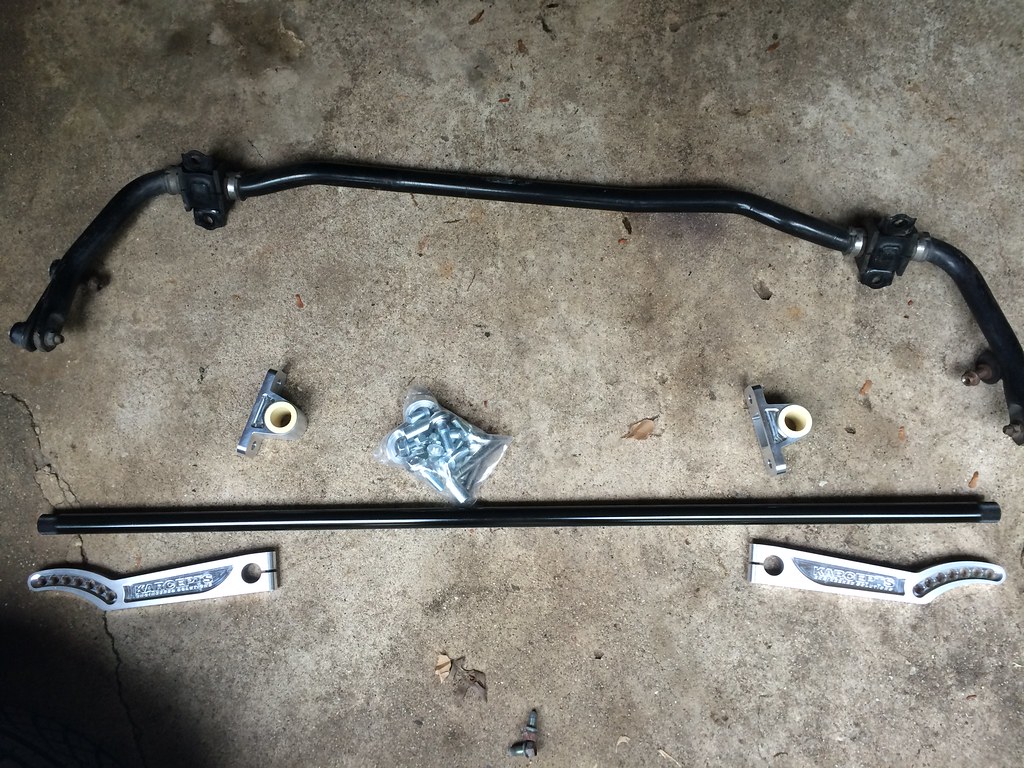
CR front sway bar (top) / Karcepts adjustable front sway bar (bottom) 6/27/2015
While I run the Gendron (Small Fortune Racing) monster front sway bar on Bumblestook, it's a bit dated in design now and the bar to have is the Karcepts adjustable front sway bar. It's an incredible piece of engineering, designed in such a way that you can adjust the stiffness of the bar without having to adjust the length of the endlink and with the car still on the ground. This is a huge advantage for autocross as sway bar adjustments can now be done in grid in a matter of a minute or two with only a single wrench! I opted for the 0.25" wall hollow bar with 6 levels of adjustment and running it at 5/6 stiffness to start off with which is about on par with a full stiff Gendron setup.
Karcepts Front sway bar installed - 6/27/2015
Karcepts Front sway bar installed - 6/27/2015
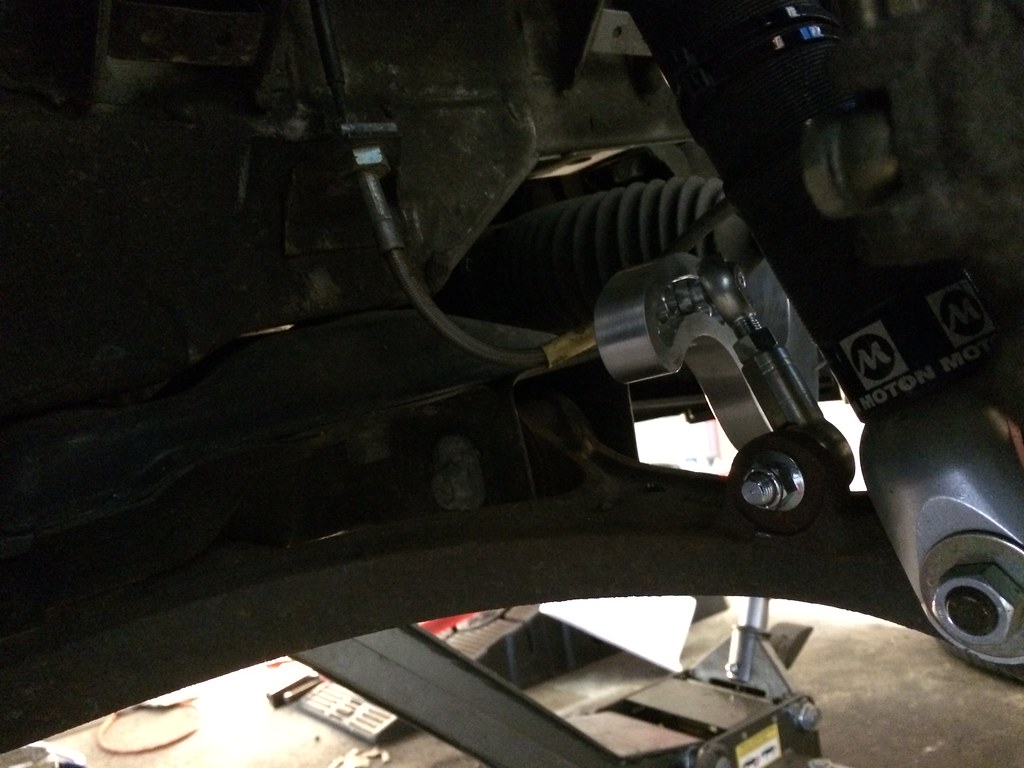
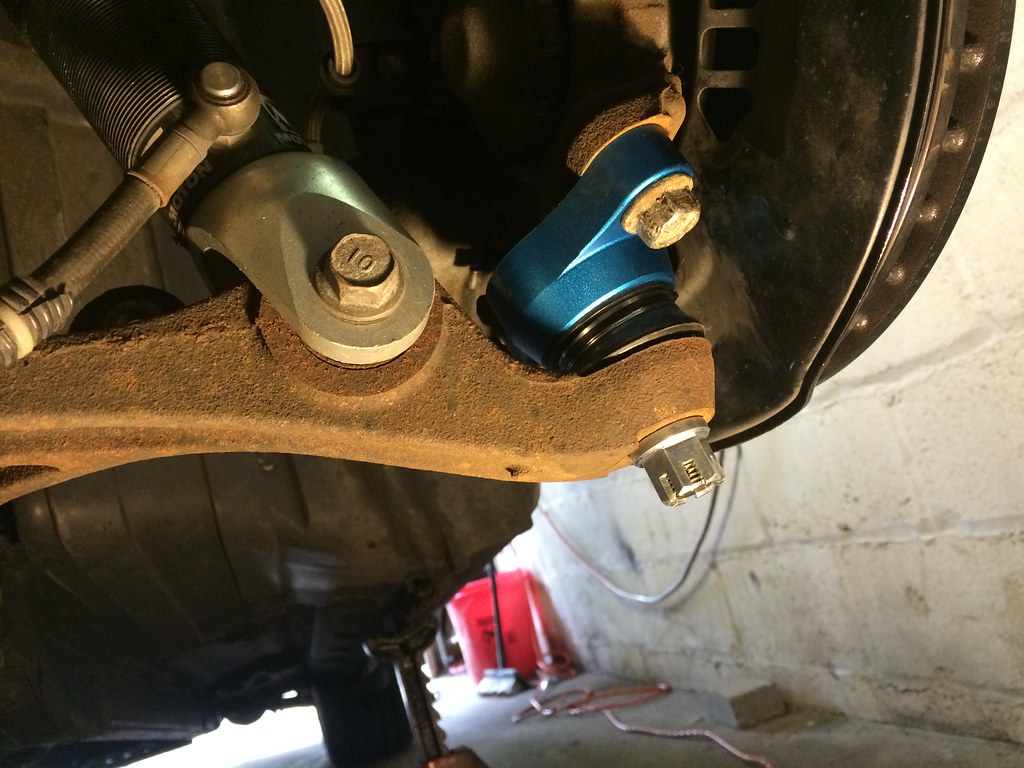
To get more front camber, I replaced the stock lower control arm ball joint with a Hardrace offset ball joint which should easily make -3.5 or more degrees of front camber possible (yea yea, #winnie protest).
Hardrace offset ball joint - 6/27/2015 (yes, I did remember to put the cotter pin back in - not shown)
With the square 255 setup and high spring rates most STR S2000s run there's open debate about the need for a rear bar. Some swear by no rear bar, some swear that you have to have one at least installed (just in case). I prefer to have the option to apply one as needed (such as when running on concrete) so I opted for the Karcepts adjustable rear bar (0.095" sidewall hollow) to match up nicely with the front bar. It's much thinner than stock with the same amazingly quick adjustment capabilities of the front bar. I'm running this at full soft (1/7) which adds approximately 60 or so lbs of spring rate in the rear while cornering.
CR rear sway bar (top) / Karcepts adjustable rear sway bar (bottom) 6/27/2015
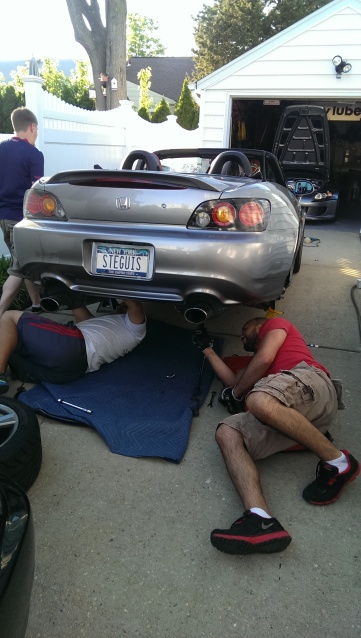
At first we thought we might have difficulty getting the stock rear sway bar off without removing the exhaust since I run a dual muffler Mugen setup but with a bit of "angling off the angles" (hehe), we were able to slide it right out from the side and pop in the snazzy new adjustable one. We then lowered the car back on its wheels to make sure the endlinks were set to the proper length (easily movable from one adjustment hole to another with no preload) and we were done for the day.
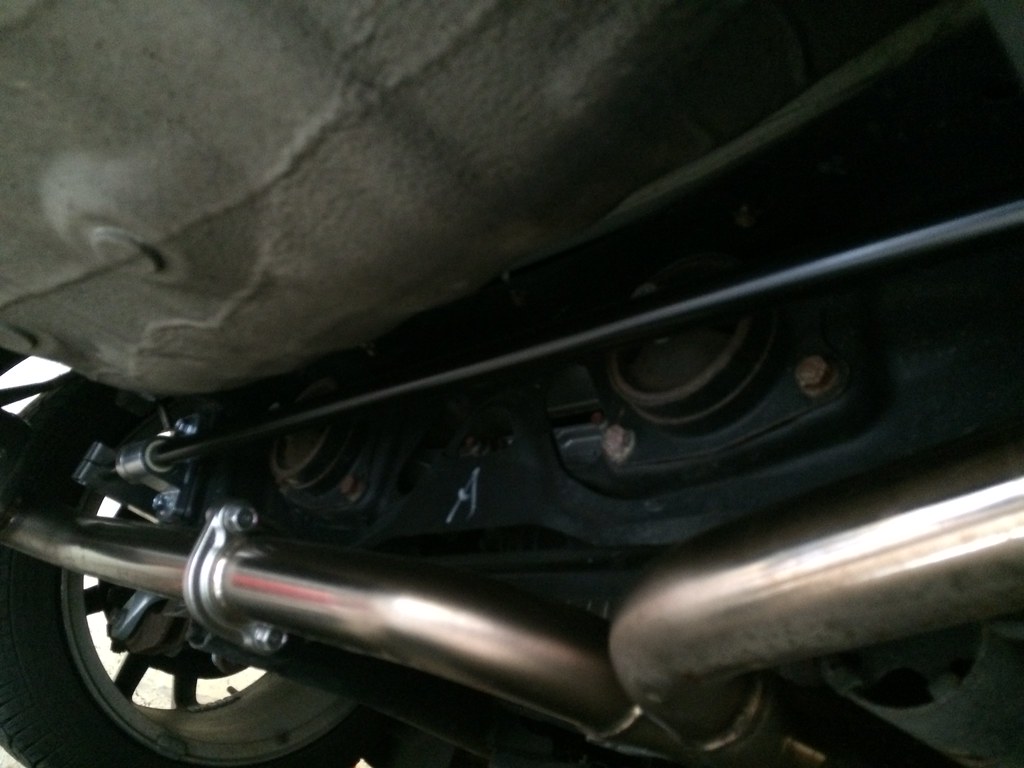
Karcepts rear sway bar installed - 6/27/2015
Karcepts rear sway bar installed - 6/27/2015
All that's left now from a suspension point of view is to get an alignment at SJF Performance and we'll be ready to go. I do still have a few major things to sort out before her maiden event but a significant portion of the STR prep work/conversion is now done. Again, big thanks to Hez for all the help today and another shout out to Brian Karwan of Karcepts for putting together a sweet STR power/suspension package for me.
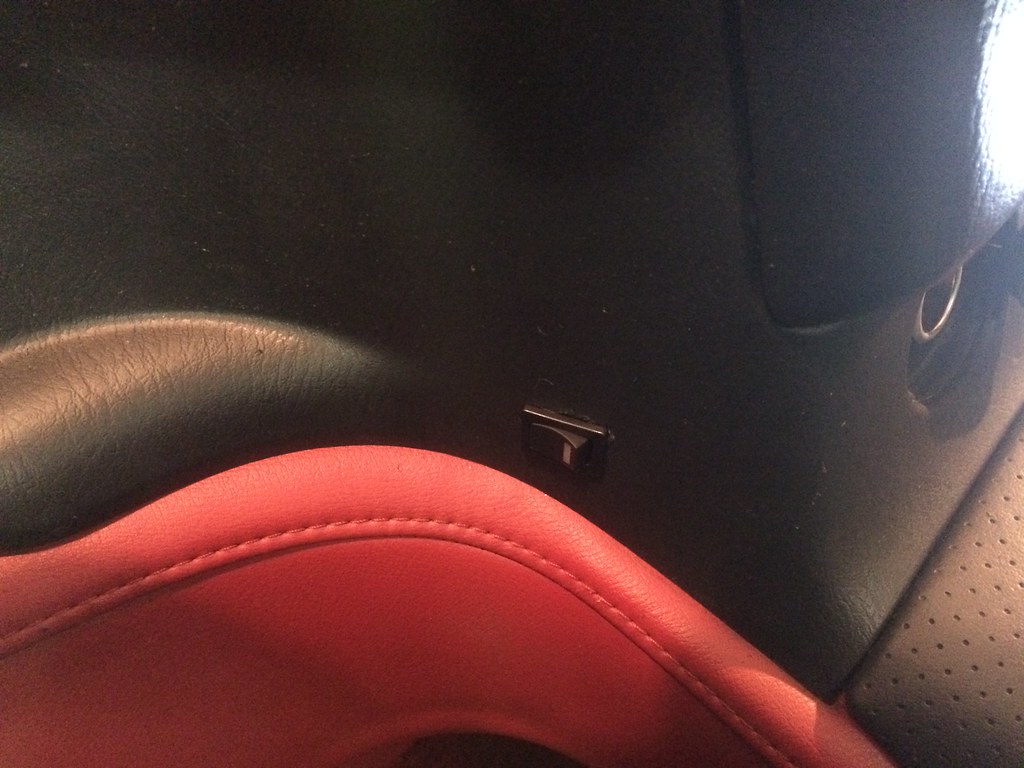
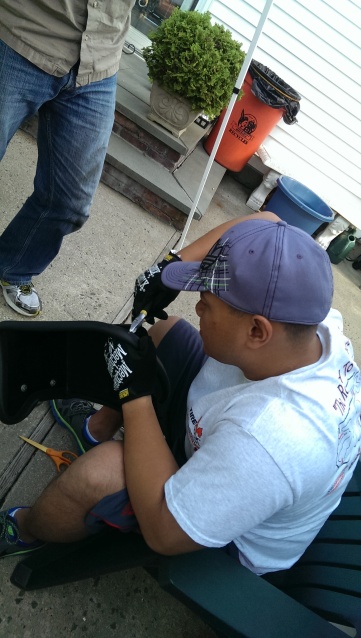
Several weeks ago I decided the best way to supplement my seat time with Bumblestook would be to have a streetable race car I could take to more local events and not have to trailer all the time. Having two S2000s, the natural choice was to prep Lupa for the SCCA Street Touring Roadster (STR) class. I ordered all the necessary parts and this past weekend, Rad was kind enough to let me stay over at his place and help me work on her in his garage. Since I arrived Friday night and we needed the engine to cool before working on any power adders, we spent the evening working on the electrical parts of the modifications. First up was the Modifry Seat Belt Lock (SBL). It's a really neat mod that allows you to engage the seat belt lock with the flip of a switch by applying a magnetic force on the seat belt spool. It's fairly easy to install with the hardest part being having to squeeze into the trunk to attach the magnet on a bolt you can't see and cutting out a small hole in the console for the switch.
Uncomfortably trying to locate the bolt to install the SBL 6/19/2015
The bolt is all the way in there - 6/19/2015
Switch for the SBL installed - 6/19/2015
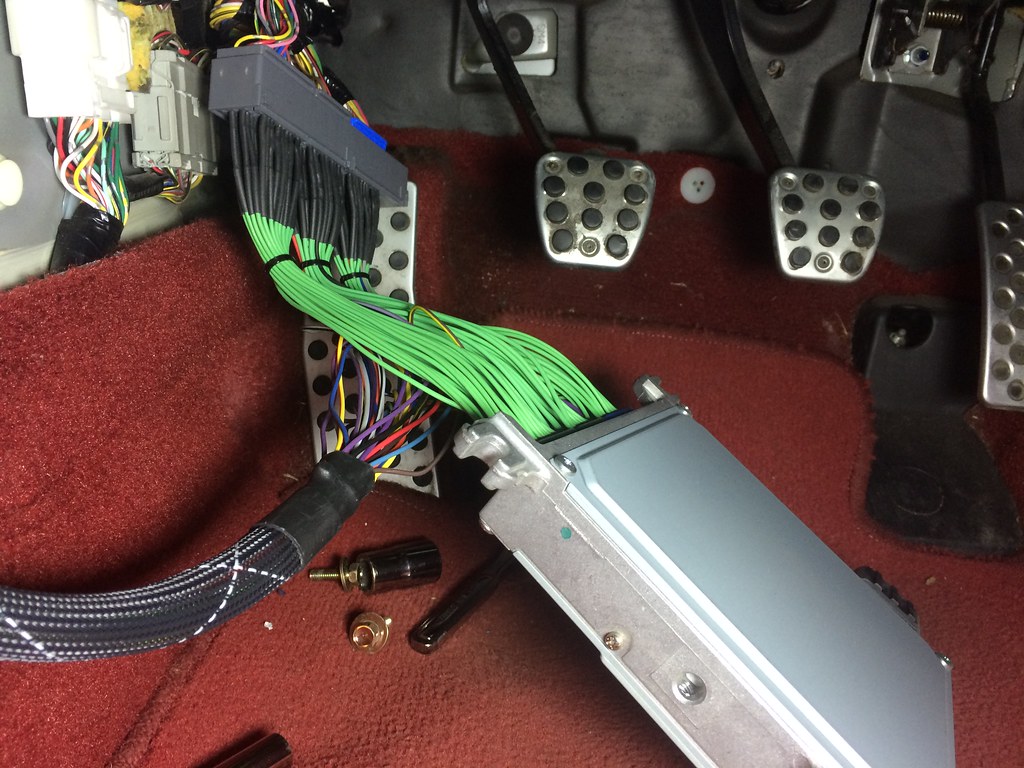
The second thing we wanted to tackle that evening was the installation of the GReddy Emanage Ultimate piggy back EMU with the Karcepts modified Boomslang harness which already had the Karcepts STR base tune preloaded on it. The rules of STR state that you can't replace the ECU so for a pre-06 S2000s, the only choice is a piggy back and Brian Karwan of Karcepts figured out how to make it all work a few years ago. With pretty much everyone in STR running the same or very similar mods, he developed a very good base tune that gets you most of the performance (with the requisite mods of course) without having to dyno tune (although a dyno tune is always preferred/recommended).
Stock ECU with Karcepts modified boomslang harness on - 6/19/2015
OEM ECU back in its location with the rest of the harness tucked away behind it - 6/19/2015
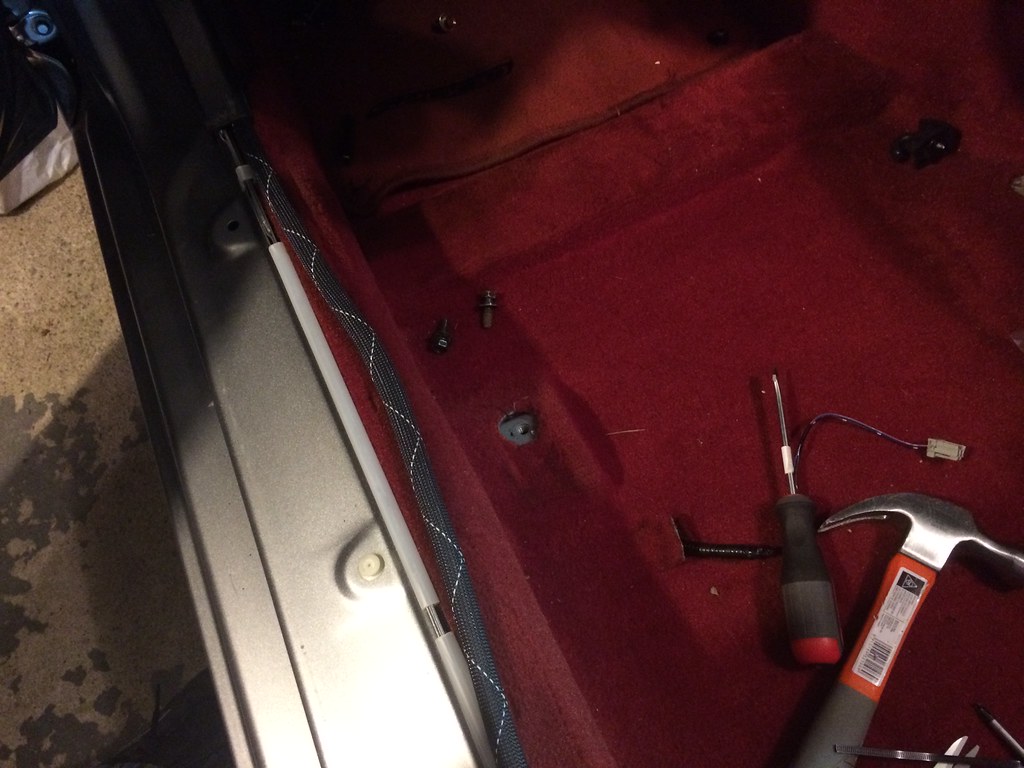
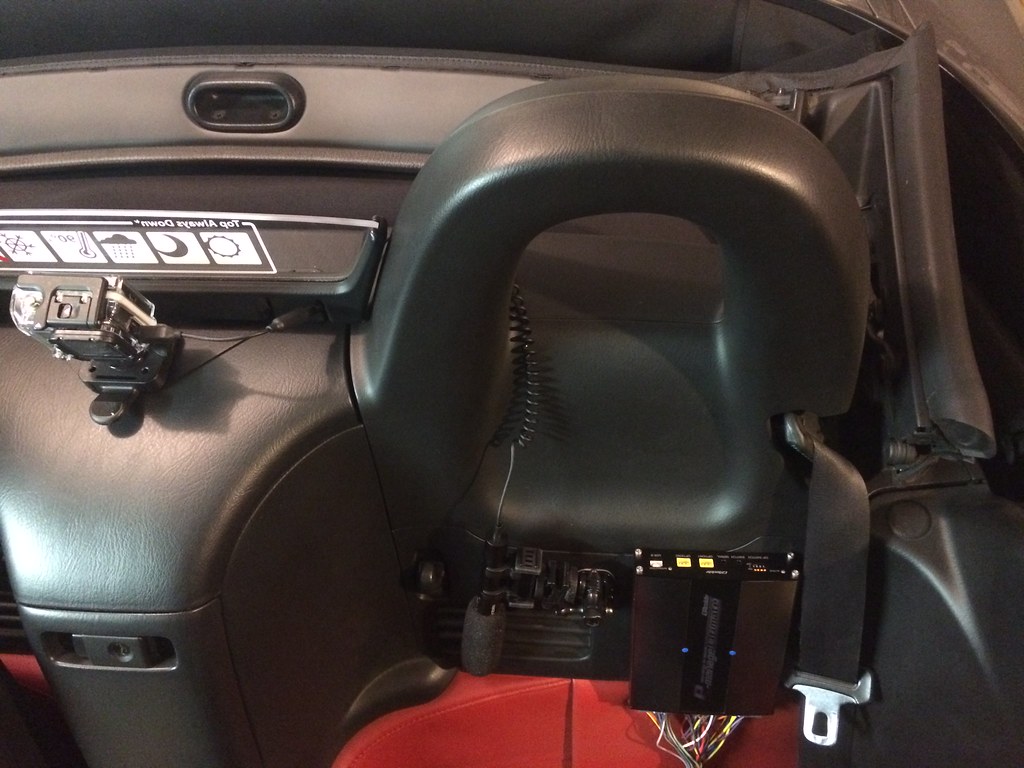
Rad had figured out when he installed the same EMU on his car that the best place to put it was on the panel behind the driver seat and drilling holes so it could be mounted using machine screws. We then ran the harness underneath the driver door sill. The new generation Boomslang harness seems to have much thicker insulation that what Rad got a few years ago so he had to dremel out some of the plastic "fins" to make it sit more flush (S2000 people like clean installs). Similarly, I had figured out that the best place to mount my Azden SMX-10 mic for my GoPro was on the same panel making for a perfect pairing behind the driver seat.
Rad cleaning up the doors sill for better clearance - 6/19/2015
Routing the wire for the EMU - 6/19/2015
GReddy EManage and Azden SMX-10 mic mounted - 6/19/2015
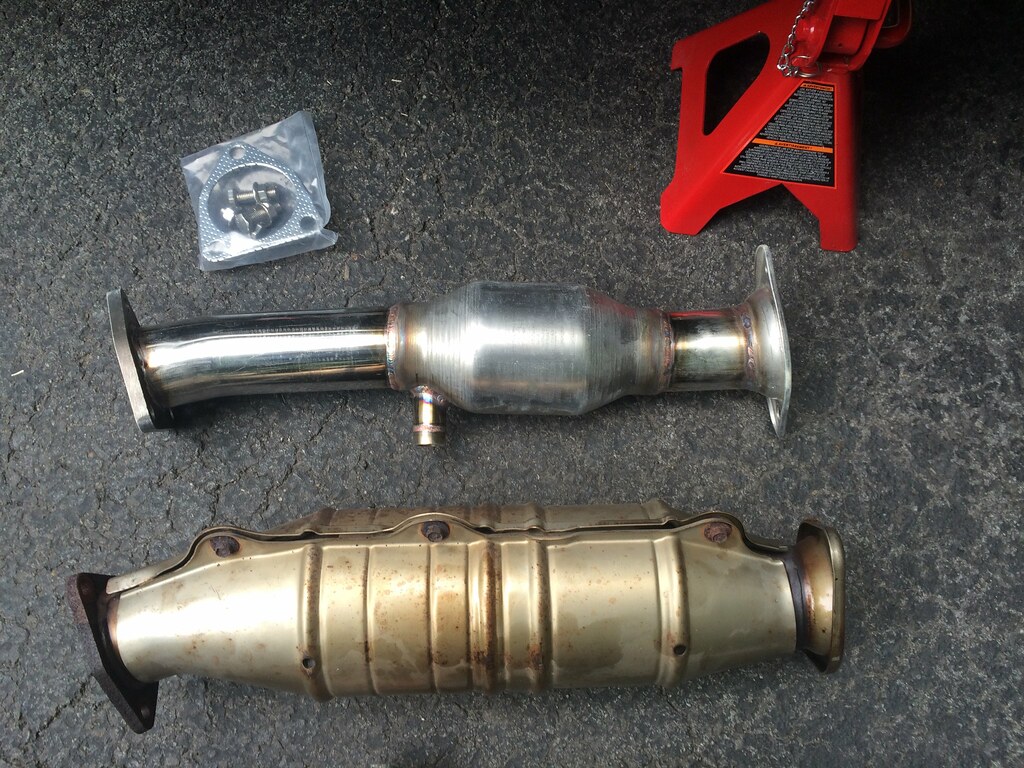
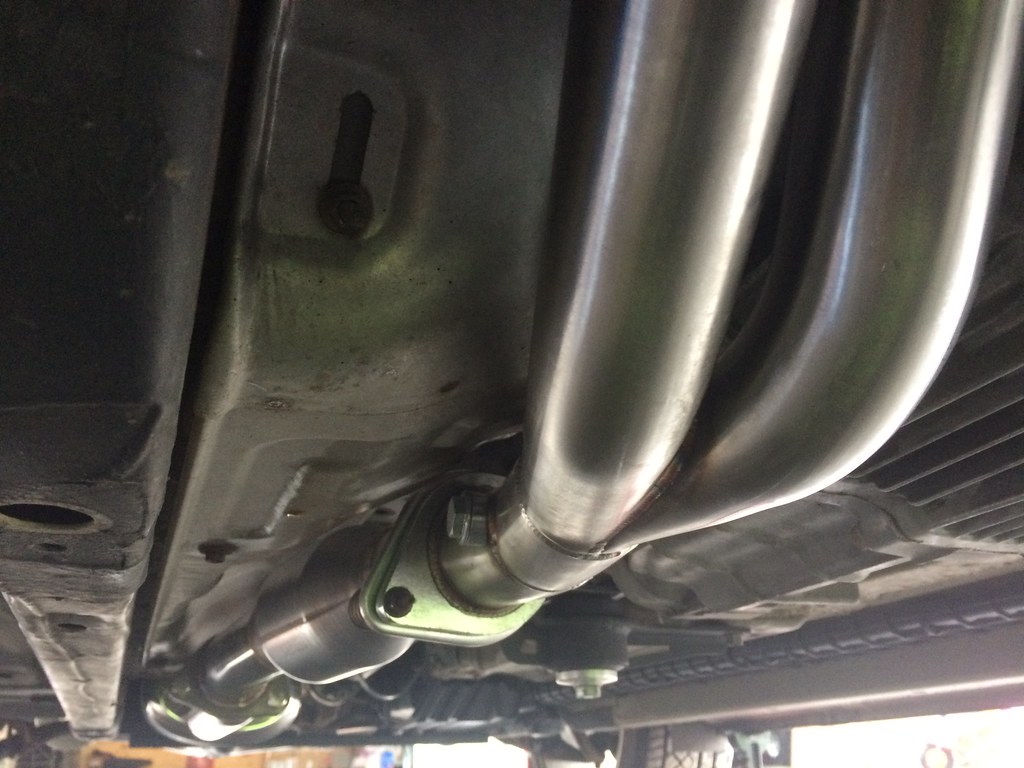
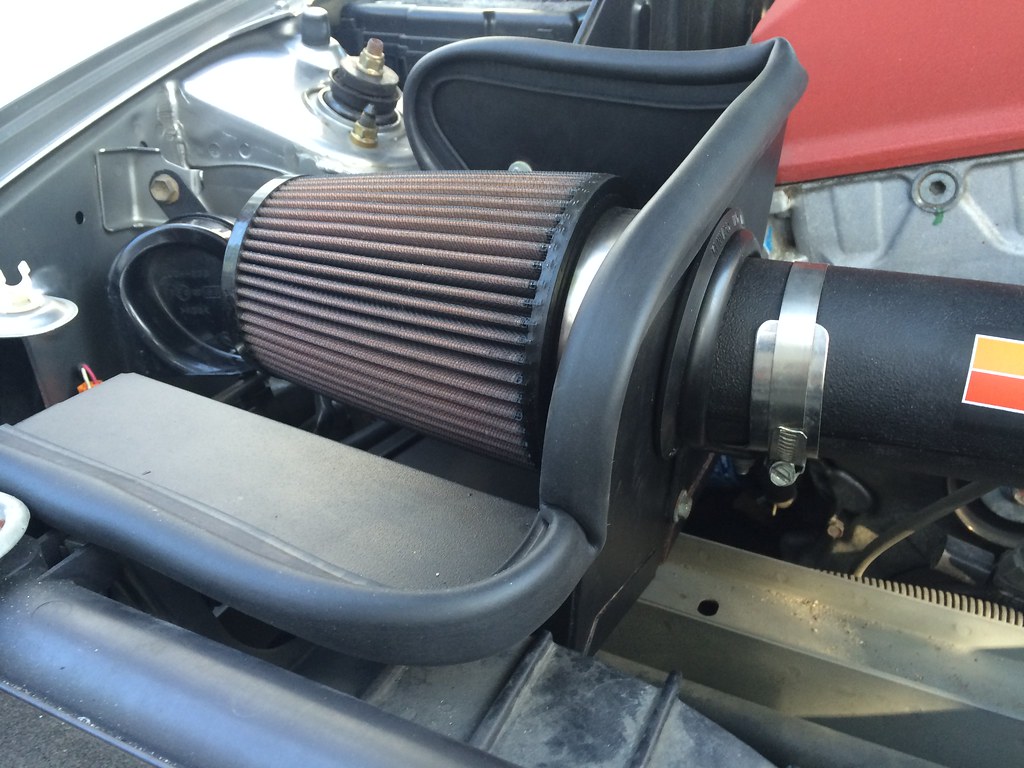
That's all we really felt like tackling that evening so it was off to bed for an early start for some real wrenching the next day. The STR power formula for STR S2000s is fairly straight forward, intake (most of us run the K&N FIPK), a header for power and weight reduction (lots of choices here but the PLM is the cheapest option that yields the best power), Berk high flow cat and an exhaust of your choice. I already had the Mugen titanium sport exhaust on Lupa which is 63.5mm so I went with the Berk 63.5mm high flow cat. Most STR guys run a 70mm cat and exhaust but really the power difference is negligible (at least in my book). I do understand I'm running with more weight though since I have a dual instead of a single exhaust but the Mugen is oh so sweet so you'll have to kill me first before I give that up.
Berk HF cat above, stock below - 6/20/2015
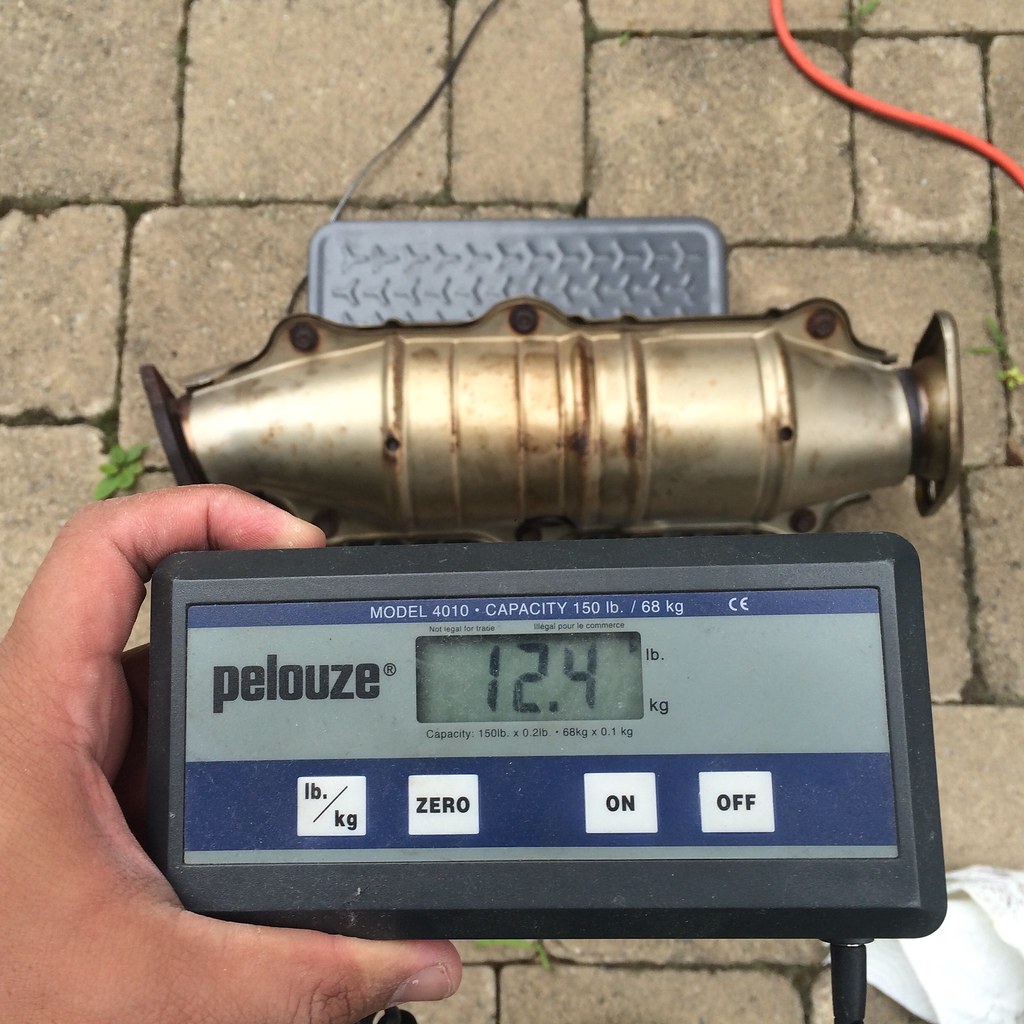
Stock cat - 12.4lbs - 6/20/2015
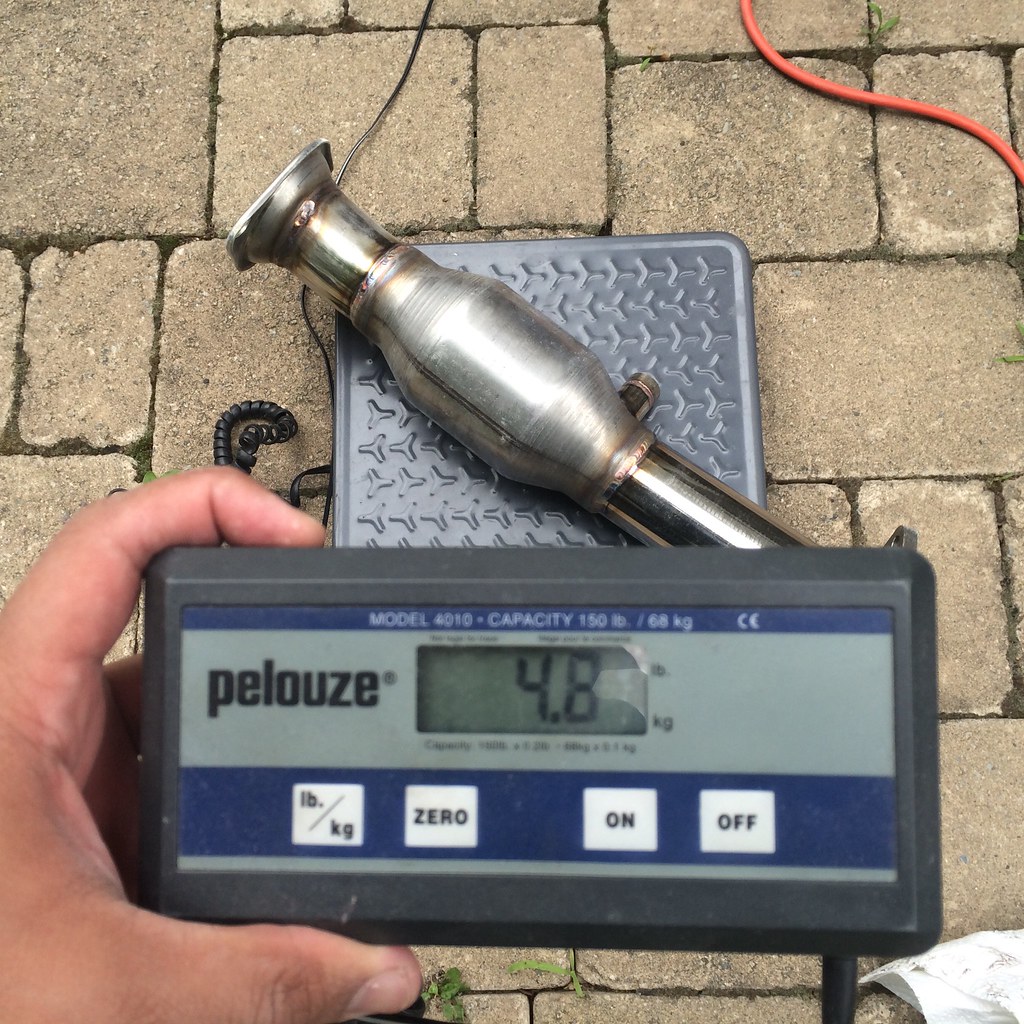
Berk 63.5mm HF Cat - 4.8lbs 7.6lbs of weight savings - 6/20/2015
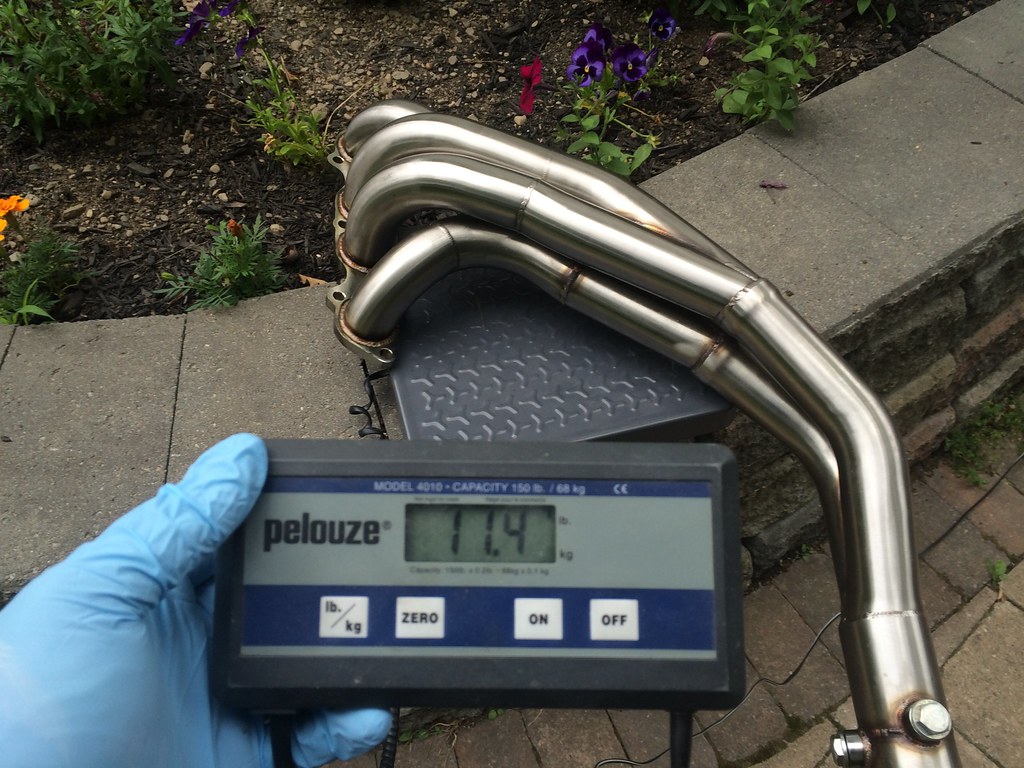
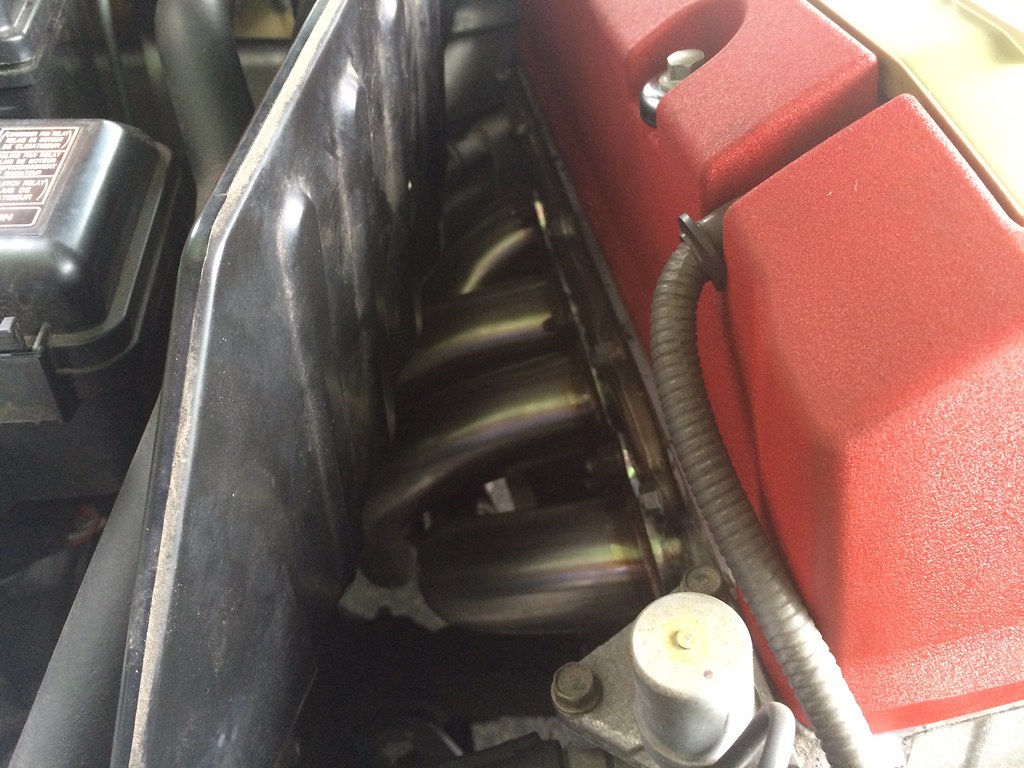
The cat is easy to swap out. Pull out secondary O2 sensor, the 2 bolts going to header, and 3 going to exhaust and done. The header is a bit more complicated but still very doable albeit annoying thanks to the location of certain bolts. Remove the black heatshield in the engine bay, remove the header heatshield, remove the nuts going to the block, remove the primary O2 sensor, remove the bolt holding it to the bracket supporting it to the body and with enough shifting around and turning the end of the header towards the driver side, pulls right out from underneath. The PLM header which I got, doesn't have a heatshield making it a bit easier to install. It also has 2 bungs on it for a wideband if you want it but since I don't have/need one, I just left that plugged. The black heatshield in the engine bay had to go back in though to be compliant with the STR rules. Of course, I used new OEM header gaskets to make sure I have a nice tight seal.
We then got her off jack stands to take her for a quick spin to make sure all the power mods and tune were working well and thankfully everything felt great. No leaks, power was very smooth and noticeably stronger, no check engine lights and I was also able to test out my new audio setup for my GoPro. STRRrrrrrrr!!!
First drive with the STR power mods - 6/20/2015
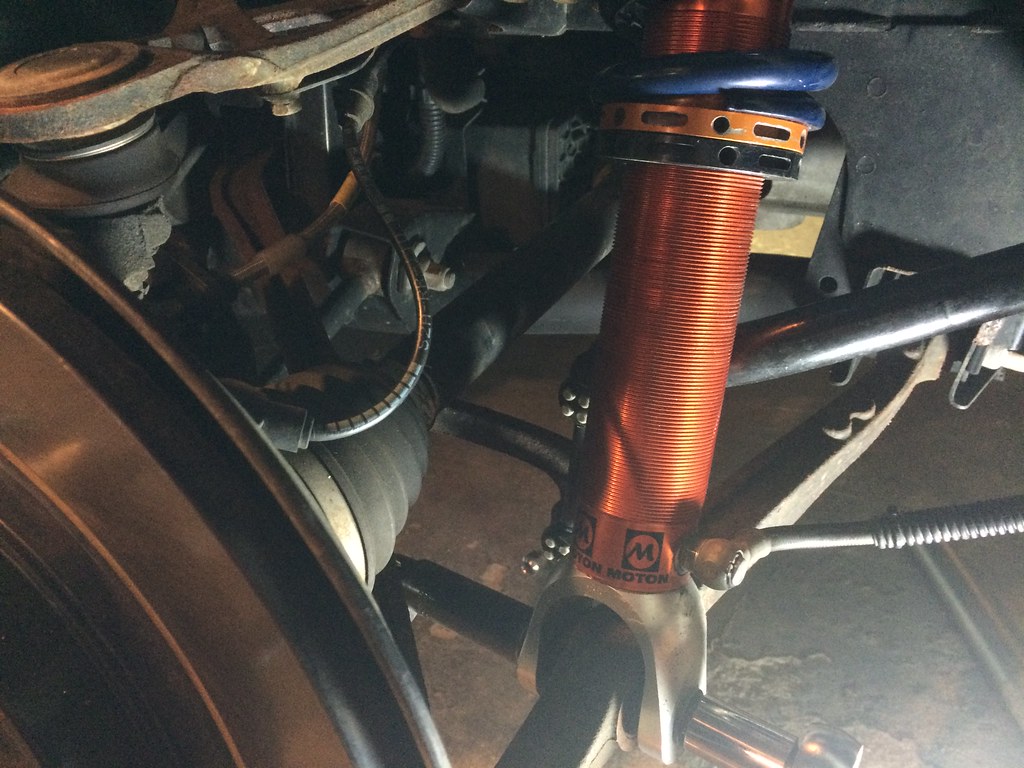
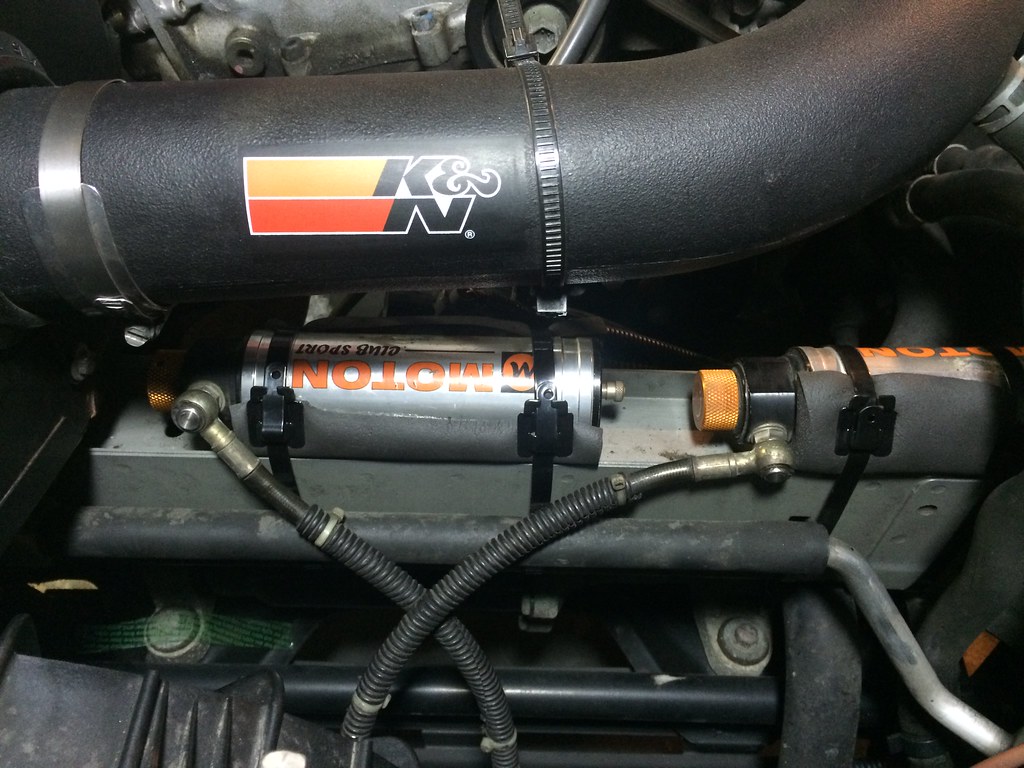
This was really all we had planned to get done this weekend but since we ended fairly early, we (ok more like "I"), said we should be able to get the shocks installed with plenty of time to spare (wrong haha). When the opportunity came to buy Bumblestook's old Moton Clubsports back, I jumped at the opportunity. I paired it with 850lb 2.5" ID x 7" Hypercoil springs up front (donated by Rad) and new 750lb 2.5" ID x 7" Hypercoil springs in the rear. All four shocks were topped off with the Karcepts spherical upper shock mounts for maximum performance.
Old school Moton Clubsports rear - 6/20/2015
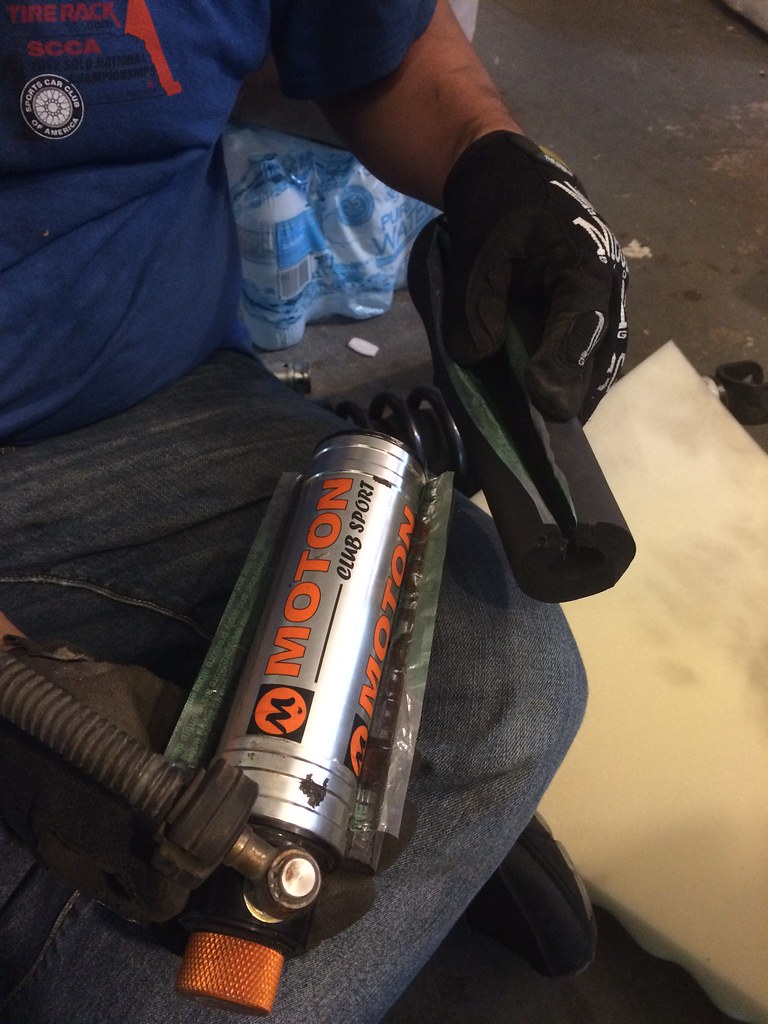
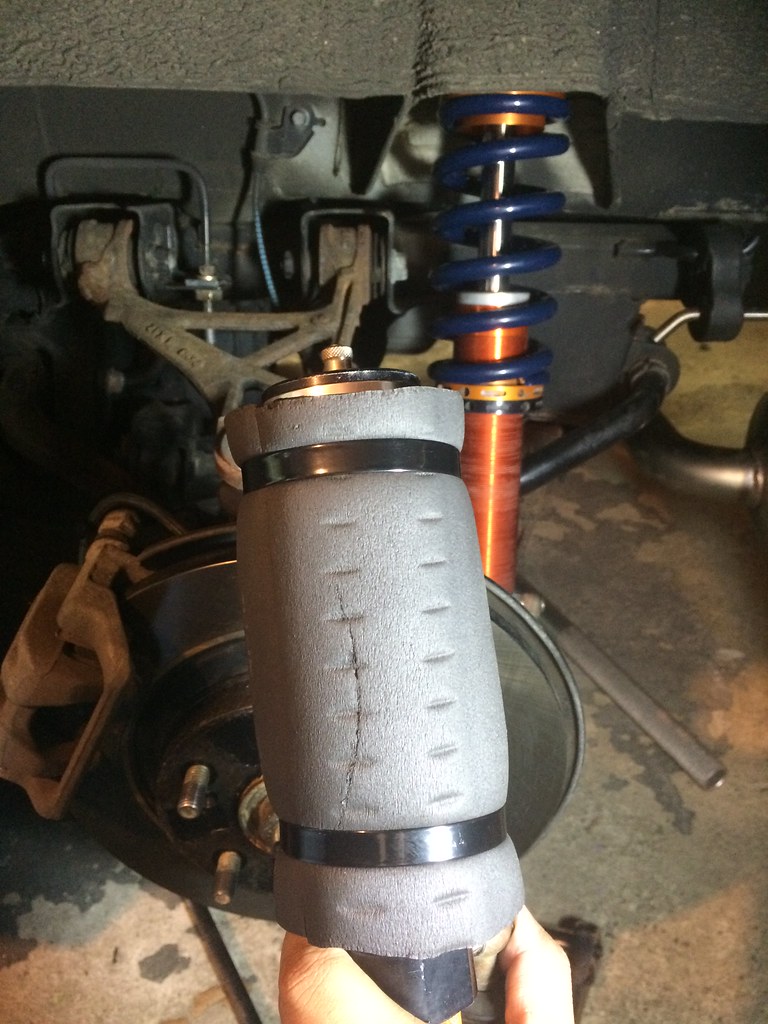
We tackled the rear first since that would be the most difficult with the fuel filler pipe in the way. It ended up being relatively easy pulling it off but we did spend time trying to figure out where to put the external reservoirs since I didn't want to drill a hole in the body. After some thinking, we settled on placing it behind the rear bumper support but in order to protect the canisters we needed to pad it somehow. Luckily Rad had some 1/2" foam pipe insulation that we cut to size and joined together to provide the ultimate protection.
1/2" pipe insulation is perfect - 6/20/2015
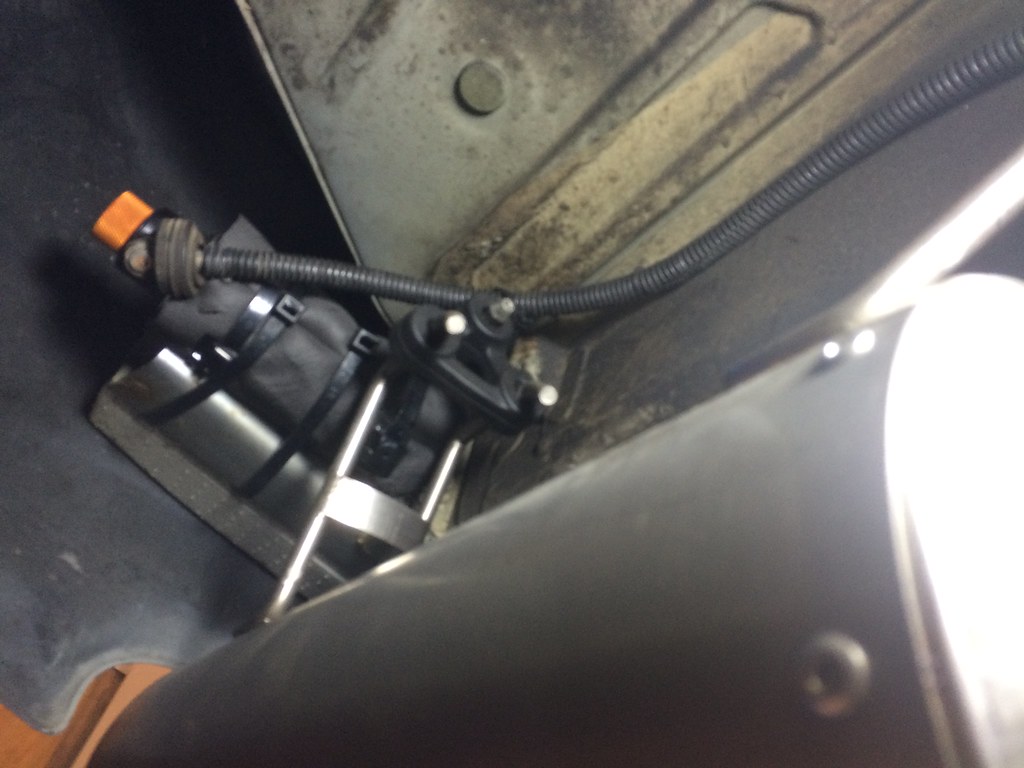
Shock reservoir padded and secured using Nylon coated stainless steel zip ties - 6/20/2015
Canisters mounted behind the rear bumper support - 6/20/2015
The front should've been easy but it turned out we didn't have the bolts for the bottom so we just had to reuse the OEM bolts but we didn't have a nut that fit (OEM shocks have a captive nut on the shock body itself). Luckily we were able to find some at Lowes. The correct size being M12-1.25 for future reference. The actual mechanics of removing the shocks were easy...2 bolts up top, 1 bolt at the bottom, disconnect the upper control arm, disconnect the brake line bracket and done.
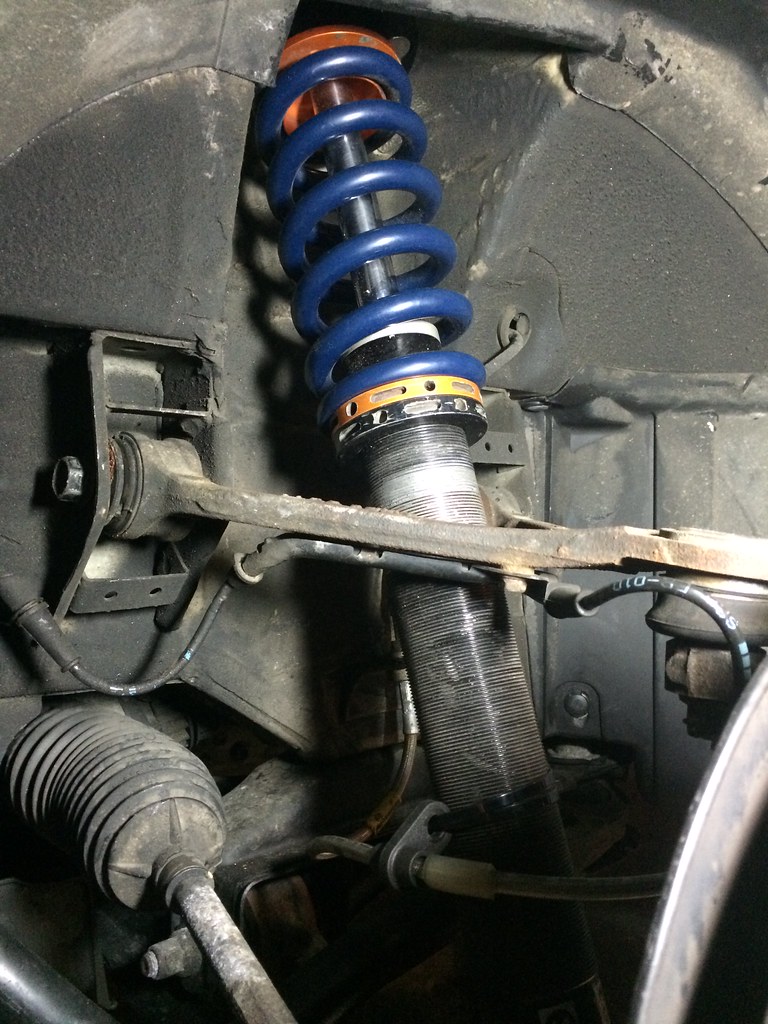
Front shocks in - 6/20/2015
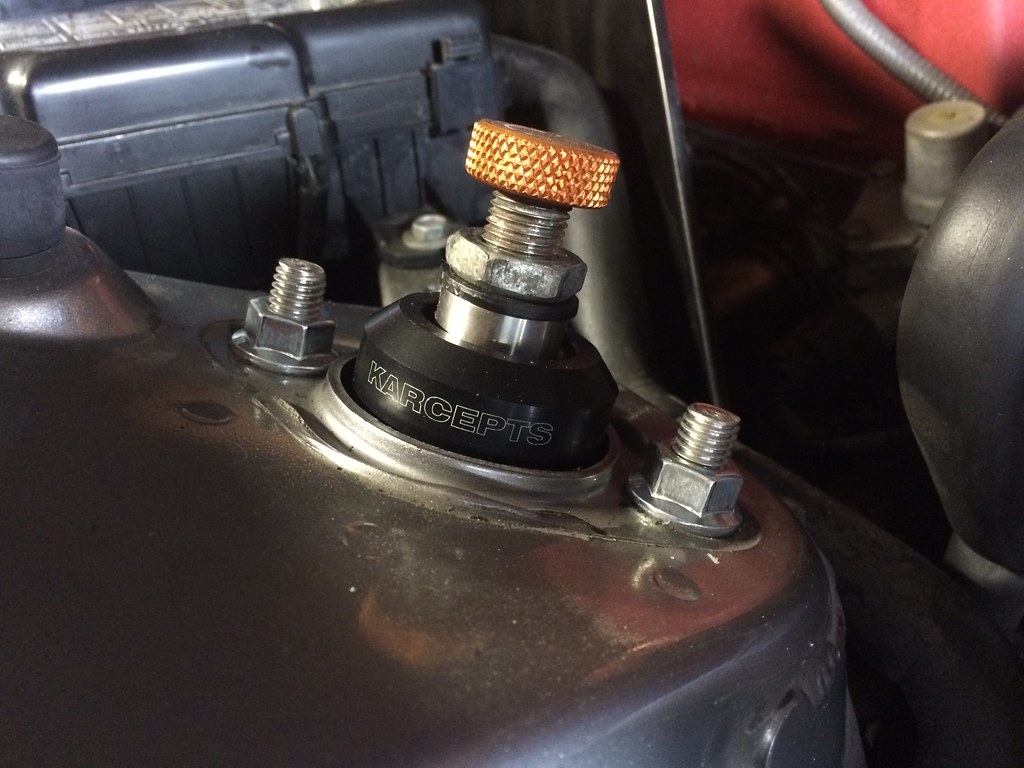
Karcepts spherical upper shock mounts - 6/20/2015
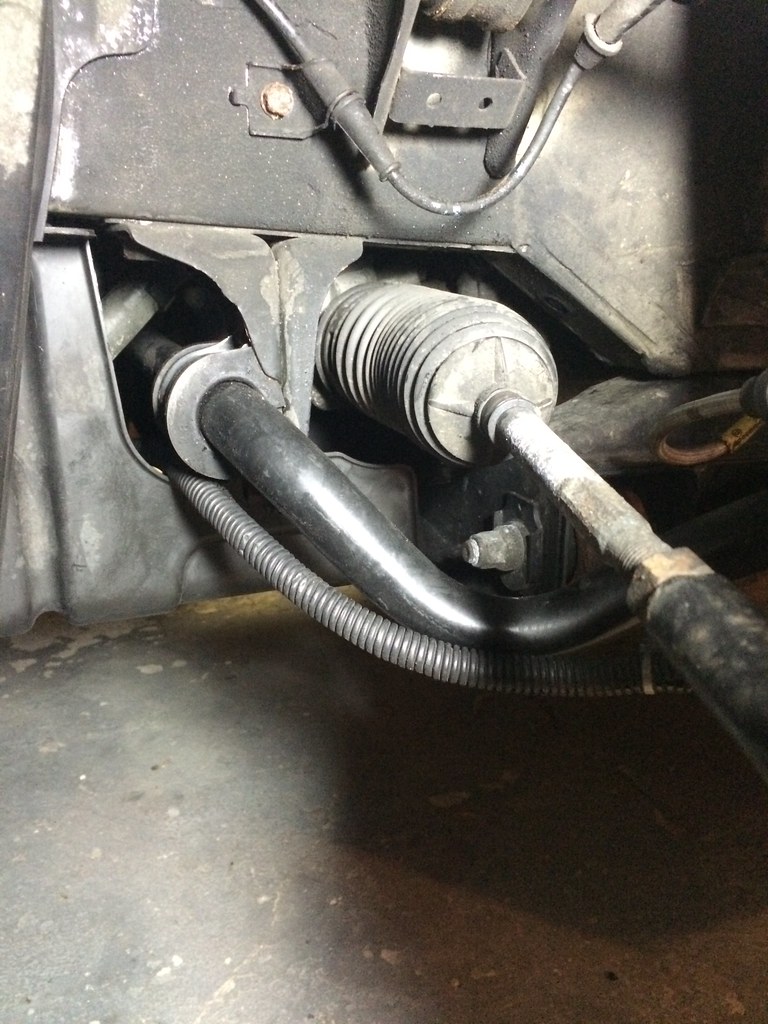
The next problem would be the canister locations. On Bumblestook I have it mounted above the plastic air deflection shield between the front bumper and the hood but this time I decided to try Rad's setup of placing it on the crossbeam. In order to pad the canister, we used 3/4" foam pipe insulation this time to get something underneath so we wouldn't have metal to metal contact and then routed the hose by the swaybar.
Front canister hose routing - 6/20/2015
Front canisters mounted on crossbeam - 6/20/2015
With it getting late and everything buttoned down, we finally got her off jack stands to behold the 4x4 stance and I drove her home. We didn't bother adjusting the ride height since I'm going to have to drive her a bit to get the springs to fully settle and I'm still debating on whether or not to add helper springs since dropping the ride height will introduce slop in the spring when fully unloaded. It's definitely interesting driving on the street again on a highly sprung car but the Motons do a tremendous job of keeping it in check. More work still needs to be done but the first major steps are out of the way. Big thanks to Rad for the help in getting it all installed with me. We definitely ran into more than our fair share of annoying bolts and nuts but in the end we were able to back out a lot in a little more than a day. More to come soon.
It started off as a miserable rainy day that was not something to look forward to when you get up at 5am to go to an event but we got lucky and the skies finally cleared and the sun came out so by the time our heat started, the lot was bone dry. I did an easy first run to makes everything was working fine and thankfully, the transmission felt smooth, gears engaged as you'd expect and I was able to start pushing it.
NNJR SCCA Autocross - 6/5/2015 Meadowlands, NJ
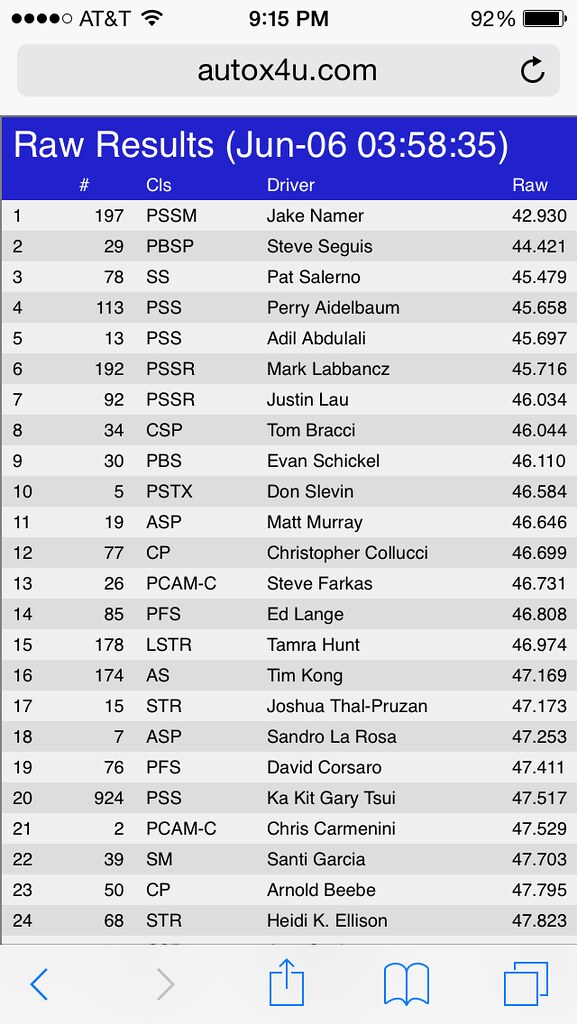
The taller gearing shifts the torque curve somewhat which I found actually smoothed out the power so I could get on it even sooner. Fortunately, even in some of the relatively tighter digs, I didn't find Bumblestook lacking in power. Where it really shined was in the back section where I soon found myself at the top of 2nd gear hitting the limiter, a very useful bump in top speed which yielded very good raw time results. I was able to consistently set times that comfortably placed her 2nd in RAW time out of 101 drivers.
Top Raw results - 6/5/2015
We got 8 runs today but it ended up being 10 runs for me due to reruns. This is not typical for NNJR SCCA but I'm glad we did since I got to put her through the paces. Since we normally don't get these many runs, I didn't think the tires would heat up enough so I didn't bring my tire sprayer. It was unfortunate since I couldn't find more time out there in my later runs due to tires getting greasy. I was able to try a few launches and she held beautifully. Once we get her on the lift again for the next alignment, we'll be able to recheck the driveshaft bolts to see if there was any shifting that happened. At least from inside the cockpit, everything continues to feel nice and tight. This was most definitely an overdue modification that I'm certain will pay good dividends in Ohio in a few months.
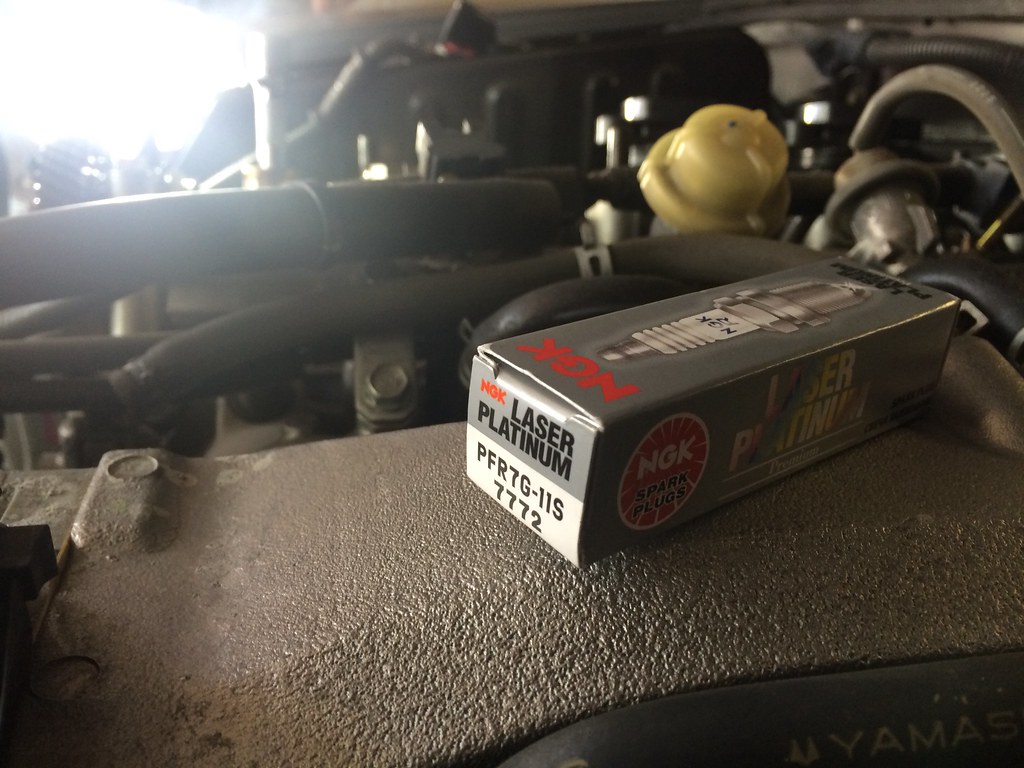
Went over to see Hez so we could do the valve adjustment. Not sure when it was last done by 55K miles is probably overdue for a check anyway. We put in a fresh set of OEM set of NGK spark plugs in the process. Big thanks to Hez and Donny for helping me with this.
Valve Adjustment - 10/18/2014
NGK Spark plugs - 10/18/2014
Finally, since the valve cover appeared to have seen better days, I swapped in a fresh new one to make her look extra clean.
I'm a serious Mugen whore. I love everything Mugen. I have a Mugen shift knob on Bumblestook so I wanted the same for Lupa.
Mugen shift knob - 7/2/2014
Then for the most awesome thing ever...I was able to get in just in time to order the Mugen titanium dual exhuast through Kingmotorsports. Such an incredible work of art with an exhaust note that is just sweet music to my ears.
Mugen exhaust installation - 7/21/2014
First drive with the Mugen exhaust - 7/21/2014
While we were at it we also installed the Innovative 75A motor and transmission mounts that used to be on Bumblestook. I like the stiffer mounts for the more raw/direct feel and the even more solid shifting.
With the weather getting nicer it was time for a good old time at 234 with mods and grilling. Continuing on with the CR theme, I replaced both front and rear sway bars with CR bars.
Sway bar install - 6/1/2014
The heatshield around the K&N airbox had a broken rubber seal. I contacted K&N and they gladly sent me a replacement at no extra cost (yay for excellent customer service).
I wanted Lupa to take some design cues from the S2000 Type-S in Japan which is basically a CR with a soft top. The front bumper had seen better days so I wanted to have it resprayed as well as properly plug the license plate holes. To kill two birds with one stone, I ordered a CR lip and had that painted and installed at the same time at D&G Auto Body in Mineola.
CR Lip, resprayed front bumper and CR wheels - 3/14/2014
I also bought CR wheels from Jeremy and wrapped them in 225/255 Dunlop Direzza Z2s for the summer for superior grip.
I'm a big stickler about being able to know the condition of the brakes on any of my vehicles. Since I had new idea when the brakes were last serviced, I decided to replace all the rotors, pads, install new stainless braided lines and put in some good brake fluid for good measure.
New Centric rotors - 2/22/2014
New OEM pads - 2/22/2014
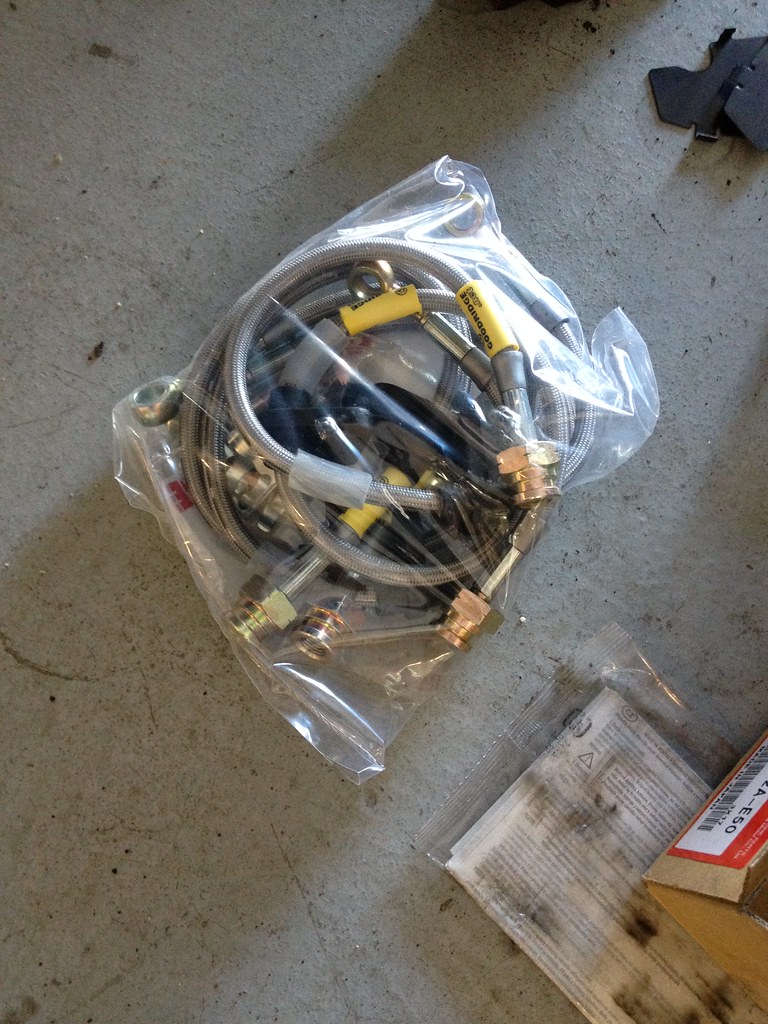
New stainless braided lines - 2/22/2014
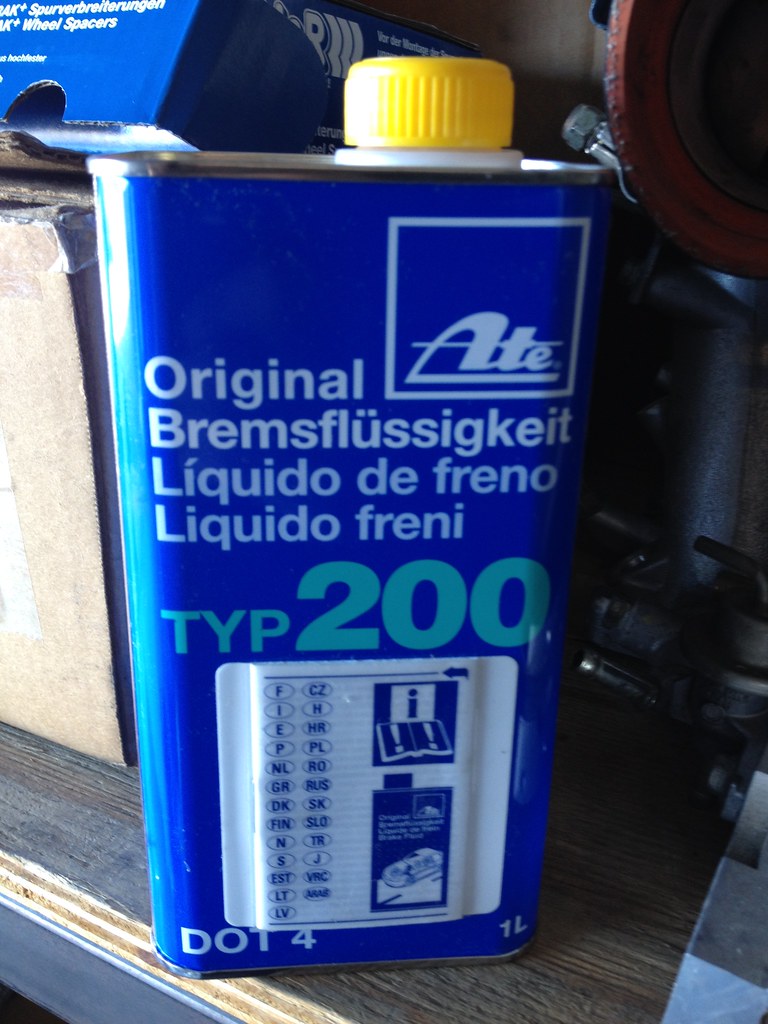
ATE Brake fluid - 2/22/2014
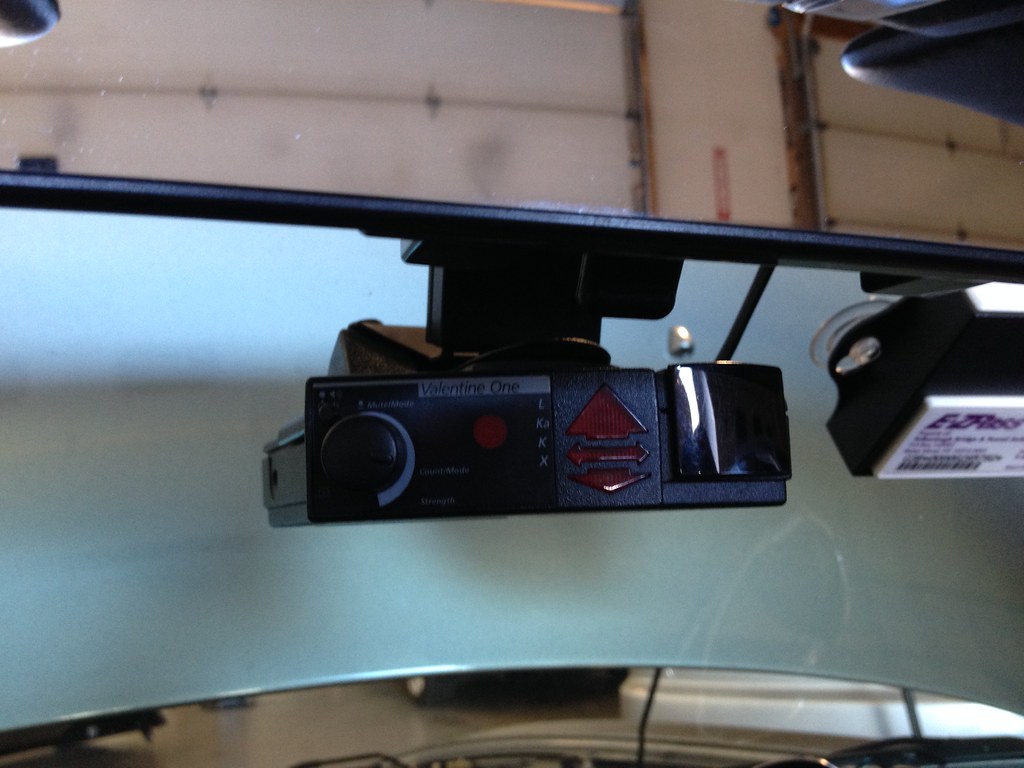
We also transferred over the Valentine One radar detector with remote display from Bumblestook over to Lupa (also using the Blendmount mirror mount).
V1 on Blendmount mirror mount - 2/22/2014
I also switch all the bulbs in the and around the car to LEDs. They're brighter, last longer and look great so why not?