Between the miles driven since the shock/spring install last week and stuffing the car with heavy items while parked, I felt that the springs have had a chance to settle a bit and I could continue to finish off installing the remaining necessary suspension pieces this weekend. This time Hez was kind enough to help me out in his garage (you can see his sweet yellow CR in the background of the first pic). The goals for this weekend were:
- Front and rear sway bars
- Hardrace offset camber joint
- Ride height adjustment
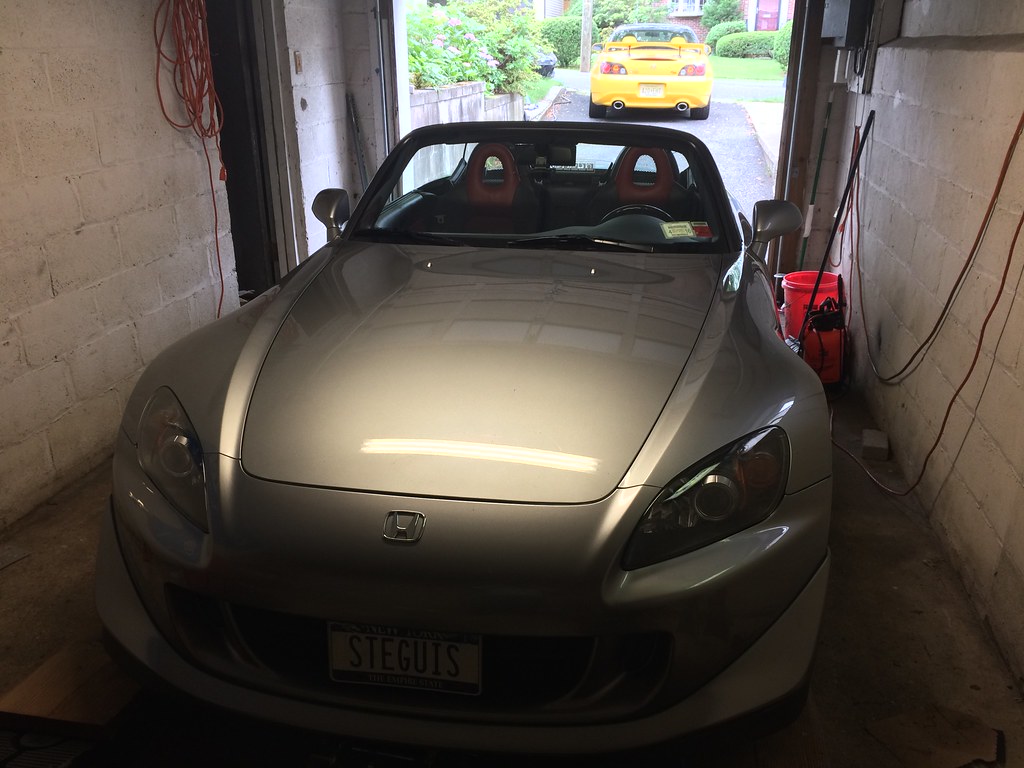 |
| Ready for part 2 of the suspension install - 6/27/2015 |
The ride height after last week's install was close to or slightly higher than stock. While most STR guys run their car low (12.75" or so from the center of the hub to the top of the fender), I'm opting to run Lupa a bit higher. My target ride height is 13.5" which is exactly the ride height of the car lowered on the Eibach ProKit (about a 1" drop from stock). Having seen the wonders of higher ride height on Bumblestook, I feel that a very mild drop is most appropriate because it provides a few specific advantages:
- As a street driven car it makes clearing ramps and drive ways better.
- It offers more suspension travel.
- It maintains the geometry the Honda engineers carefully determined to be optimal for the S2000 chassis.
- I may not even have to push the fender tab up to clear the 255s up front.
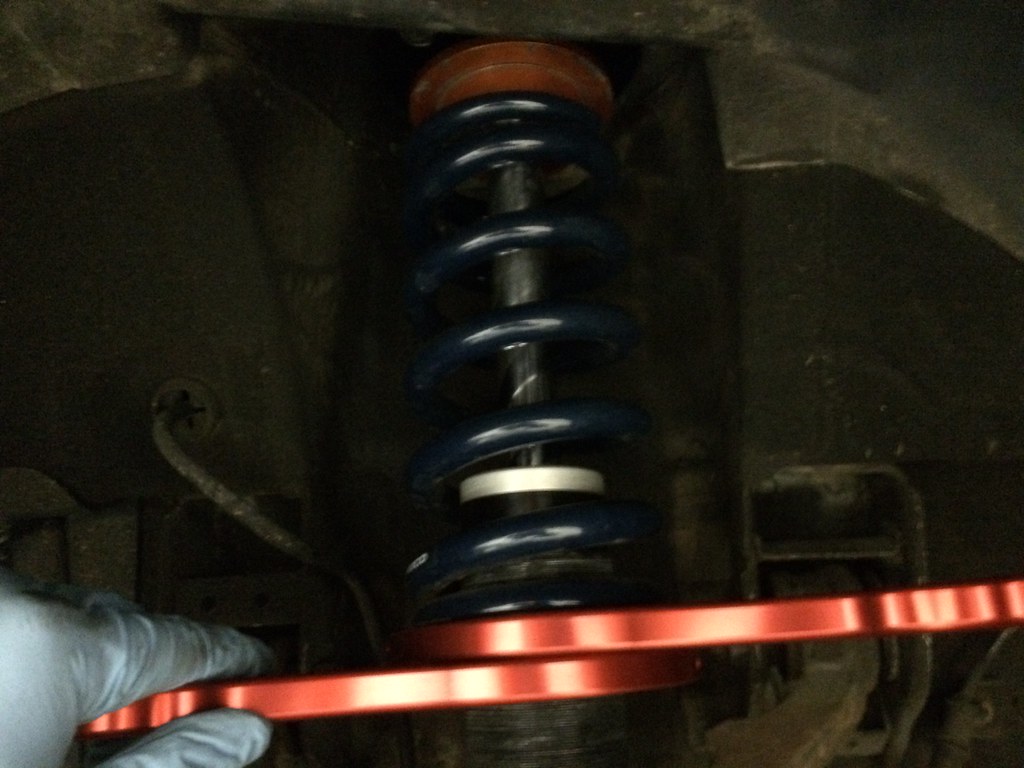 |
| Adjusting ride height - 6/27/2015 |
While Hez was working on disconnecting the stock sway bars, I went ahead and started adjusting the ride height. I'm not getting overly precise here. The ride height is approximately 13.5" which is good enough (and equal left to right) since I'm going to eventually do corner balancing anyway. For now I just wanted the ride height to be closer to what I will eventually run and not the 14.5" or so it was sitting at before we started. I'm running 7" springs so unfortunately dropping it that much now leaves some slop up top between the spring and the top hat at full droop which I could remedy by using helper springs but for now I'm opting to leave it out. Mostly it's to save money but also because I'm likely going to have to pull the shocks again in the future anyway so I'll deal with it then. During normal driving conditions and racing with the sway bars in place I'll never reach full droop so I don't foresee any issues. I do have to be careful that the springs seat properly when I lower the car from being on jacks now though but it's really not that big of a deal.
 |
CR front sway bar (top) /
Karcepts adjustable front sway bar (bottom)
6/27/2015 |
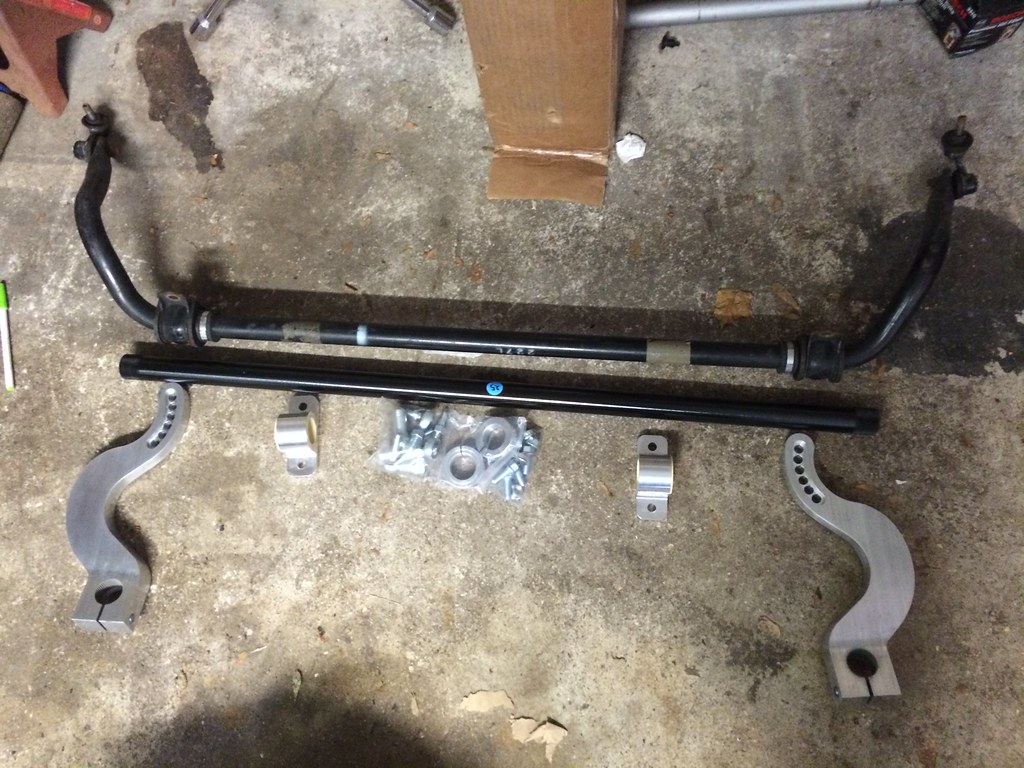
While I run the Gendron (Small Fortune Racing) monster front sway bar on
Bumblestook, it's a bit dated in design now and the bar to have is the
Karcepts adjustable front sway bar. It's an incredible piece of engineering, designed in such a way that you can adjust the stiffness of the bar without having to adjust the length of the endlink and with the car still on the ground. This is a huge advantage for autocross as sway bar adjustments can now be done in grid in a matter of a minute or two with only a single wrench! I opted for the 0.25" wall hollow bar with 6 levels of adjustment and running it at 5/6 stiffness to start off with which is about on par with a full stiff Gendron setup.
 |
| Karcepts Front sway bar installed - 6/27/2015 |
 |
| Karcepts Front sway bar installed - 6/27/2015 |
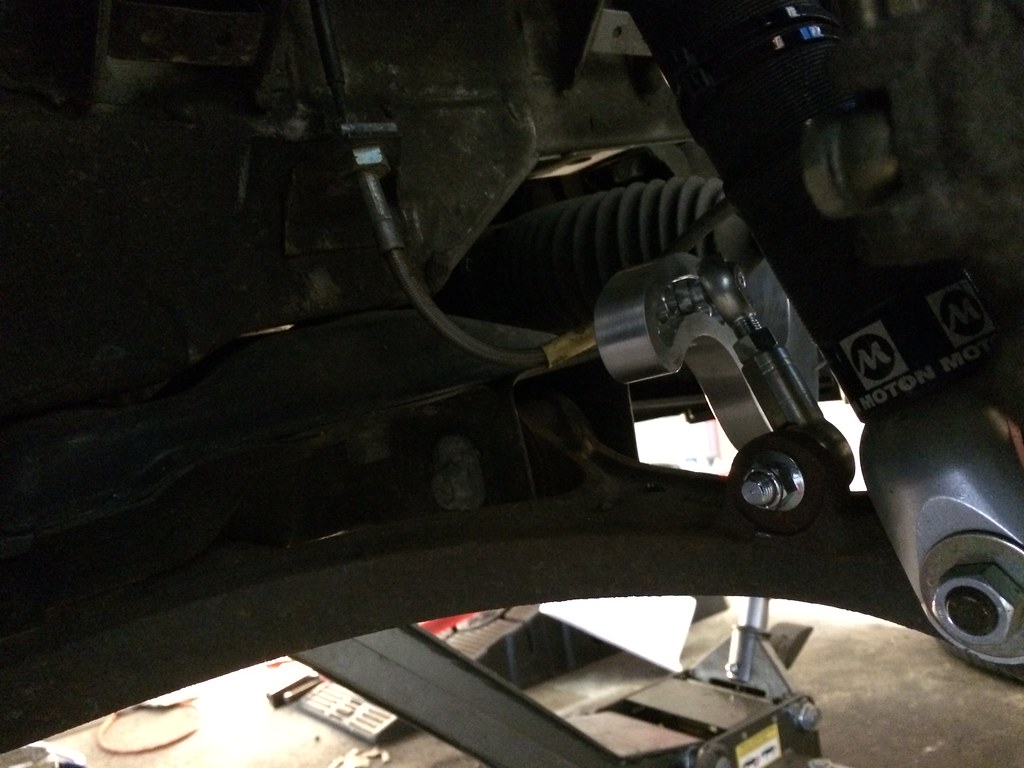
To get more front camber, I replaced the stock lower control arm ball joint with a Hardrace offset ball joint which should easily make -3.5 or more degrees of front camber possible (yea yea, #winnie protest).
 |
Old OEM ball joint (left) /
Hardrace offset ball joint (right)
6/27/2015 |
 |
| Removing the OEM joint - 6/27/2015 |
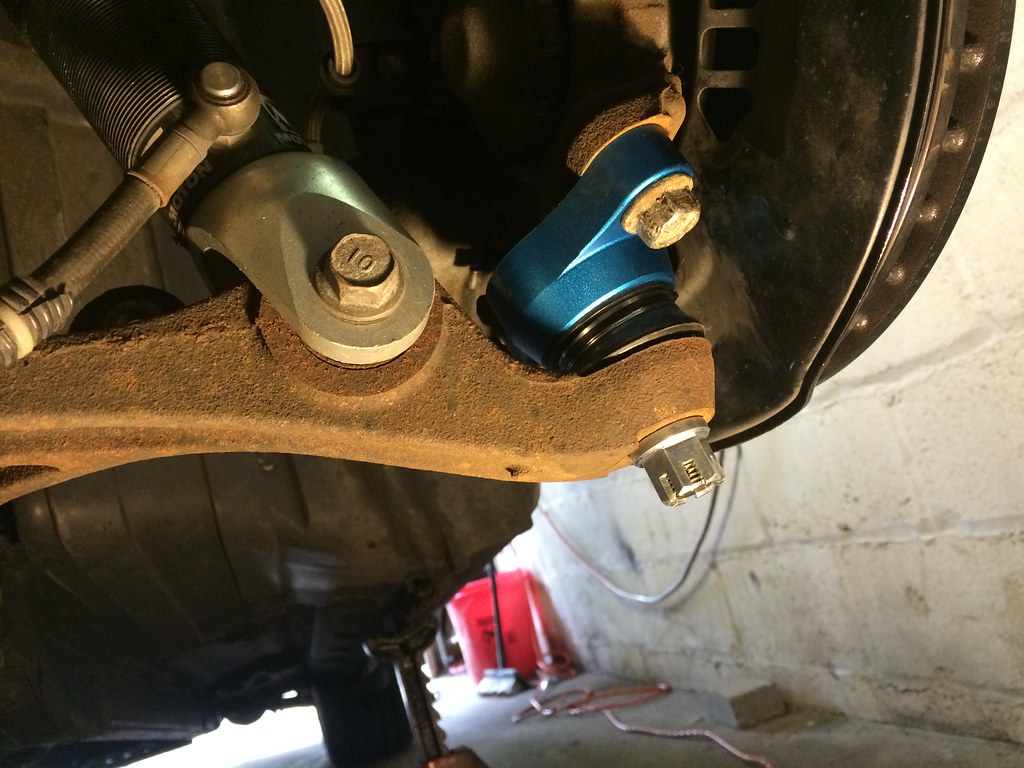 |
Hardrace offset ball joint - 6/27/2015
(yes, I did remember to put the cotter pin back in - not shown) |
With the square 255 setup and high spring rates most STR S2000s run there's open debate about the need for a rear bar. Some swear by no rear bar, some swear that you have to have one at least installed (just in case). I prefer to have the option to apply one as needed (such as when running on concrete) so I opted for the Karcepts adjustable rear bar (0.095" sidewall hollow) to match up nicely with the front bar. It's much thinner than stock with the same amazingly quick adjustment capabilities of the front bar. I'm running this at full soft (1/7) which adds approximately 60 or so lbs of spring rate in the rear while cornering.
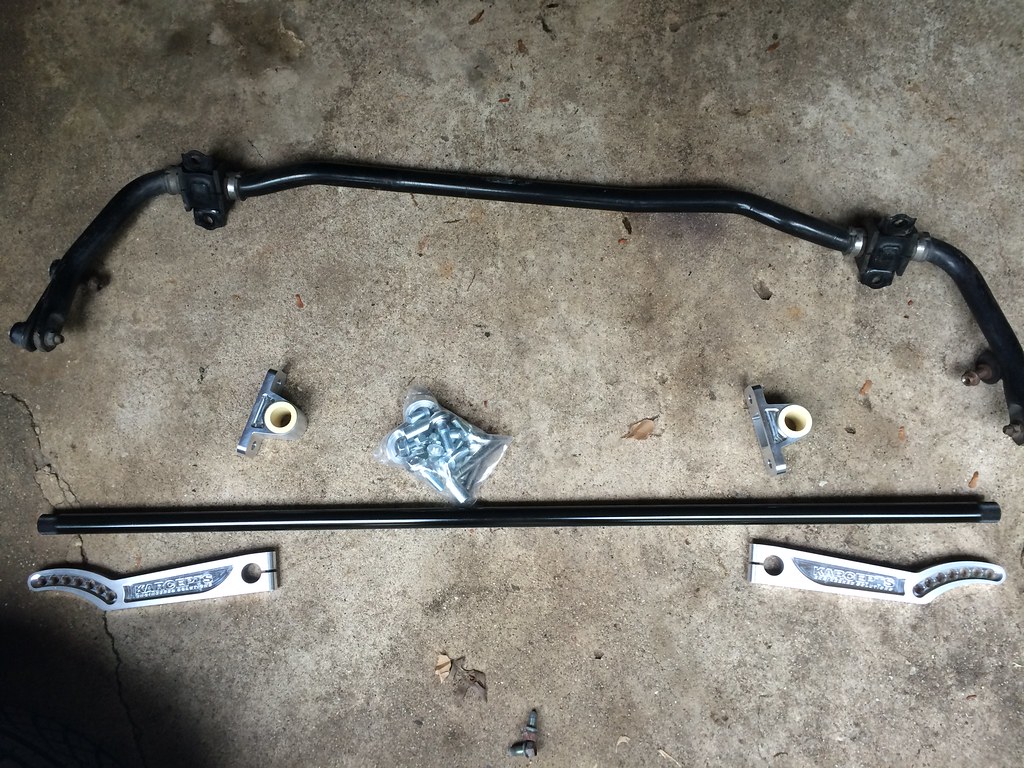 |
CR rear sway bar (top) /
Karcepts adjustable rear sway bar (bottom)
6/27/2015 |
At first we thought we might have difficulty getting the stock rear sway bar off without removing the exhaust since I run a dual muffler Mugen setup but with a bit of "angling off the angles" (hehe), we were able to slide it right out from the side and pop in the snazzy new adjustable one. We then lowered the car back on its wheels to make sure the endlinks were set to the proper length (easily movable from one adjustment hole to another with no preload) and we were done for the day.
 |
| Karcepts rear sway bar installed - 6/27/2015 |
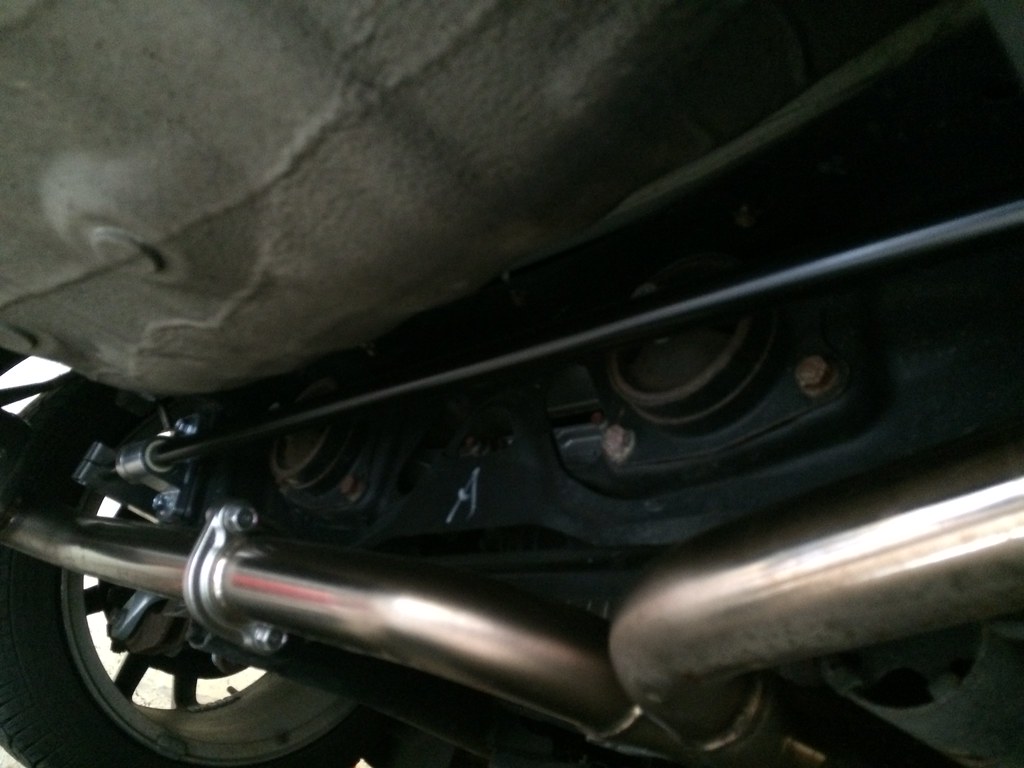 |
| Karcepts rear sway bar installed - 6/27/2015 |
All that's left now from a suspension point of view is to get an alignment at
SJF Performance and we'll be ready to go. I do still have a few major things to sort out before her maiden event but a significant portion of the STR prep work/conversion is now done. Again, big thanks to Hez for all the help today and another shout out to Brian Karwan of Karcepts for putting together a sweet STR power/suspension package for me.


