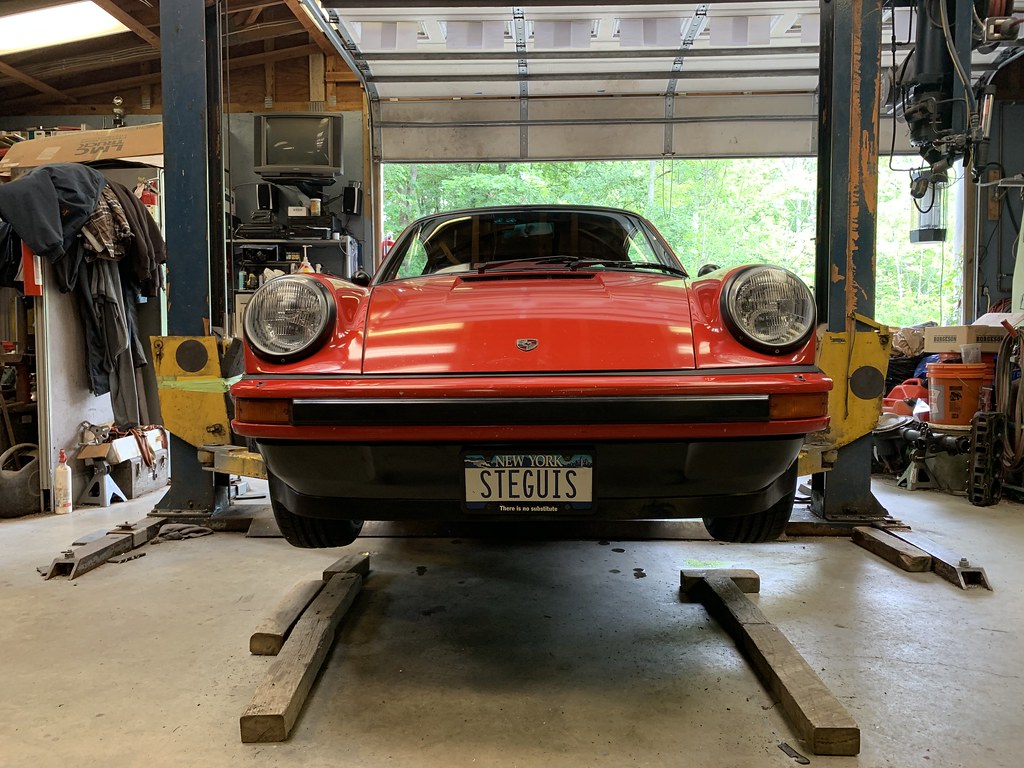
Now that I'm pretty confident that all my mechanical and electrical issues are fully sorted, it was time to tackle some of the exterior modifications before she goes in for paint in the next month or two. It was a pretty good day to be doing this stuff with
SJF Performance. Nice and cool with nasty rain outside made it ideal conditions to just spend the whole day in the garage. First up was deleting the pretty useless fog lights and installing the new club sport lower valence that deletes holes for the OEM foglights. There's nothing wrong per se with the stock SC foglights but I got rid of them for a few reasons. The first is that with LED headlights, I have more than enough illumination that the added foglights don't even register with my eyes when I turn them on. Secondly, unlike the 3.2 Carrera that followed, the foglights stick out on stalks that look like they're an afterthought rather than being tightly integrated into the lower valence.
 |
| Foglights deleted, new valence and lip installed - 8-16-2020 |
The first step was to unscrew the sides of the front black bumper bar cover, then you can just pull it out and try not to break any clips. 4 nuts hold the bumper to the front bumper shocks and then there's two nuts you have to get to from inside the frunk.
 |
| Removing the front bumper |
Next you have to remove the side bellows. There are 4 nuts that need to be removed, two holding it to the a little bumper trim and two to the front bumper itself. You only really need to remove the two in the rear going to the bumper trim and then the top nut going to the bumper itself which is in an annoying hard to get spot especially if you have big fender intercooler. SJF figured out it was easiest to get to it from the side if you pull the bellows out slightly.
 |
| Removing the front bellows |
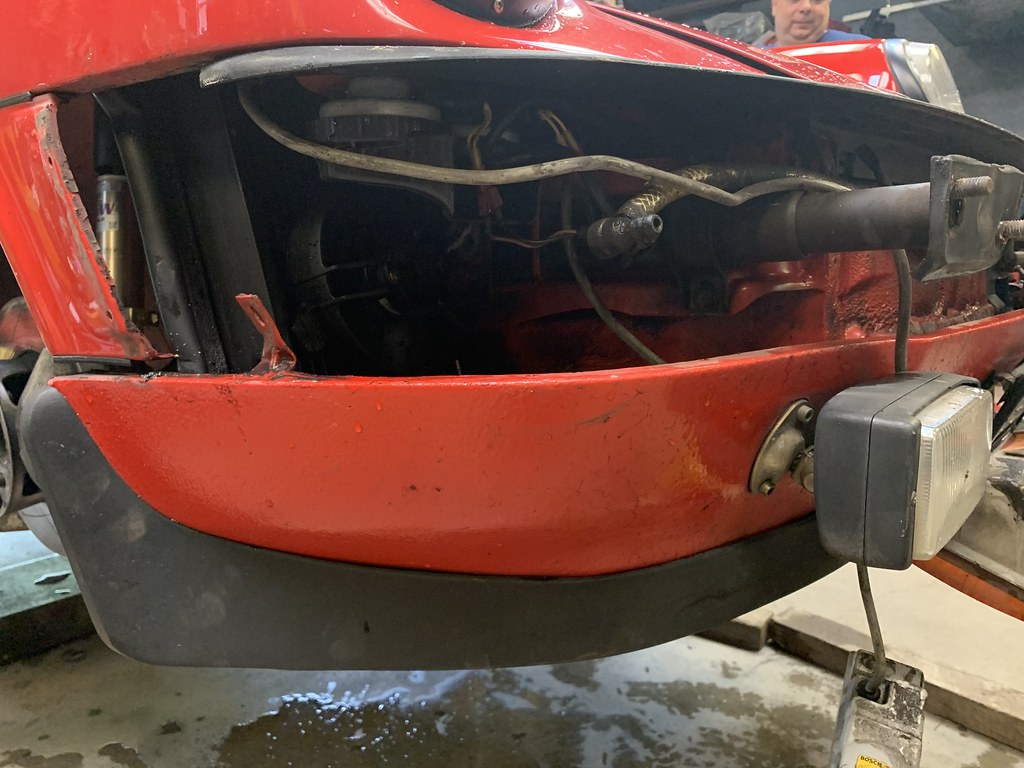
With the bumper free from attachments you can start to pull on it forward and it should just come right off. Unfortunately the front signal lights are attached to the bumper so you'll need to detach them by undoing the nuts from behind the bumper and then passing them through the hole. Similarly, we disconnected the headlight washer hose going to the nozzles.
 |
| Front bumper removed |
Before we could remove the front valence, the front foglights had to be disconnected. Removing the front lenses allowed for the internal assembly to come out and the foglights disconnected. It was then a matter of slipping the wiring through the grommet for removal. We could then tape up the connectors and zip tie them out of the way just in case I ever want to put them back (yea right).
 |
| Foglight housing |
 |
| Internal foglight assembly removed |
 |
| Foglight wiring zip tied out of the way |
With the wiring cleared up, it was just a matter of removing the nuts and bolts holding the valence in place. The old OEM front splitter was attached to the lower valence so removing the valence also conveniently removes it as well. My original splitter was actually cracked already when I bought it so I was able to pick up another used one that was in better condition and that's what we connected to the new valance. Installation of the new valence was pretty much just the reverse. We did have to drill the holes on the sides that the splitter attaches to and I got new hardware for the splitter since I wasn't sure what the condition of the old hardware was. I also got a new license plate mount since I didn't want the slowly rusting old one to fall apart on me. I think the new valence with the fresher splitter and no foglights really tidies up the front quite nicely and removes some weight up there even though it's pretty negligible.
 |
| Side profile of new valence |
 |
| It looks pretty nice, even in black |
After that was sorted and stuffing our face for lunch, we moved onto the rear. I had initially planned on replacing the original bumperettes with euro, slimmer style, bumperettes but after some contemplation I decided that removing them altogether would actually look best. We had to drop the muffler in order to get the 3 nuts holding each bumperette in place and because they'd been in place for 37 years, they needed some persuasion with a rubber mallet from the back to come off.
 |
| Say good-bye to the "in your face" bumperettes |
You also have to remove the license plate lights so the wiring can be disconnected before actually pulling the bumperettes off. The bumperettes weight in at a hefty 7 lbs each and considering they stick out all the way back there, they're adding weight in the wrong spot. They also add about 6 inches to length of the car unnecessarily.
 |
| Bumperettes removed |
I was pleased to see that the paint underneath was quite good but of course over the years some dirt and grime had found its way in there. We pulled the wire through and taped and zip tied them out of the way. After some cleaning, they looked half-way decent but with the obvious holes still in place. These holes are going to be welded shut before the car gets painted over so they'll be nice and smooth in the end.
 |
| Rear bumper cleaned a bit |
SJF had the bright idea of using some red vinyl he had for decals that was surprisingly a good match for Guards Red and Jenna cut some small pieces to cover the holes. You can see them in real life but as you can see, they're almost invisible in photos or from a distance.
 |
| Red vinyl covering the holes |
Finally, it was time to remove the stock plastic deck lid grille and install the perforated aluminum one from X-Faktory. This should be a simple job but since the car has AC, the condenser is in the way of all the nuts that needed to be removed. Still, after some patience and the three of us doing our part, we got the grille in and transferred the Luftgekuhlt emblem I had on the factory grille over. I think this grille is a simple detail that adds a touch of low key aggression and actually weighs less than the factory pieces (about half the weight).
 |
| Factory plastic grille |
 |
| New black X-Faktory perforated aluminum grille installed |
 |
| New black X-Faktory perforated aluminum grille installed |
This pretty much completes the external mods to the car. I have to think about how I'm going to do the rear license plate lights but frankly I don't really drive the car at night so it's really not that big of a deal. I'm super excited to get the car off to get painted later this year. I'm still waiting on replacement front and rear bellows since a few of the studs in my original ones are a bit screwed up and don't allow the nut to come on or off properly. I might also get new front and rear bumper strips since it probably makes sense to put in some fresh ones after the car gets painted. Overall, I'm really happy with how she's turned out. It's just the right amount of restomod without going full on outlaw and while I'm certainly going to get snubbed by purists, I think real Porsche enthusiasts can appreciate what's been done to breath new and exciting life back into this 83 SC.


