Since I took the week off, I figured it'd be a good time to get on with the minor modifications I've been procrastinating on. First up was the 3.0 badge I had JimmyT on the Pelican boards make for me. I've been having a thing recently for low key badges that are only visible when you look really closely so I had it coated matte black to be mostly invisible. It'll probably have to be modified in the future since it doesn't sit flush but I wanted to install it before it got lost in the garage somewhere. It was designed to sit inside the slats of the OEM grille so it sits a little high but overall I like how it looks.
 |
| 3.0 Badge |
Next I removed the oil temp/pressure gauge so I could install new overlays that allow me to actually read out the oil temp in Fahrenheit and the pressure in PSI. Unfortunately, I got sent two temperature overlays instead so for now I only installed temperature one. It wasn't too bad but I took a ton of pictures to remember which wires go where since the entire gauge had to pulled out of the car. The overlay method is really nice because it literally just sits on top of the factory oil gauge face once you pull the mechanism out. The alternative is to get a backdate gauge but that also requires a new backdated oil temp sender to be installed. This is far easier and looks just as good. New Vintage USA makes 3 different temperature ranges based on how your stock gauge looks like. Since mine has a "big red" bar on top, I needed the "Style C" overlay face to ensure that the numbers are correct.
 |
| Disconnecting the oi temp/pressure gauge |
 |
| Stock gauge indicators are a bit vague |
 |
| New Gauge Overlay from New Vintage USA |
 |
| Just need to unscrew each gauge and screw the new face on |
 |
| The engineer in me loves seeing numbers |
Fascinatingly enough, now that I see the numbers, that means that in the summer with the AC on, idling in traffic, before I got my new oil cooler setup, I was seeing oil temps as high as 260F yikes. The final thing I wanted to get done today was changing out all the exterior bulbs to LED. Changing bulbs shouldn't really be difficult and frankly it isn't but for this car if you change the exterior turn signal bulbs to LEDs, you need to replace the gauge bulbs with LEDs, redo some wiring and put in a new flasher relay. The flasher relay was supposed to be the easy part especially since I already had the oil temp gauge out of the way but it's also accessible from the frunk. Unfortunately when I went to find it, it was missing.
 |
| Um...where's the flasher relay? |
It was supposed to be where that little hole right in the middle of the picture above is. I turned my signals on and they were working and I could even hear the relay but I couldn't see it anywhere. Initially I thought that maybe in 83 they relocated it elsewhere so I spent the better part of an hour trying to find pictures. Everything I read said it was supposed to be right there. Finally after reaching behind all the wires and air ducting, I found it. I guess at some point, this relay was replaced but they pulled the little socket from the body and got lazy to re-attach it (to be fair I was lazy to do it too) and just tucked it in there out of the way.
 |
| Eureka...found the old relay and installed the one |
Now I could proceed to replace the signal bulbs inside the gauge, disconnecting the blue/white signal wires replacing it with the new harness (blue wires).
 |
| New gauge turn signal bulbs |
 |
| New signal bulb wiring harness installed |
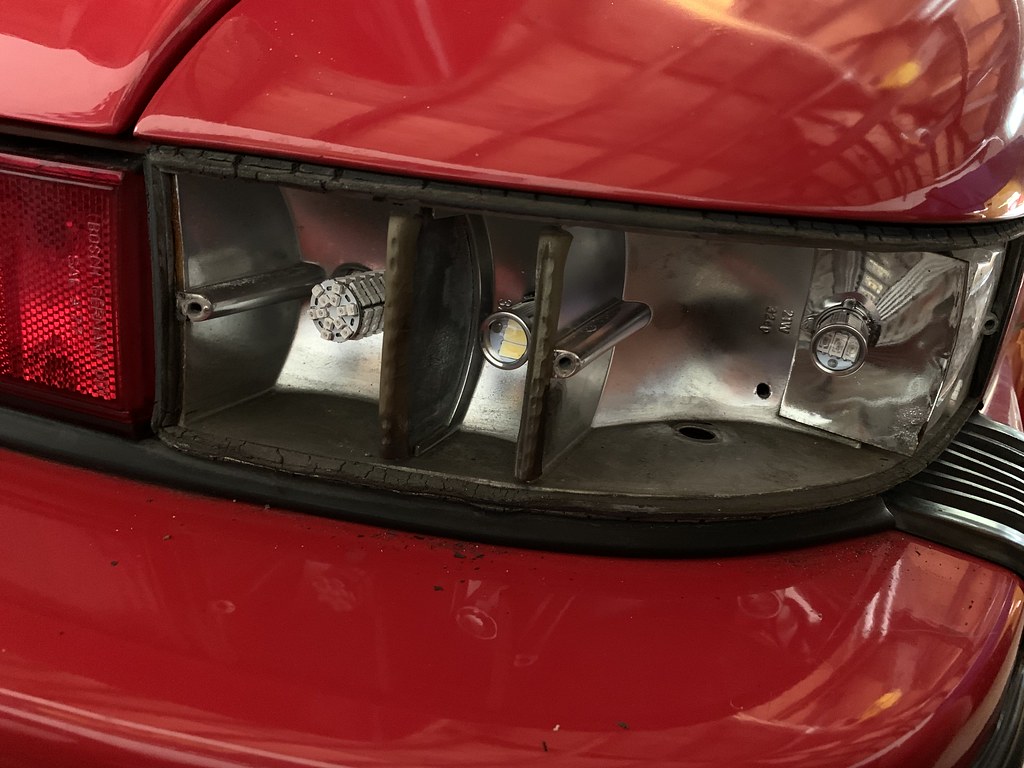
It was all downhill from there. I just had to go swap out all the exterior bulbs which were nicely labeled by Carmagic. I love how easy it is to swap the exterior bulbs. You just need to unscrew the lenses and they're right there.
 |
| New front bulbs |
 |
| New LED front bulbs installed |
 |
| New LED rear bulbs installed |
 |
| New LED rear bulbs installed |
I got the polarity right on all the bulbs except for one of the gauge signal bulbs but quickly flipping it over solved that. It was a worthwhile upgrade despite taking far longer than it should have. The lights are much brighter and use far less power. The reverse lights are so bright, it's like having headings on the back of your car.
 |
| So bright, so good |
 |
| I can back up when it's pitch black out now |
Overall that was a pretty productive morning. I didn't want to waste the whole day fiddling around with the cars in the garage so I spent a good part of the afternoon taking her out for a nice little drive which is always fun any day of the week.


