Sunday, August 20, 2023

Back in the Saddle

After a few months of being preoccupied with other activities I was glad to finally get back in the saddle and autocross again. The course was fun and fast and despite the sunny and hot weather it was well worth it. I ran the car at 29psi all around (just noting this since I've been playing with pressures recently). 

NNJR SCCA - 8-20-2023

I won the class but compared with XSA cars running in pro-class I was about 2 seconds off pace. 


Sunday, August 6, 2023

Palmer Motorsports with S2K Takeover

With all the garage work in early summer, I was forced to take a hiatus from making events so when I got all my cars back I was super eager to make the first once I could possibly go to and that meant going to Palmer Motorsports Park with S2K Takeover.

Palmer Motorsports Park - 8/6/2023

This was my first ever trip there so I decided to do both days so I could get as much seat time as I could and boy did I need it. The track itself has many blind apexes and walls everywhere but nonetheless was one of the most satisfying tracks I've driven. It was like driving a mountain road but without speed limits and safer.

Palmer Motorsports Park - 8/6/2023

As I got more confident I found a bit more time but as the temps kept rising I started to struggle with greasy tires. Still, Bumblestook took lap after lap like a champ with no issues. I was suffering some oversteer so where I would normally a 2 PSI difference from to rear, I lowered it to 1 PSI (29/28) and that helped the balance a lot.

Palmer Motorsports Park - 8/6/2023

Palmer Motorsports Park - 8/6/2023

I think after Watkins Glen, this is probably my next favorite track now and I can't wait to go back and try to find more confidence and speed. At the end of the day I was only able to manage a 1:57. I'm confident I can easily run faster next time now.


1:57 at Palmer Motorsports Park


Sunday, July 16, 2023

First Maintenance in the New Garage Setup

After getting the cars back in the newly renovated garage, I couldn't wait to finally put it to practical use. Bumblestook needed an oil change and a once over as part of our pre-track inspection and prep. Doing so on a 4-post lift is so much easier now. I picked up a rolling oil drain from Harbor Freight and my oil changes are now forever changed.


I also bought the low profile 1.5" rubber blocks from QuickJack and modified the quickjacks with roller bearings so i'ts easy to slide around. Now my 4-post lift can even be used when I need to take the wheels off the car.


Maintenance Update:

Mileage: 62,891

- 5.5 quarts Amsoil 10W-30
- 1 new Honda oil filter (15400-PCX-306)

Saturday, July 8, 2023

Steguis Motorsports Garage v2.0

I have pretty average oversized 24x24' 2-car garage. Two years ago when we moved in I did some basic renovations to make the garage usable. I got rid of lally columns and had a LVL beam installed instead to open up the space, coated the floor with polyaspartic coating, fixed the electrical to not be so sketchy, and ordered some cabinets. This served me well but I always wanted more. I wanted to raise the roof to fit lifts and have more indoor space for the fleet. 

Steguis Motorsports Garage v2.0

The problem was that the town allowed a maximum of a 15ft height which is exactly what the height of the garage already was but my maximum interior headroom was only 6.5ft due to all the space taken up by the ceiling trusses. It's hard to get the clearance with a traditional roof so I gave up on the idea for a while until I realized I could do a single pitch roof to get the vertical clearance I needed. 

Pre-construction

Architect drawing 

I worked with Peter Reo, fellow NEDC member, and owner of Elite Estate Holdings as my GC. He got me an architect who figure out how to get me the vertical clearance I needed. The garage would be 14' 4" at the front and 10' at the back which would give me enough slow to handle snow while maximizing internal space. A triple LVL beam would be used inside to support the weight of the roof leaving me with around 12ft of ceiling room around the area where the cars would be. We would also be putting in a 100A subpanel to run enough power for the lifts and anything else I needed in there. 

New framing done for the roof

We ordered the front windows, custom doors and lifts and after about a month or so applied for the building and electrical permits. This would reduce the amount of downtime I'd have. I moved my cars to storage units and put all the stuff I had in the garage into a storage pod in the driveway and then construction began. In one day the whole roof got demoed and the new frame put up. 

Trench for the electrical conduit

Front windows in

In the interior, we fully finished it with double layers of fire resistant drywall sheet to meet code, painted the ceiling black, added LED lights and shelves to reduce the amount of lose items sitting out that didn't fit in the cabinets. 

Drywall in and painted

Siding, roof and gutters done

We then got the high lift doors installed and I was able to unload my pod and put all my stuff back in the garage.

Doors in

Lastly we got the dual Challenger CL4P7 4-post lifts installed, got it all wired up and I was finally able to bring my cars home.

Lifts installed, just need to be wired

Lifts all functional and cars getting driven in

Lastly, I picked up a cheap 50' LED TV so I can watch shows while I'm working in the garage.

TV installed

Overall it took exactly a month from the moment we started demo to completion. Everything seemed to align nicely. Inspections (2 electrical, 3 building) were done and passed easily. Supplies lined up nice and despite some bad weather during construction, it didn't really slow us down much. 


Wednesday, July 5, 2023

Freshly Rebuilt Transmission for Bumblestook

I'm a die hard S2000 fan so when Bumblestook used to be a dedicated autocross competition vehicle I had to get another just so I could drive it around. I sadly sold it 5 years ago to buy my Cayman but I kept one part from it, its original AP2 transmission. I didn't realize it when I bought it but the car had 2nd gear popup and it turns out the VIN was in the range of it as a known issue. At the time, S2000 parts were pretty cheap so I just bought another AP2 transmission and swapped it in and kept the original as a spare until a few months ago when I decided I wanted to put an AP2 transmission back into Bumblestook for the shorter gearing and carbon synchros. The problem was when would I do it if I wanted to minimize downtime. 

Transmission Rebuild

With a garage renovation project underway, I found my perfect timing. I needed to store my car anyway so I dropped it off with Christian (@christian_s2k) along with my spare transmission and I had him take it apart to see what was needed. I knew we had to change the second gearset (1st and 2nd gear) to fix the popup but while he was in there I had him inspect the other gears. Third gear was showing signs of wear as well so I said replace gears 1 through 4 so I'm starting with a known good state along with the bearings and seals. 


Magnetic pickup not looking great

AP1 vs AP2 transmission
Same same but different

I also took this opportunity to change out my clutch line to a Science of Speed stainless line. Obviously had to go with some fresh Amsoil MTF too.


Swap was smooth of course. This car definitely doesn't suffer from stuck bolts from the constant changes. We're heading out to Palmer Motorsports Park next month with S2K Takeover so I can't wait to test this all out.

Ready to roll out

Some more random pictures from the transmission rebuild


Tuesday, May 30, 2023

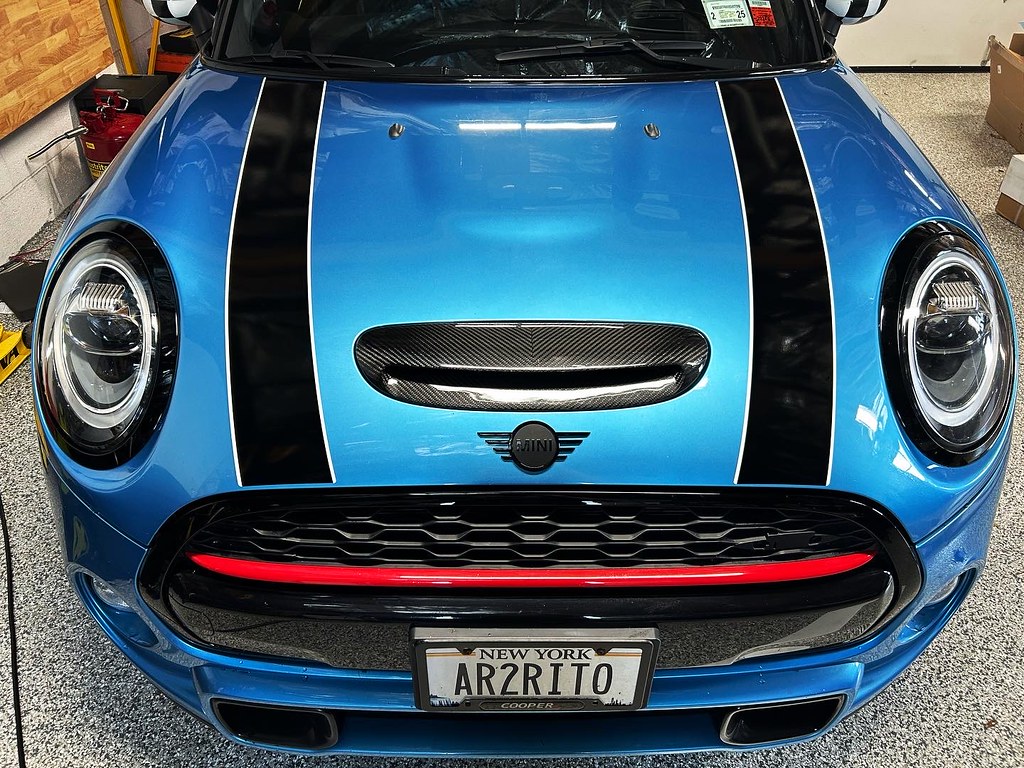
Fresh Stripes and Completed Chrome Delete

For some reason the previous owner left a cup imprint on one of the hood stripes that kept bothering me so I ended up ordering fresh stripes from Mini USA to swap in.

Annoying blemish

The process was simple enough but tedious. I marked off the edges using painter's tape and heated then peeled off the old stripes. The problem is that it still left a sticky residue on the hood so I spent a solid few hours using adhesive remover to get it all off before applying the fresh stripes.

Edged marked

Residue left from peeled stripes

New stripes applied

I also picked up some "blackout tape" for the beltline to finish off the chrome delete look. It was also tedious and I'm not sure I like the finished look up close but it'll do for now. I may end up just buying the real replacement black trim to do it right.

Applying blackout tape

However the complete look with everything de-chromed looks so good.

Final look with the blackout and fresh stripes


Saturday, May 27, 2023

JL Rubicon Steel Bumper

The factory plastic bumper on the wife's JK was quite scratched up by the previous owner and I had been looking for the 10th Anniversary steel front bumper for some time now but it's selling for a premium. After I learned that the JL Rubicon steel bumper is a direct fit, I went that route instead and saved several hundred over the 10th anniversary bumper in the process. 

Hooks scratched from shipping

Unfortunately the red hooks got scratched during shippping. It wasn't bad enough that I wanted to go through the process of shipping it all back for it to maybe just happen again. Instead, I picked up a can of Dupli-Color Perfect Match Chrysler in Flame Red (PR4) from Autozone and it's a perfect match. 

Perfect matching paint for the hooks

Perfect matching paint for the hooks

I sprayed on about 5 coats, waiting 30 or so minutes between coatings and you can't even tell I did anything.

Paint fixed

Installation itself was straight forward. I removed the OEM JK bumper and this one bolted right into the same place. It did come with OEM JL LED fog lights but apparently these don't work properly if your car is coded for LED lights. I also just recently installed the nice amber LED fog lights that I wanted but it doesn't bolt up directly to the JL steel bumper. To get around this, I picked up an adapter bracket from Amazon that allows you to bolt up OEM style bolt pattern fog lights into the JL steel bumper setup. The other advantage to using the aftermarket fog lights is that they already have longer cables meaning I didn't need to buy yet another pair of extension wires to make them work in their newer location further away from center.

Connect the amber LED fog lights to the adapter brackets

Bumper and foglights installed

Lights work great

Wiring loom zip tied to bumper


Clean install, even OEM plastic cover fits back in place

Also installed the Mopar bumper bar for it