Sunday, September 12, 2021

Back On Track - NJMP Lightning

After several months of hiatus from motorsports due to various life events and being distracted with my garage build, I finally got time to head back on track. The weather was just perfect, low to mid-80s and not a cloud in the sky. 

NJMP Lightning - 9-12-2021

I took the morning sessions to get used to the car again. Since the last event the car got fresh brakes, new rear Karcepts hubs and a fresh alignment. Really my main issue was feeling super rusty with this car. I've been driving my other cars more recently and I really started to feel my steering inputs were incorrect for what I know this car likes. After getting a few sessions under my belt and feeling confident everything was working as it should, I tried to beat my previous personal best of 1:20.7. Frankly that's not a very fast time but given my general desire to avoid 4-wheel excursions and collisions with hard objects with this car, my goal with each event is simply to have fun and see if I can beat my own time. I was able to get a 1:19.3 which is a 1.4 s improvement from my last outing here. I set that at the warmest time of the day on a full tank so I think if I repeat that lap on a cooler day with low fuel, I should be able to find more time pretty easily. 

Bumblestook @ NJMP Lightning
Stupid camera was aimed down so exposure was all wrong

Mostly I was trying to use less brakes or no brakes in certain corners. I know I'm losing a bunch of time in turn 1 but I'm still a bit hesitant to push it there since I know what can happen if you get that wrong. Overall though, it was a great day. I had loads of fun and it was a much needed motorsports event to help clear my mind. I think I might need new tires soon though. These clockwise tracks do a number on your left side tires. 

Tire wear on left side


Monday, September 6, 2021

Garage Build - Radiant Barrier

One of the issues with having a detached garage with no shade is that it heats up pretty quickly once the sun hits the roof. In the middle of summer, I was detecting temperatures inside well over 102F. Even though I recently installed an AC, without proper insulation, it's just a losing battle so pretty much anytime the outside temp is above 85, I was simply not going to spend any time inside the garage and certainly not going to waste energy trying to run the AC.

Radiant Barrier Installation - 9-6-2021

To attempt to fix this, I picked up enough radiant barrier foil from Attic Foil to cover 1000 square feet, more than I'd ever reasonably need but having more is always better than not having enough. The theory was sound, place the foil just under the roof stapled to the rafters such that there's an air gap in between, and the reflective nature of the foil would significantly reduce radiant heat from the roof surface. It's relatively affordable so it was worth a try. I was hoping for maybe a 10F drop in temperature at the roof. 

Temperature right under the roof surface

Temperature on the bottom surface of the radiant barrier

I really didn't want to deal with installing this myself even though it's really just a matter of cutting it to size and stapling it to the rafters so I decided to hire some help in the form of Barry's Handyman Services. We had been chatting about this project online and he was very responsive and reasonably priced. When he showed up, what a crazy surprise it was to find out we knew each other. Barry is an OG S2000 owner and we used to see each other at  S2000 meets all the time when those things were very active in the region. He still has his S2000 and he immediately recognized my car when he saw it in the driveway. 

Radiant Barrier Installed

Anyway, back on topic...covering the entire roof took around 5 hours mostly because I had a few obstacles up there that needed to be worked around. I have about 95% coverage since it's recommended you leave a bit of the bottom and top parts open to allow air to pass and used up maybe 70% of the material I had purchased. You can see how dramatic the difference in temperature is. Shooting my IR thermometer onto the surface of the roof I was seeing temps of almost 122F in the middle of the day after it had been baking in the sun for at least 6 hours (ambient air temp around 83F). The surface of the radiant barrier foil just a few inches away almost matched ambient of 83F. That's about a 40F difference! We kept the garage door shut and the AC running during the install and you could noticeably feel how much better it was getting as more and more of the surface was getting covered. This is no replacement for a properly insulated ceiling (something I might consider next) but having 40F less heat being radiated from the roof to the rest of the garage really helps the AC keep up. It's never going to be frigid cold but it takes a lot of the edge off, like the garage was under the shade or something. I know this isn't the most pleasant thing to look at but it beats getting roasted inside your own garage. I'll monitor the temperatures over the next few warm days since I have data from all summer to compare against. If this is really effective, then I think adding an attic fan and an insulated ceiling will get me to ice cold status inside the garage if/when I need it. 

Barry's business card

Overall I'd give this project a solid 10/10 for bang for buck. You can absolutely install this yourself if you have the patience to do so. You just need a ladder, scissors and a staple gun. I'll probably use the rest of the foil to add some barrier to my shed next. If anyone needs a general handyman in Northern NJ though, I'd definitely recommend Barry. He's an honest guy that's very responsive, shows up on time, and gets the job done. It was also cool catching up and talking about old times. 

Tuesday, August 17, 2021

Oil and Plugs for the GTi

I've been so busy the past few months I've almost neglected to be on time with my GTi maintenance. Nothing crazy, but the oil was in there 1000 miles more than I usually let it sit so I finally took care of it this weekend. It was also the first real car work I did in the new garage.

Oil change time - 8-15-2021

Really just needed a good oil change and new coil pack since I was started to get a bit of a rough idle especially when cold. I'm trying out these APR coils to replace the RS3 coils that I had there for the past, almost 20K miles. Car runs super smoothly right now so I guess it's happy with the changes.

APR Coils

APR coils installed

Finally, I'm really happy with Penntek polyaspartic coating on the garage floor. Got a bit of oil on the ground while draining the oil and a quick wipe with a paper towel and it was spotless again. It's definitely going to help keep the garage nice and clean.

Maintenance Update:

Mileage: 70,825

- 4 new APR ignition coils
- New Mann oil filter and drain plug
- 6 quarts Liqui Moly 5W-40 Molygen

Sunday, July 18, 2021

Cooling Fix, Brakes and Karcepts Rear Hubs

I've had a stockpile of parts for maintenance that had unfortunately been getting deferred while I've focused on my other projects. Unfortunately, I've been having sporadic cooling issues on Bumbestook that were symptomatic of a sticking thermostat. Fixing that so I could feel comfortable driving the car again pushed me over the edge to finally get everything else done by SJF Performance while I was working on the garage. 

Karcepts Rear Hub (left), OEM Rear Hub (right)

For starters, the Karcepts rear hubs that I got last year could finally go in. These are nice and beefy compared to OEM hubs. The rear wheel bearings were due for a replacement anyway after years of abuse on massive 315 Hoosiers. Of course, if you're going to replace the hubs, you might as well put in fresh studs, so a set of extended ARP studs were installed too.

Karcepts rear hubs, ARP extended studs installed

After the last track day, I had finally used up my previous set of brakes so a fresh set of cryo rotors and Carbotech XP10/XP8 pads were also put in. 

Fresh cryo rotors and Carbotech XP10/XP8 pads

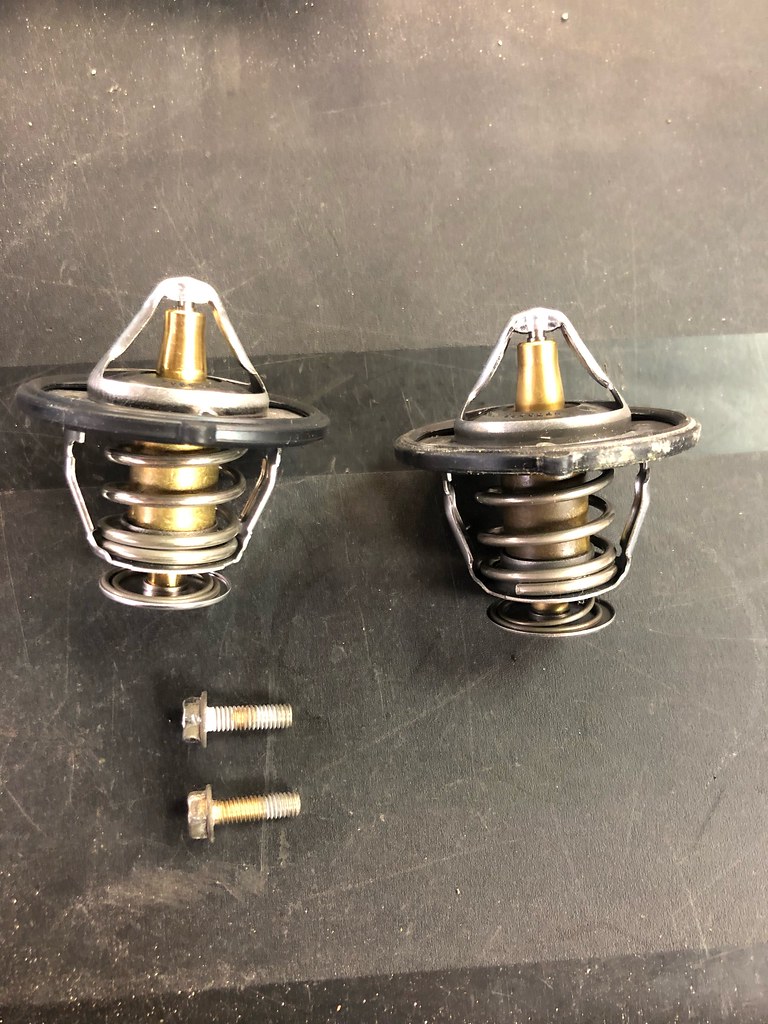
Of course, the most important thing to fix was my cooling issue. I already had a Mugen thermostat installed but that was done 10 years ago now. I'm obviously a big Mugen fanboy but the reason why I like this part, in particular, is the OEM fitment and quality. This car's been taken apart and put back together again a bunch of times over the years but the thermostat is one piece that's largely been untouched. The bolts were almost stuck in there but thankfully they did come out but not without applying enough force to deform the head of the bolt a bit. The cooling system was then completely flushed with fresh OEM Honda Type 2 coolant and voila, the coolant temps are now finally stable. 

New Mugen Thermostat

Old thermostat finally out, new one ready to go in. 

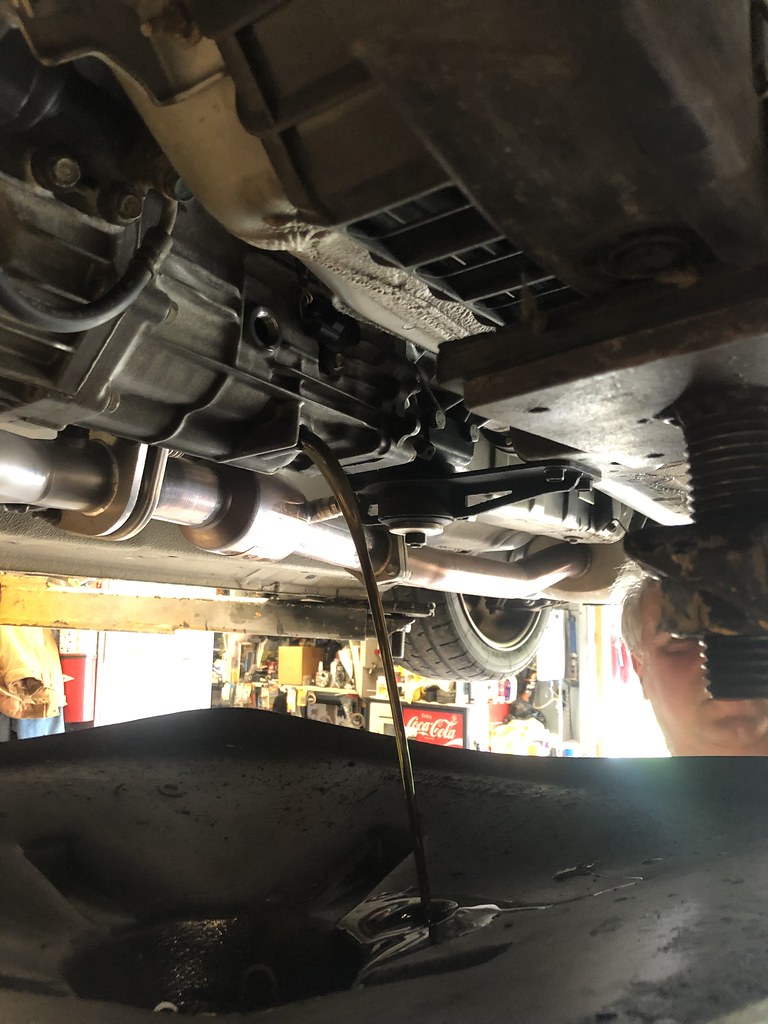
I get the transmission fluid changed regularly but didn't get to it when I changed the oil earlier this year so that had to get done. The fluid looks pretty clean though. 

Time to change the transmission fluid

Finally, since the rear hubs were removed, a fresh alignment was in order. The alignment was already feeling a bit off on our last track day so it feels great to get the car handling the way it's supposed to again. 

Much overdue alignment - 7-18-2021


Maintenance Updates:

- 2 quarts Amsoil MTF
- New Mugen Thermostat
- Coolant flush - OEM Honda fluid
- New slotted cryo rotors all around
- New Carbotech XP10/XP8 pads
- New Karcepts Rear Hubs
- New OEM Rear bearings
- New ARP extended studs for the rear only

Saturday, July 17, 2021

Garage Build - Cabinets and Electric

There were two general design considerations I had when figuring out what to do with this garage. The first was that it needed to be clutter-free. From experience, I learned the more I let clutter accumulate, the more likely I was to generate more clutter until eventually, it became difficult to find anything or even just get around the cars to do basic things. The second was to make as efficient use of the little space I had as possible. 
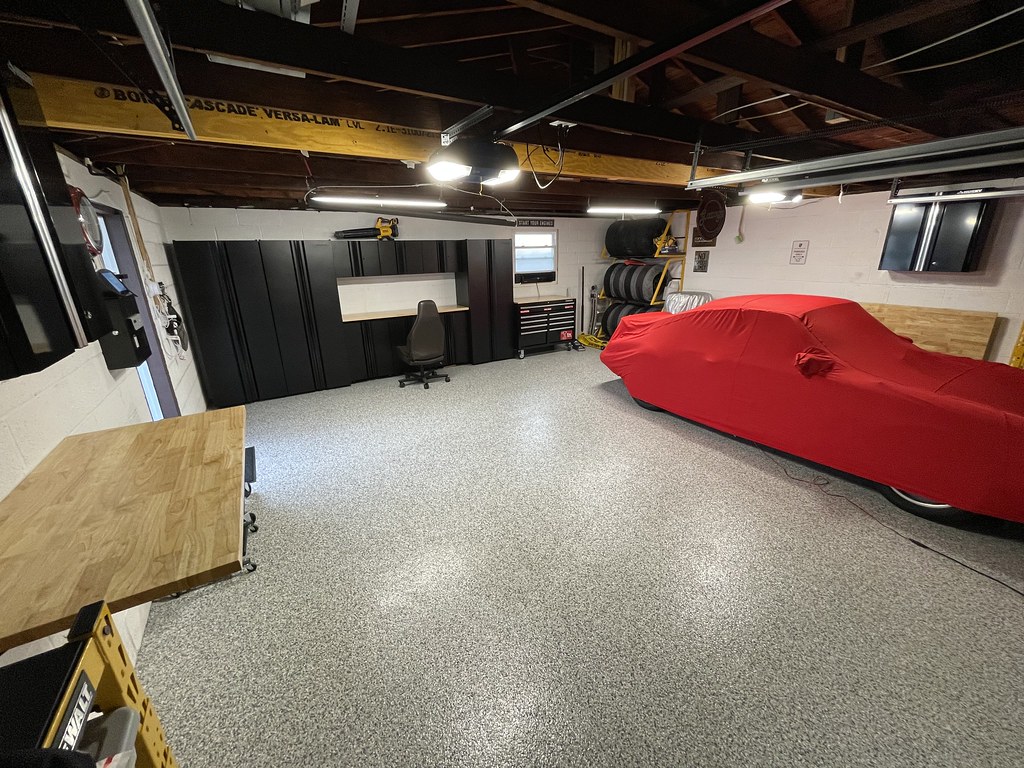
Cabinets and fold away tables installed - 7-16-2021

After the floors were done last week, I placed the order for the Husky 10 piece garage storage system a wood worktop. This is a great value system consisting of 3 tall lockers, 3 wall cabinets, 3 door cabinets, and either a wood or steel worktop. I chose wood. It features soft close locking doors and most importantly for me, was delivered fully assembled. I just had to add the feet, shelves, and of course, the mounts for the top wall cabinets. Putting all together wasn't too bad but moving all these pieces by myself made it a bit more difficult than it needed to be. 
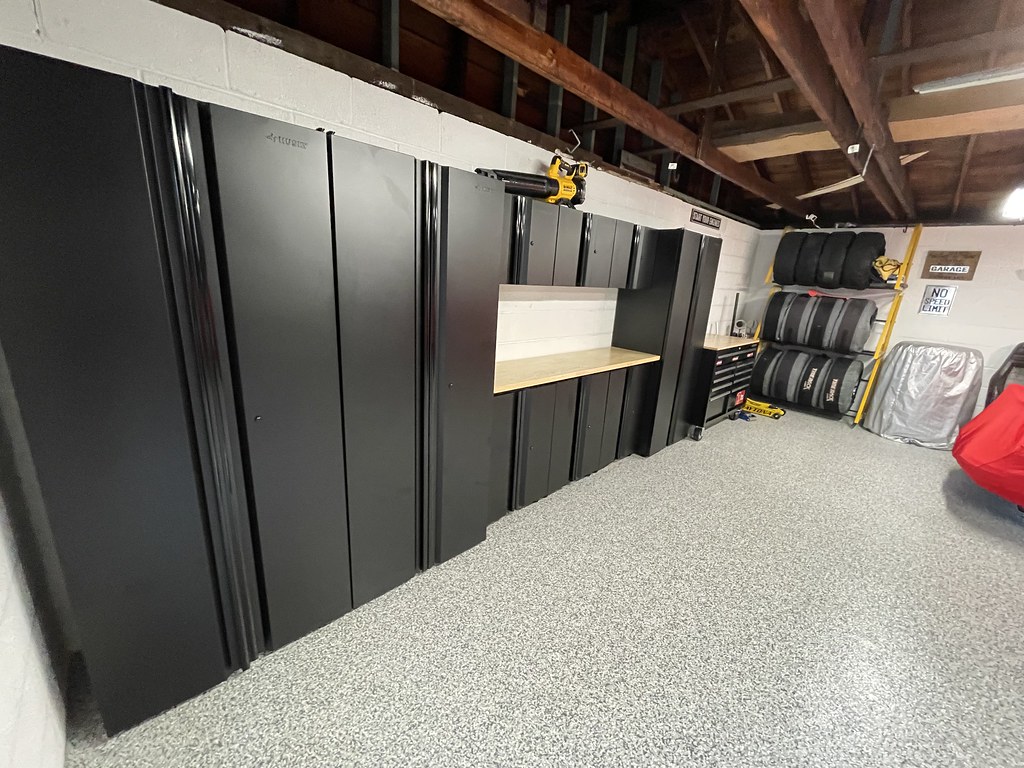
Husky 10 piece garage storage system

I also ordered a 46" Husky mobile tool chest. Years of dealing with tools in different toolboxes, unable to find the right tool, had to come to an end. The hardest part was figuring out how to get the wheels bolted on by myself. The fact that it arrived on a pallette helped since I was able to slide it out a little and use my floor jack to raise one end at a time. The storage system fits perfectly against the back wall and the tool chest fits in nicely right next to it just below the window. The tool chest includes an integrated power strip which is going to come in handy.

Husky mobile too chest

Husky 46" mobile toolchest

For the walls next to the car doors, I didn't want anything that would prevent me from opening up the doors all the way. However, I also didn't want to waste that space. Taking some inspiration from 12 Gauge Garage, I decided that some wall-mounted folding workbenches (https://www.homedepot.com/p/Industrial-4-ft-Folding-Wood-Top-Workbench-WSHD48FWB/302769459) would be the right solution. I can fold it out when I need the work area but the rest of the time, it can remain folded and out of the way. To not waste the space above it without cramping the space, I added 18" deep Husky wall cabinets. They're perfect for regularly accessed items like cleaning sprays and microfiber cloths. 

Industrial 4ft wall mounted folding workbench and
Husky wall cabinet

Industrial 4ft wall mounted folding workbench pulled out

Finally, today the electricians from Kat Electric came to finally fix one of the most annoying things about my garage which was the lack of outlets. There were only 2 outlets by the side door and 2 outlets by the garage doors and some outlets for the garage door openers. These were poorly installed by just running wire and stapling them to the wood. Not only does this look ugly, but it's also not particularly safe. I had them rip out all the existing wiring, run proper metal conduits and junction boxes so that I have at least 4 GFI outlets on each wall (some with more). I added a 45ft retractable extension cable from Griot's Garage to one wall, with another one that I'll probably add in the middle of the garage. For my OCD friends, yes, the electricians were very particular about making sure every conduit lines were perfectly plumb. Unfortunately, I'm unable to add more power to the garage without removing all the paver stones and digging up a trench to run larger gauge wire. I don't really run any higher power equipment out of the garage though, mostly I just want to convenient of being able to plug in something as close to where I need it as possible and not run extension cords everywhere.

All new outlets, wires and in proper conduit - 7-17-2021

Griot's Garage 45ft retractable extension cord

Now with a convenient outlet near my window fan
and mobile tool chest

We also added two additional LED lights to the front of the garage giving me 6 lights total to really make everything super bright at night if I'm in there.

LED light strips added above the garage doors

Overall, it's been a hot and exhausting weekend in the garage but we're basically done. Now I can bring over all the stuff from the other garage and give it up. I plan on hanging the quick jacks in the space between the window and tire racks, then the rest of the stuff should fit perfectly in the cabinets. 

Saturday, July 10, 2021

Garage Build - Polyaspartic Floor Coating

When I got this garage, it had lots of potential but needed some work to get it the way I really wanted. The floor in particular, although not in terrible shape, had quite a bit of pitting and stains over the years despite what appeared to be some kind of epoxy based paint on top of it. I knew I wanted to do something about the floors. I debated about fresh epoxy coating (cheapest), floor tiles like Racedeck or Swisstrax (pricier side but looked good), or do what I really wanted which was polyaspartic coating (more expensive option). The Penntek polyaspartic coating has all the benefits of epoxy but is supposed to be much more resilient, easy to clean and looks really good. I decided tiles wasn't for me because it was really just a veneer and ultimately anything you spill or drag into the garage will eventually work its way to the underlying floor anyway. I can see the draw but it's not for me.

Penntek Polyaspartic Coating - Slate Stone - 7-10-2021

After doing some research and calling around, I ended up contacting Spectrum Painting LLC based in Pompton Lakes, NJ. They answered all my questions, were very professional and responsive, was reasonably priced and the reviews and client references checked out. Although it took a few weeks to get scheduled, the process itself only takes a day and the floor is ready for use in about 24 hours after the clear has been laid down. The first thing they did was to diamond grind the entire floor, removing any old coating there might be on there. The machine worked really well containing the dust but I did remove everything within 2 feet of the floor as well as anything else I didn't want to get dirty just in case. 

Spectrum Painting on the job

Diamond cutting the floors  - 7-8-2021

Once that was done, the top layer of concrete dust was vacuumed again. They filled any cracks in the concrete, inspected it for excess moisture (which mine thankfully didn't have or they'd have to add a moisture barrier for additional cost and time). They then applied a layer of a liquid filler to even out the surface as best they can including filling all the little pits in the concrete.

Fixing the cracks and pits - 7-8-2021

Once that dried, they grind the floor one more time to smooth it out again and vacuum any dust off. Next up they apply the base coat and liberally spread the paint chips (I chose slate stone but they a bunch of other options) over it to give that awesome texture and color effect. 

Applying base coat and paint chips - 7-8-2021

This has to cure for about 1.5 hours before the next step. Unfortunately, this is where our luck ran out. The skies opened up after about an hour and they couldn't risk the clear coat getting wet so they had to stop there until we had a forecast of clear weather for at least 24 hours straight. That was today, so they came back to finish the job. First they scraped and collected any excess paint flakes to smooth out the surface and did one final cleaning to ensure a clean surface. They then pour the clear coat on top, using a squeegee to spread it evenly then a roller is applied to make sure it's nice and even. 

Applying clear coat - 7-10-2021

The results are absolutely amazing. I still have to wait 8 hours before I can walk on it and a total of at least 24 hours before I consider putting the cars back in (the longer the time the better, 48 hours would be ideal) but the transformation is incredible. Now everything that's been waiting for the floors to get done can move forward for this project. 

Before - 7-8-2021

After - 7-10-2021

Despite the rather stressful past two days of having all my cars in the driveway in the middle of heavy storms (thankfully dodging hail), it was totally worth getting it done the right way. This looks amazing and the product is warrantied for 15 years and should hold up well to my usage. 

Saturday, July 3, 2021

Garage Build - Hardtop Hoist and more organization

One thing that I bought a few years ago but never installed was a GarageSmart Basic Lifter. While my previous setup worked, I was never really a fan of the 220lb hoist that I bought simply because it moved a bit too quickly for me making it somewhat difficult to precisely lower my hardtop back onto the car. The GarageSmart unit has a 50 lbs lifting capacity but doubles to 100 lbs if you loop it back up because of how pulleys work (https://www.youtube.com/watch?v=M2w3NZzPwOM). That's more than enough headroom given my hardtop only weights around 25lbs and the extra hardware that makes up the hoist, maybe no more than 5lbs more. 

New hardtop hoist installed

I kept the rest of my old setup with the only minor change of shortening the cables as much as I could since I only have a 7.5ft to of clearance to work with. The engineered beam installed last week to help with the roof support perfectly lined up to where I needed the hoist to be so that made quick work of finding a good spot for it. A few lag bolts later and voila, we were back in business. The upside (and maybe downside) of this device is that you operate it using your phone via an app over bluetooth. It's easy to set max and min height for the cable so you can one touch raise and lower it to your desired spots. I would've preferred physical controls though if it was an option. 

GarageSmart Basic Lifter

Clear and out of the way when not in use

I also finally brought over my final set of wheels, this time for the GTi. I didn't want to take up more valuable wall space with a tire rack just for 4 wheels so I got a MaxHaul Tire Dolly instead to keep it off the ground and make it easy to move as needed. It fits perfectly next to my other tire racks and doesn't take up a lot of space. The 300lb capacity is more than enough for my needs.

MaxHaul Tire Dolly

Found a good spot for the GTi wheels

The floors are scheduled to be done in the next two weeks so I haven't been able to get my cabinets yet but I was getting frustrated with all the clutter on the floor. I wanted some shelves I could use towards the garage door entrance that wouldn't interfere with fully opening of the car doors or if I need to change wheels one of the cars. These DeWALT shelves fit the bill nicely with only 18" in depth and 4 ft wide, they provided decent shelf space without taking up a big footprint. All the stuff on them will eventually go inside the cabinets though. These are more for oversized tools or spare parts. Of course, there are many manufacturers to choose shelves from but I like to keep my stuff consistent and since I already picked yellow for the tire racks, it was obvious that I need to continue to the black and yellow scheme elsewhere. It's also probably not a coincidence that a guy with a black and yellow car chose to buy black and yellow tools over the years. 

Getting read to assemble the pair of DeWALT shelves

Assembled with magnetic bin and wire hangers

Both shelves in place

If you have a keen eye you can probably see some parts for Bumblestook that I need to desperately put on (new brakes, rear hubs and a new thermostat). Poor Bumblestook hasn't been getting any serious action recently because I've been to busy to get that taken care of but hopefully once the garage build settles down, I can get back to actually enjoying the cars. You'll also notice the banners are now behind the garage doors instead of the walls. I realized having those big banners take up valuable wall space didn't make much sense. I thought of an interesting way to make that wall space next to the cars functional while still fulfilling my requirement that nothing get in the way of me being able to open the car doors all the way. That stuff's on the way and will be for the next installment of this series.