Sunday, December 5, 2021

BFG K02s

I was going over the records for Chopper and the previous owner bought the wheel and tire package in mid-2016 which was only 3.5 years ago but it seems that in that time he logged a little over 40k miles. The Nitto Ridge Grapplers still looked ok but I wanted to give a different tire a try since I needed a new tire for the spare ATX Series AX201 wheels I bought to replace the OEM one on the car already.

ATX Series AX201 - 18x9 0-offset matte bronze

I decided to go with a fresh set of BF Goodrich K02 tires in LT285/65R18. This was the same specs as the Ridge Grapplers coming off the wheels but they are actually about 0.5" shorter (32.5" vs 33") and weigh a bit less. Since the TPMS sensors on the wheels were also over 6 years old now, I figured a new set of those was worth slapping on at the same time.

New TPMS sensors

I went over to SJF Performance to get it all mounted of course. One side of the tires had the white lettering whereas the other side was all black. I kind of like the white lettering look on off-road vehicles so I had SJF put that side facing out. 

SJF putting on the new sensors

Tire mounting time

I had to clean off the protective blue coating they put on there to actually make them white and they sure look the part now.

Mounted and balanced.

We had to make some minor adjustments to the tire carrier I installed yesterday, moving it towards the vehicle about an inch, to get the tire closer to the body. Also, the way these spokes lined up, I had to put the camera a bit offset in order to make the camera slip into the opening between the spokes. It's now slightly off-center but shouldn't impact parking too much. 

New spare wheel and tire mounted up

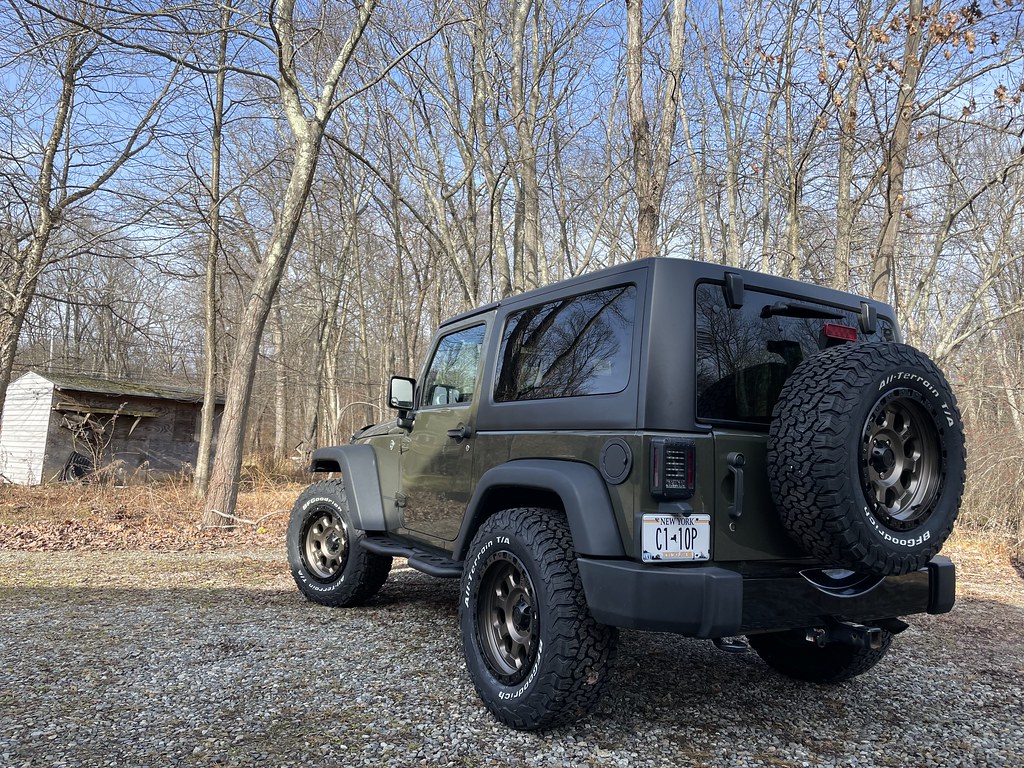
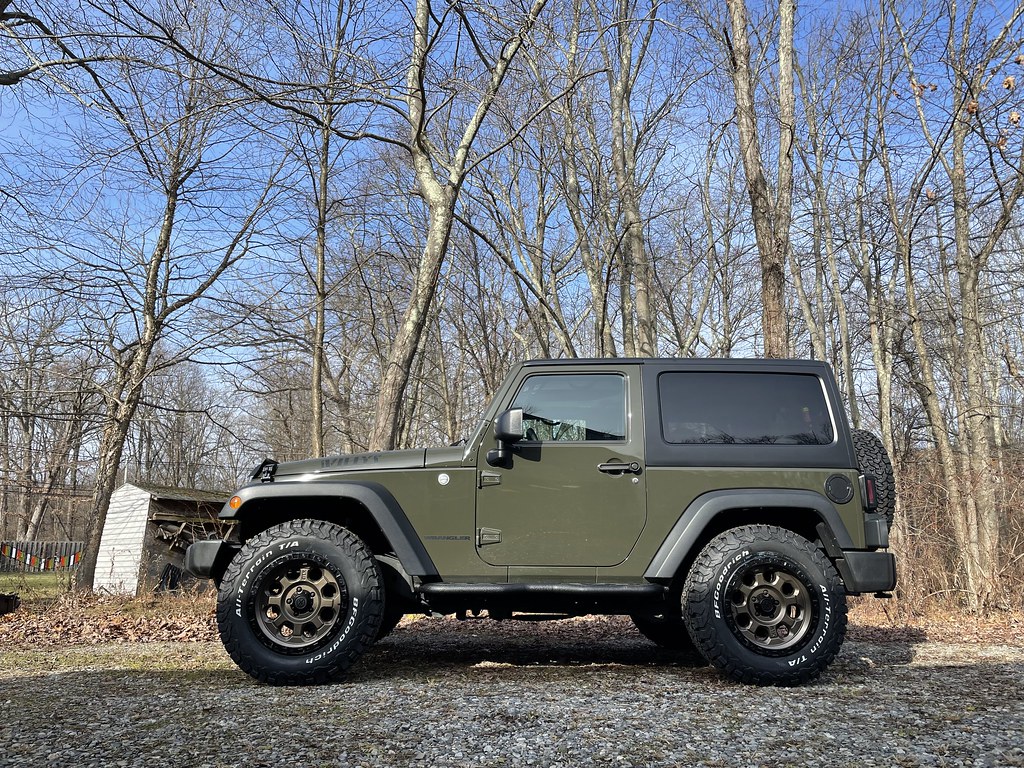
Obviously all the tires were replaced with K02s and I think it looks really proper on Chopper. I was semi-annoyed I forgot my "real" camera but these will have to do for now.

Chopper with the new rubber

Chopper with the new rubber

Chopper with the new rubber

I set the pressure to 35psi which seems to be the recommended street pressure on the forums for these tires. My first impression is that these are pretty awesome. They're actually quiet on the road and felt compliant to uneven surfaces. I also felt that they were easy to control. The new TPMS sensors kicked in and got detected by the ECU within just a few miles of driving. I'll reserve my final judgement on this setup for a long term review later but for now I'm definitely happy with this purchase. It should do pretty well on snow and be a good all around, all year tire setup. The new suspension and tire package has really helped a lot in the handling department. It still drives like a Jeep but with better street manners. I'd definitely recommend this combination for anyone now going the "serious business" route. 

Maintenance Update:

Mileage: 68,976

- 5 new BFG K02 LT285/65R16 tires
- 5 new TPMS sensors

Saturday, December 4, 2021

Heavy Duty Tire Carrier

The previous owner upgraded the wheels to ATX Series AX201 Matte Bronze in 18x9 0-offset wrapped in LT285/65R18 Nitto Ridge Grapplers but left the spare tire stock. Obviously he did that to save money but it doesn't make much sense since the stock tire diameter is only 31" and the new setup is 33". That would definitely not make the diff happy if you put that on in case you needed to. I was thankfully able to find and buy one more AX201 wheel in the same spec that's on the Jeep now so that's going to go on the back. 

Stock wheel and tire setup

The stock wheel actually looks really good on the Willy Wheeler edition and I guess it came stock with mud terrain BFG KMs. Unfortunately the PO sold the stock set so this is kind of on its own. In order to be able to handle the new larger wheel/tire setup on the back I needed to upgrade the tire carrier and hinge to something more heavy duty. I decided to go with the Rugged Ridge Spartacus Heavy Duty Tire Carrier kit. 

Factory tire carrier and hinges removed

First step was to remove the factory tire carrier and hinges then clean all the cruft built up underneath it for a nice clean install. The tailgate is still latched in but since it sits 1" above the bumper so you need something to support it while the latches are removed. I had some dense insulation from a window fan lying around and used that for support wedged between the tailgate and the rear bumper. I attached the new heavy duty hinge using a combination of the factory torx bolts and some new hardware they provided. This thing is super solid. It makes it feel like you're closing a bank vault every time you close the tailgate now. It can easily handle the weight of a 37" tire setup if needed.

Rugged Ridge HD hinge installed

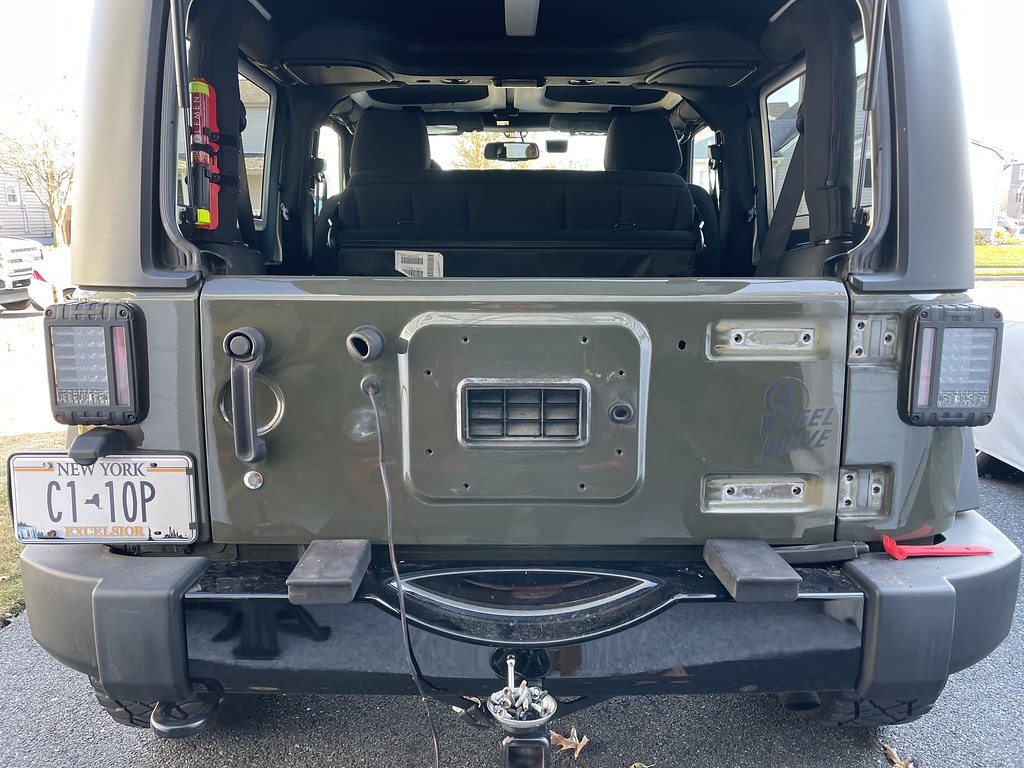
Next, I mounted the tire carrier itself. It's adjustable so you can move it further or closer to the tailgate to accommodate various tire sizes. It took several back and forth test mounting of the wheel before I was happy with the positioning. It reuses the stock third brake light housing. Since I was working on the tailgate anyway, I figured I'd wire up the new Alpine HCE-RCAM-WRA rear view camera that's going to be connected to a new Alpine ILX-W650 head unit that's on its way to me. 

Tire carrier mounted

Alpine rear view camera mounted

Everything installed. Nice and solid setup.

The rear view camera wiring just goes through the same grommet used by the factory brake light, then you fish it through the tailgate and zip tie the cable to the existing cables. 

Rear view camera wiring zip tied to factory rear light wiring

Factory spare re-installed with rear camera peaking out

For now the stock spare is back on the back but the new wheel with the fresh tires will be on very shortly. 

Factory spare setup back on for now. 

Next stop....tires!!!

Friday, December 3, 2021

Suspension Upgrades

Chopper's got 67K miles on the clock now so the dampers are getting a bit tired. My wife didn't want to lift the car any higher so I felt like the least we could do was to put on a set of fresh good shocks and a steering damper upgrade. The combination should help some of the floatiness that it currently has especially on the highways.

Chopper on the Quick Jack 

I borrowed the QuickJack SUV and Light Truck adapter from Alex and it did a perfect job of getting it high enough to get the wheels off the ground. I only have about 6 inches left until it hits the garage door opener but it was more than enough space to work with. Best part of working on the Jeep is that you don't even need to remove the wheels to change the shocks. I just had to loosen the fender liner to give myself more space to work with but even with PB Blaster, the top nut was a bitch and half to get off. The threads had rusted to the point where the nut wasn't coming off so I just used good old muscle until it snapped off. I decided to got with Fox 2.0 IFP performance shocks that are good for 0-1" lift. It's supposed to offer a slightly firmer but more controlled ride...plus they look pretty sweet.

That's one way to get the top nut off

Most of the time spent was just in removing the old shocks. The install was otherwise a cakewalk. Front shocks are only held by 2 bolts/nuts and the rear by 3. 

Front shocks in

Rear shock comparison. The old ones have seen better days.

New rear shocks in.

I figured I might as well upgrade the steering stabilizer. It's only two bolts. The hardest part was removing one of the bolts closest to the wheels. It hits the tie rod as you back it out but if you get the angle of the wheels and tie rode just right and wiggle it, it eventually works its way out.

Factory stabilizer vs Teraflex Steering Stabilizer

Teraflex steering stabilizer installed

With that out of the way, we did a few more cosmetic mods and functionality mods starting with some Red Rock honeycomb grill inserts. I think it tightens up the look on the front by hiding the radiator. Oh, the wife's super excited that her custom plates arrived. Yea, that's why this Jeep is called Chopper...that's her kinda droid lol. 

Honeycomb Grille Inserts 

Also added some Rugged Ridge grab handles for the rear to make getting in and out easier.

Rugged Ridge grab handles

Lastly I repurposed the extra roll bar mount I had lying around for the Element fire extinguisher and mounted a fire extinguisher back there just in case. It's secured via long velcro straps rather than the hose clamps the mount comes with and it's not going anywhere.

Element fire extinguisher installed

We still have so many more boxes of stuff to install but for now this'll have to do. 

Maintenance Update:

Mileage: 68,187

- 4 new Fox 2.0 IFP performance shocks
- New Teraflex steering stabilizer


Saturday, November 27, 2021

Hothead Headliners

Hardtops introduce some amount of wind and road noise into the cabin because they don't have any kind of liner. In the summer time they also contribute a bit to heating up the cabin because they don't really have good insulating capabilities. To address both at the same time in the Jeep, I picked up a set of Hothead headliners. These headliners are really nicely constructed compared to other products in the market with a radiant barrier to reflect heat and a firm backing for a support the high quality headliner fabric. 

Hothead Headliners

They install by 3M VHB tape so you need to prep is key. Ideally you'd install this in the summer time when things can get nice and hot and with the outside temps near freezing today, I put the jeep in the garage, turned on the heater and let it get to a bit warm before starting this project. First step was to scuff the hardtop a few times with the provided sandpaper. You don't have to get too crazy, 3-4 passes just to rough up the surface a bit is enough. 

Scuffing up hardtop interior

Then to ensure that the surface was free of any dust or contaminants, I applied acetone twice just to be extra sure. 

Acetone time

I also ordered their "Sound Assassin" strips as part of the kit. It's really nothing more than sound deadening pre-cut into strips that go right into the hardtop ridges to help further dampen noise. A quick application and some pressure with the included roller was all that was needed to set them in nicely.

Before

Sound deadening strips being applied

All the strips installed

I also opted for the liners to cover the sides of the hardtop for a uniform look. Those are attached via Velcro strips so I put those strips down first before putting in the rest of the panels.

Velctro strips applied
Side panel ready to go in

Next, I took each panel and put them up against the heater in the garage to warm up the tape as much as I could then quickly applied each panel on making sure to apply several seconds of pressure on each strip to ensure maximum adhesion. 

Front headliners installed - 11-27-2021

Rear headliners and side panels installed

Once I was happy all the panels were in, I let the car run for a bit with the heat at maximum just to give as much opportunity for the 3M tape to bind properly. Overall, this was a pretty easy project. Took maybe 2 hours taking my time to do it and ensuring proper prep. I think it really adds to the interior aesthetically and is very functional too. 

Thursday, November 25, 2021

Jeep Modding - A Few Convenience Items

After a few short weeks with the Jeep (and spending way too much time researching parts), I've started to accumulate a list of parts I think my wife's Jeep could use. Thankfully, my wife has at least allowed me to continue tinkering with her vehicle. Modding is, after all, a lot of the fun I get out of vehicles. I love driving and all that stuff but I also enjoy learning how things work, seeing if there are ways to improve things, and ultimately make each vehicle their own. A lot of times I like to be able to do stuff myself but more often than not I'm either tool or skill limited. This Jeep, however, is very much like Lego and I feel it's so easy to work on that I've just enjoyed hanging out in my garage and working on it myself as much as I can.

Barricade Extreme HD Rocker Steps

The first order of business was to remove the factory Rubicon rails that come with the Willys Wheeler package and replace it with Barricade Extreme HD Rocker steps. This Jeep isn't lifted but sitting on 33s I felt that sliding in and out of the seat was a sure recipe for killing the side bolsters of the seats in the near future so having a step to stand on makes getting in and out much easier. Of course, if you have steps, you probably also want a grab bar to pull yourself in and a pair of GraBarsUSA a-pillar grab bars fit the bill nicely.

GraBarsUSA Handle Set

The previous owner had a plastic center console mounted phone mount which was decent but put the phone too far away and covered a lot of the windshield so I replaced with a 67Design carbon fiber phone mount system. Looks much more slick and puts the phone in a better, and more importantly safer, spot.

67Design carbon fiber phone mount

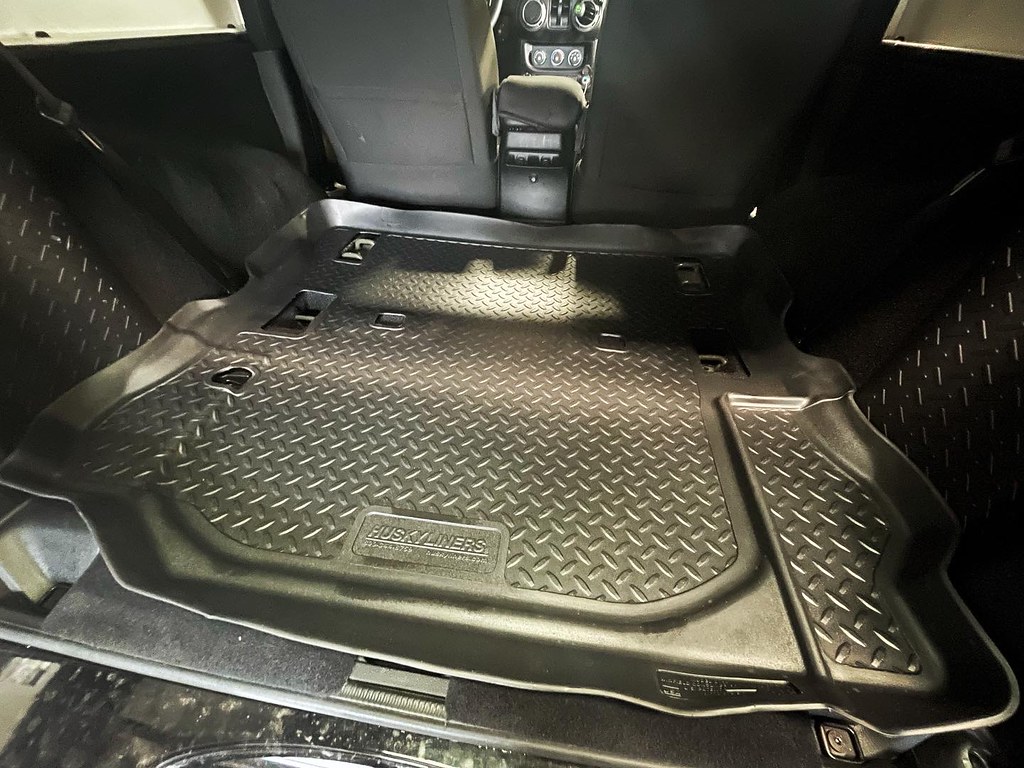
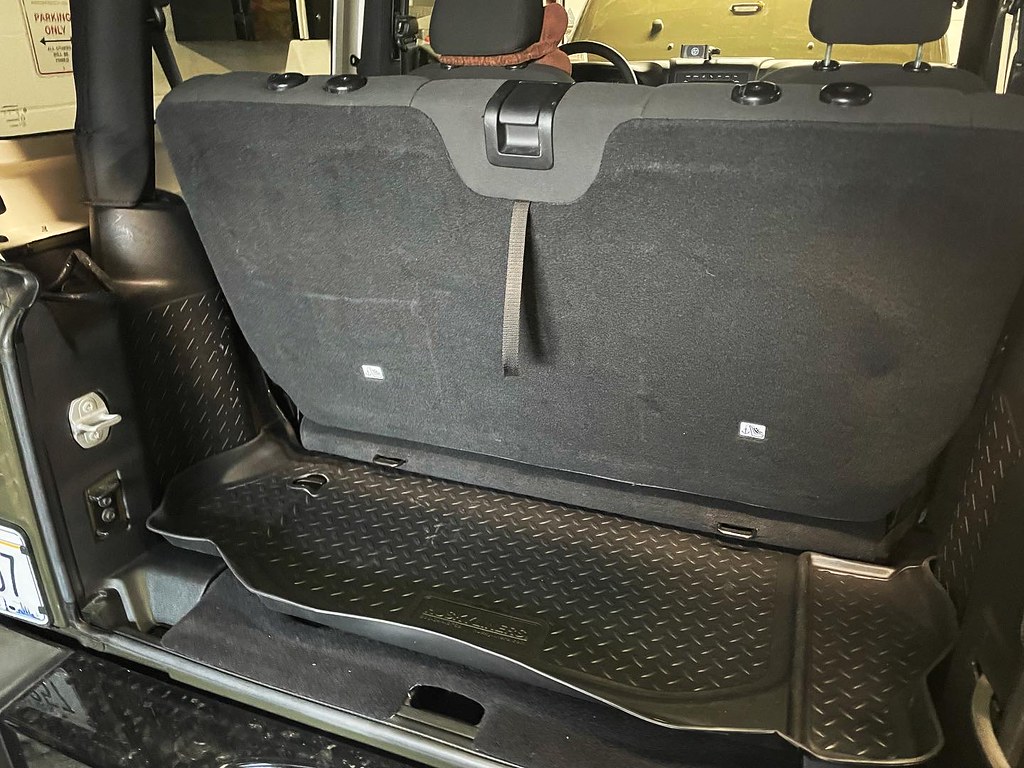
Continuing on with the interior improvements, the previous owner also had a set of random mismatched rubber floor mats that definitely weren't form fitting. I'm not OCD but that definitely bothers me so a fresh set of Husky WeatherBeater floor mats all around including the full cargo area under the rear seat had to go in.

Husky Cargo Mat

Husky Cargo Mat with rear seat re-installed

Perfectly form fitting Husky floor mats

In keeping with the military inspired Jeep theme, a green Smittybilt storage system attached to the tailgate to keep various things like spare oil tucked away seemed like a logical choice.

Smittybilt GEAR Tailgate cover and storage

The rubber hood latches were starting to look a bit weathered so an upgrade to a set of Rugged Ridge aluminum latches not only improves the look but removes any hood flutter at highway speeds. 

Rugged Ridge aluminum hood latch

Little details matter to me so the "stubby" antenna the previous owner installed didn't look right (and was starting to show rust at the base) so it had to go. Replaced by a nice 13" flexible rubber antenna with a carbon fiber base, it just cleaned up the exterior while still providing great radio reception.

Rydonair 13" antenna

These were some nice appearance and convenience upgrades to get it to where it should be but we've got some nice performance related upgrades coming next that I'm very excited to put on. 

Chopper's looking pretty sweet now


Maintenance Update:

Mileage: 67,888

- New 15" RainX front wiper blades
- New air intake filter (temporary while I wash and re-oil the K&N filter that was already in there)


Sunday, November 14, 2021

JK Wrangler Willys Wheeler - Chopper

My wife pick up her first vehicle ever. We've been keeping an eye out for dark green Jeeps for some time now and this one came up on Facebook marketplace a few weeks ago. 1-owner with 67K miles, the vehicle was well loved and maintained. It was a no brainer really. 

2016 Willy Wheeler 2-door - Chopper - 10-24-2021

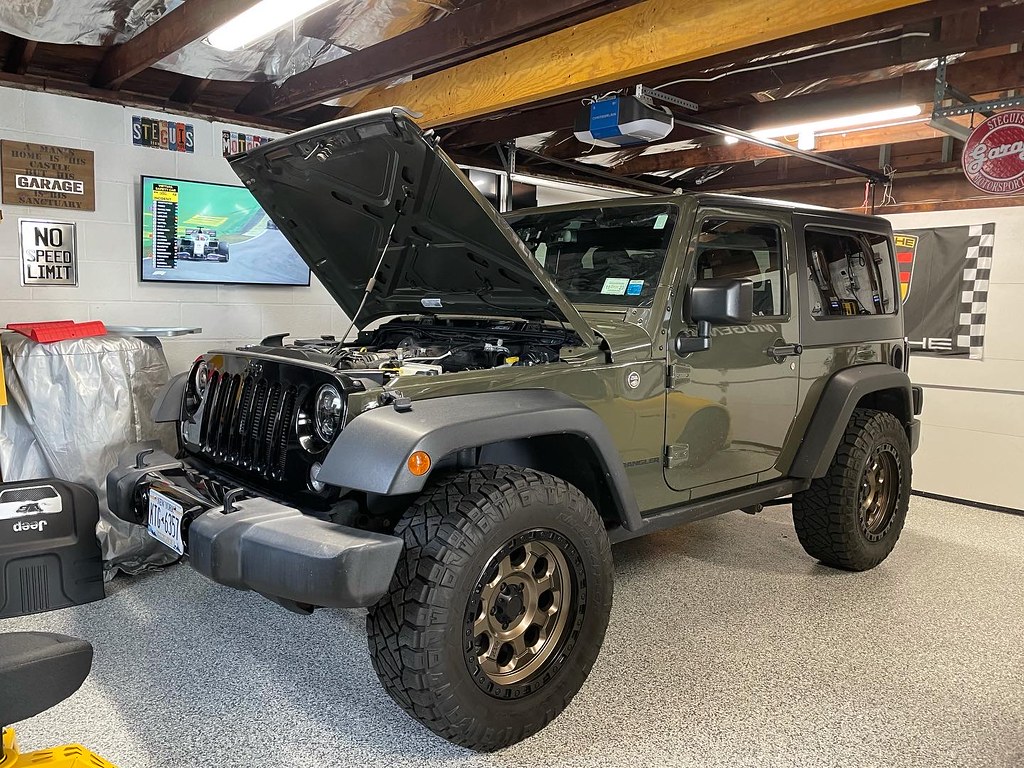
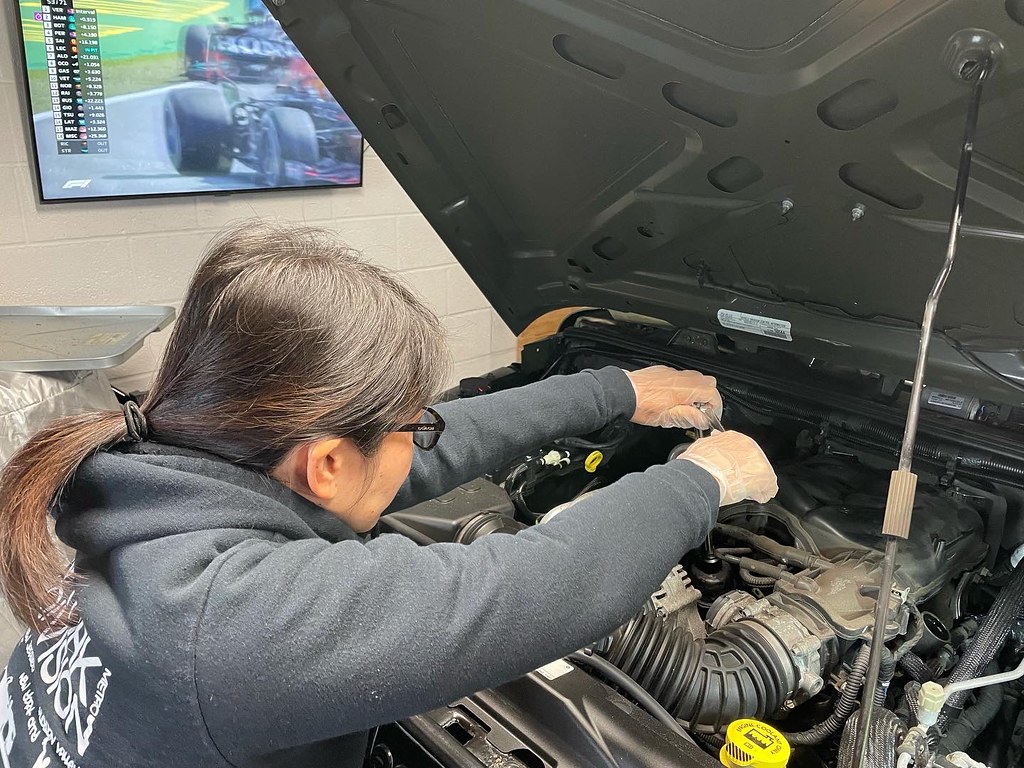
We finally registered and took it home this weekend. It's now affectionally named "Chopper" after the rather sassy Star Wars droid C1-10P. She wanted to get to know this vehicle a bit more and learn some things so today I had her do the first oil change under her ownership.

Getting ready for the oil change

After only have nothing but lowered sports cars, it's a bit of a breath of fresh air to have a vehicle that's so easy to work on, you don't even have to jack it up to change the oil. A few mopar oil filter and 6 quarters of Castrol Edge 5W-20 was put in since the last oil change was around 5K miles and 7 months ago.

Replacing the oil filter - 11-14-2021


Fresh oil - 11-14-2021

We also took the opportunity to clean up the interior a bit more, getting rid of unnecessary decals and velcro everywhere. 

Maintenance Update:

Mileage: 67,788

- New mopar oil filter
- 6qt Castrol Edge 5W-20

Sunday, October 24, 2021

GTI Maintenance - New Plugs

It's been almost 10k miles since the last time I changed plugs. The previous plugs didn't look so hot after 15k miles so I ordered a new set of NGK RS7 plugs to change them out pre-emptively. Looking at the condition of these plugs I probably didn't need to change them yet so I'll extend the the next time I do this. I think these NGK plugs work better and don't wear out as easily as the Beru plugs.

Old plugs
New Plugs - NGK VAG-06K905601M


Maintenance Updates: 

Mileage: 72,340 

 - 4 new RS7 (06K905601M) spark plugs